Archives

Camping at Dash Point State Park via bike and bus from Seattle

I found a new bike camping spot near Seattle!

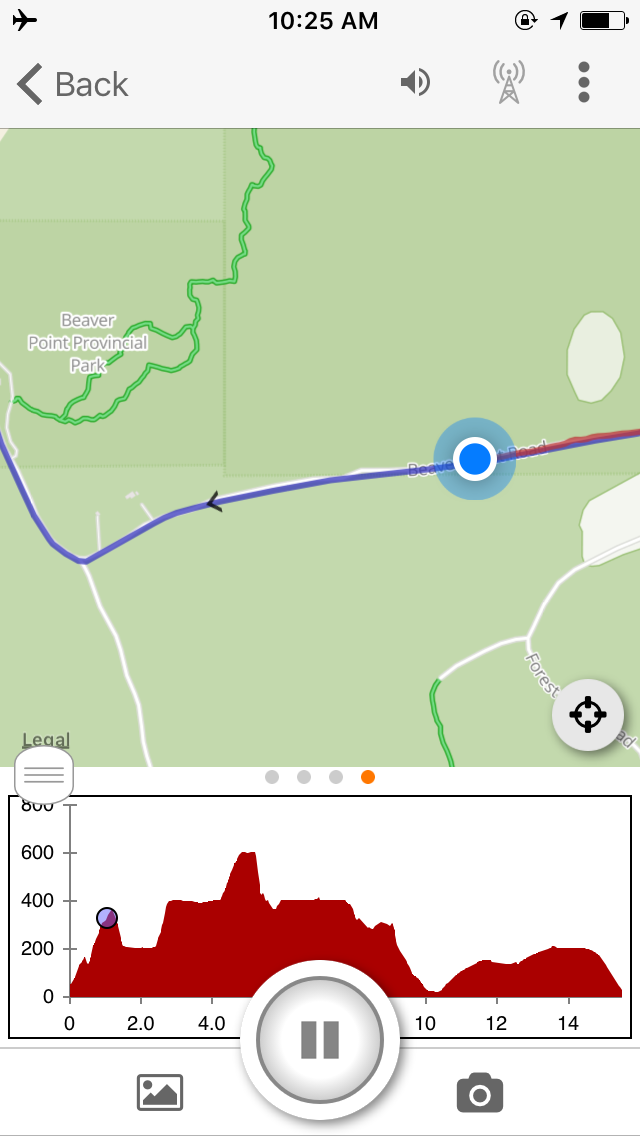
My full trip is posted on my Ride with GPS Ride Report: Bike camping at Dash Point State Park, but since day one could work well for a family (reversed to get back) I’ve got it on the blog here, with some extra kid stuff thrown in. Here’s my Ride with GPS recording of the trip and my Strava recording of the trip.

Once a month I deliver my kids to Seattle via Amtrak train so they can spend some quality time with their dad. Lately we’ve been leaving early enough that I can catch a train back home to Portland the same day. For these trips I carry them the eight miles to our train station on my cargo bike and leave it locked with every lock we own until I come back to it at night. When we haven’t been able to travel early enough for a same-day train I’ve brought a bike along and stayed at a friend’s house, but no one was staying in town for the three-day weekend. My friend invited me to stay at her house even though she’d be away, but that didn’t seem as fun as having her home (and to tell the truth, she lives around the corner from our old place and I wasn’t eager to climb my old hills now that I’m a grateful flatlander). I had the bright idea to camp overnight, but all my familiar spots didn’t seem to fit the bill very well. I love camping at Fay Bainbridge Park with the kids — the beach, play structure, and summer owl show are awesome. But without kids it can feel like a parking lot. And Illahee State Park Campground is closed for sewer repair work (and the Illahee Hiker/Biker sites are closed indefinitely for renovation). Manchester State Park, like the other two, relies on a ferry ride which didn’t seem like something that would pair well with rushing to the train in the morning.

A non-ferry spot close to Seattle I’d love to camp at someday is Tolt MacDonald, but it seemed quite far from the train station which led to my idea to check out campgrounds close to one of the next couple stations down, Tukwila or Tacoma.

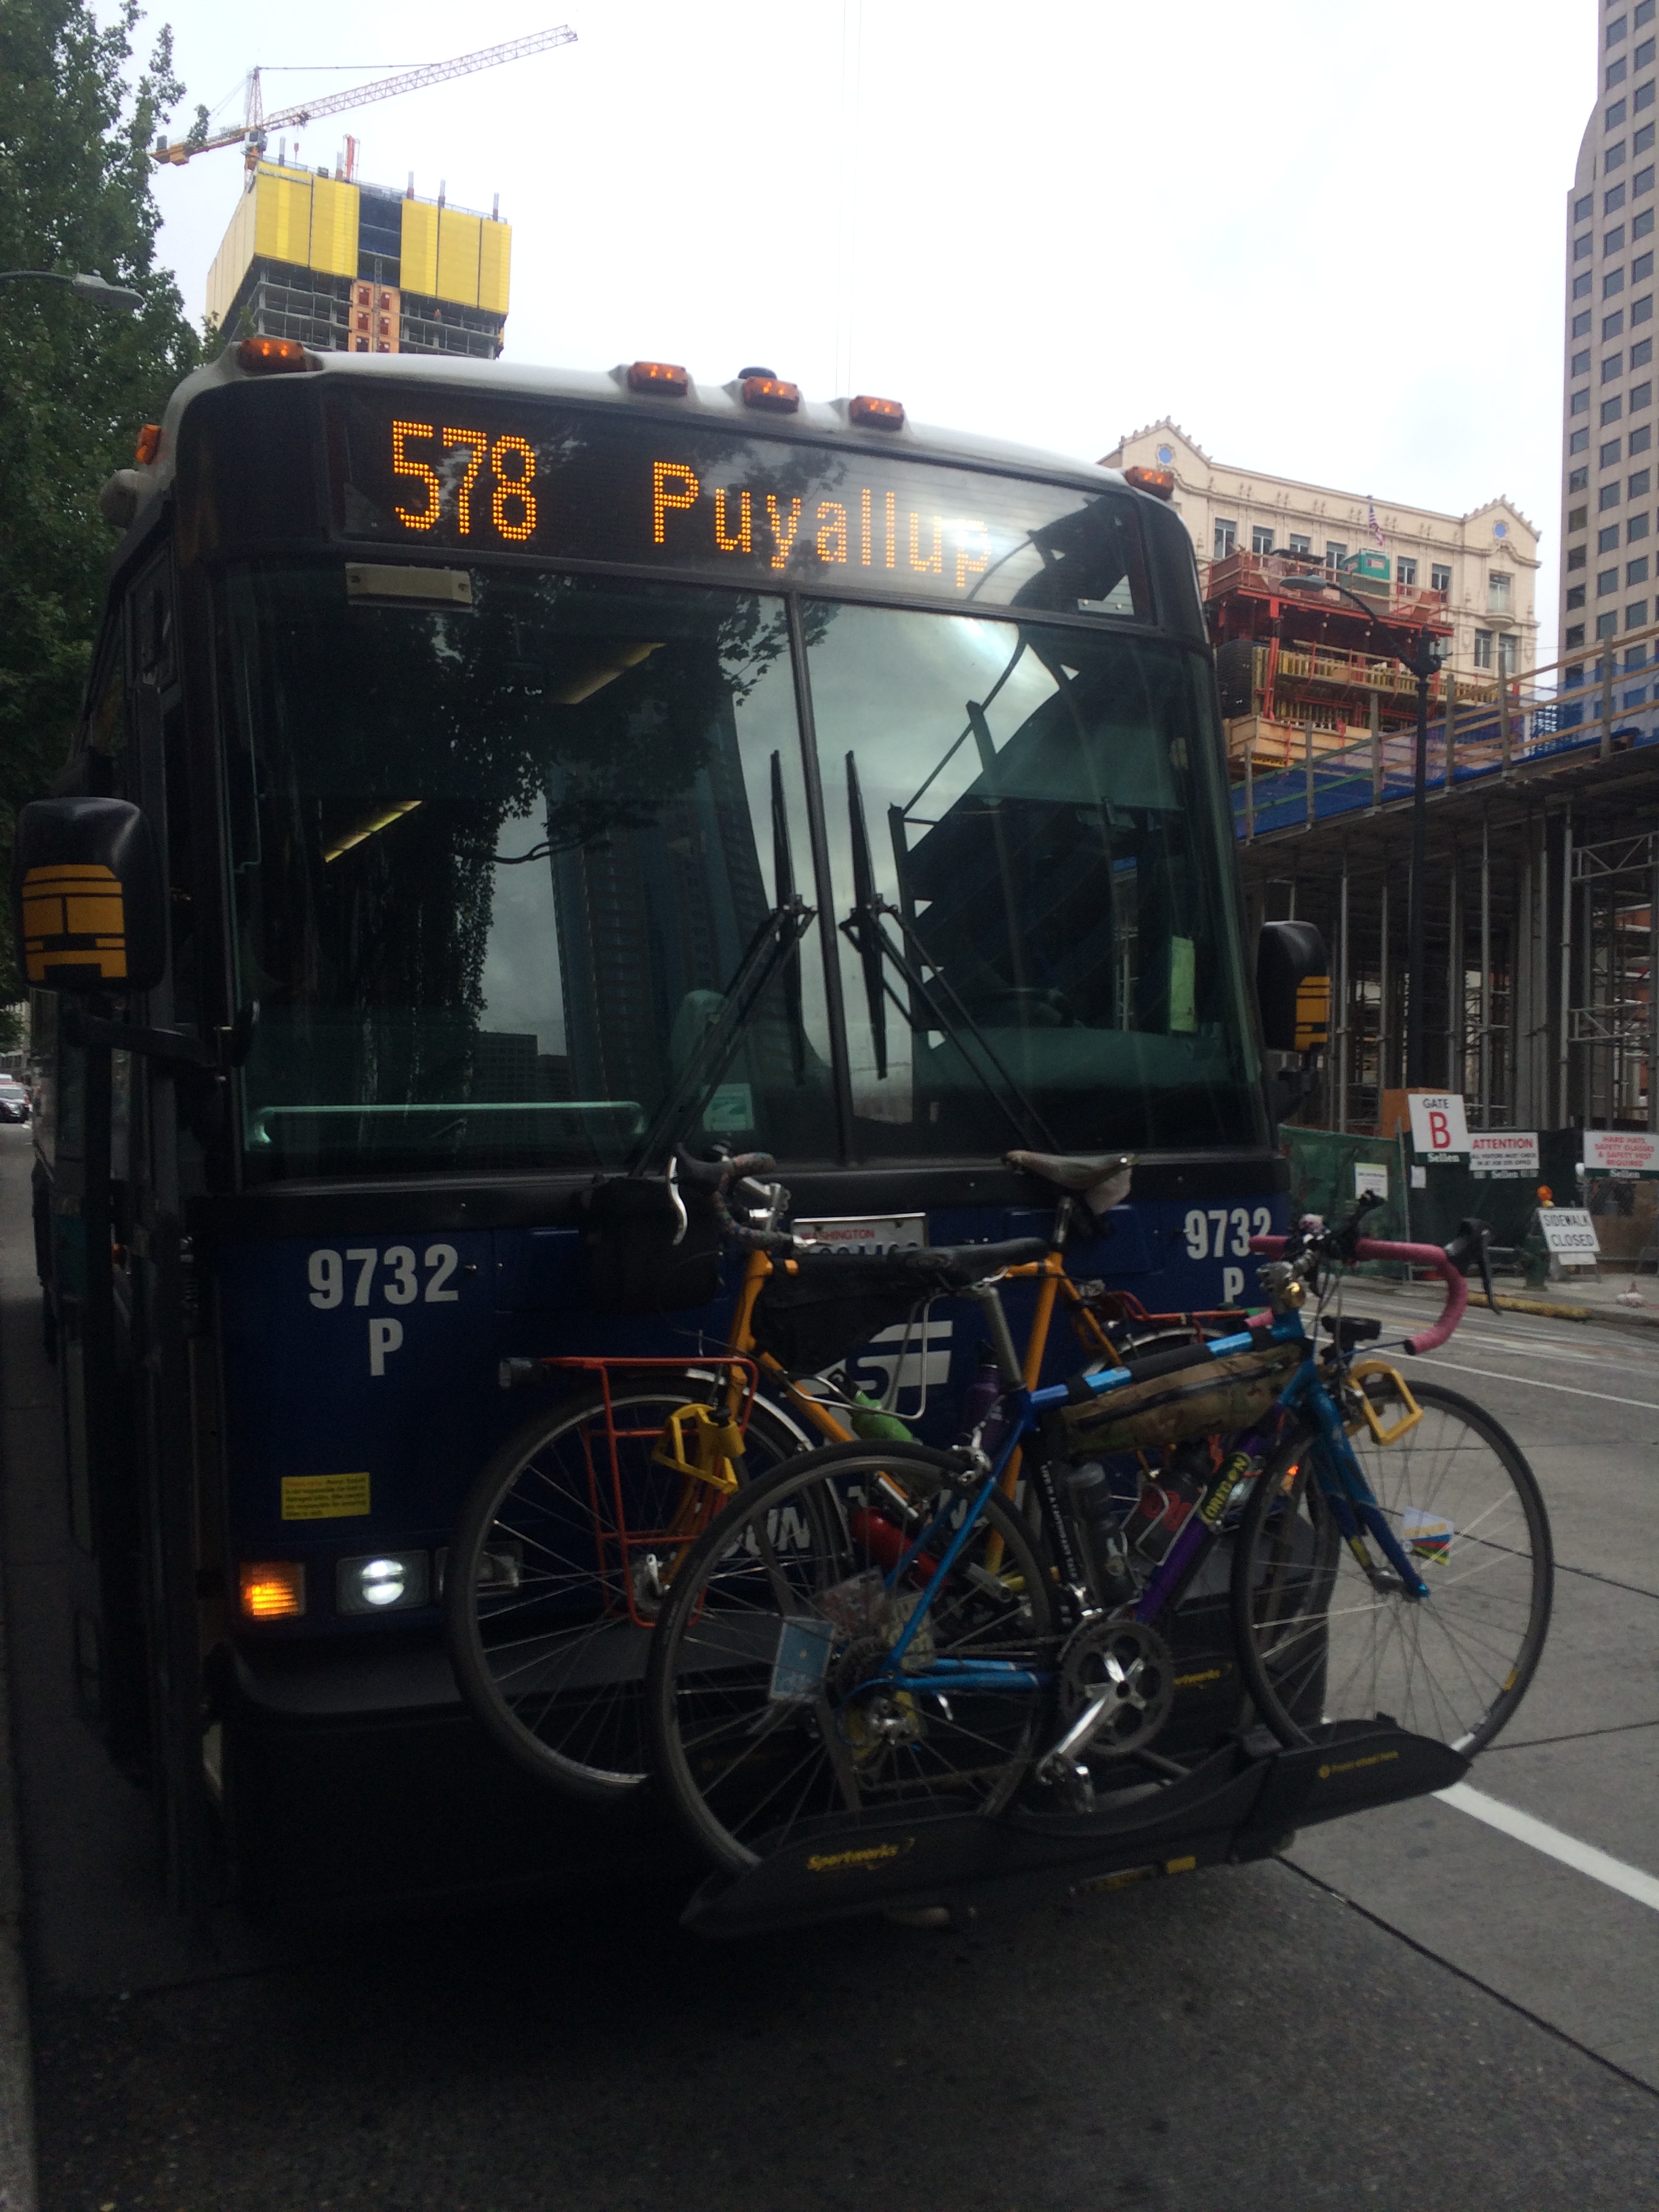
Enter Dash Point State Park! I had to bring a bus-friendly bike to begin with, so I could bus with the kids to the Portland train station so I decided that rather than bike three hours to a new-to-me campground and arrive after dark I pedaled just a few blocks from Seattle’s King Street Station to catch Sound Transit 578 Seattle to Federal Way/Puyallup. Most Seattle buses have three slots on the bike rack, but the tour bus style Sound Transit coaches — like the 578 — only have two. One slot was already taken so I made it on the first 578 to arrive, phew. Otherwise I’d have had to wait 20 minutes for the next one. I’m not sure how to tell if a Sound Transit bus is a double bus with three bike slots or tall bus with two other than by looking it up in Google image search. Once on board my bus ride was one stop/30 minutes to the Federal Way Transit Center. If I were to do this with my kids, I’d need to be on my Brompton folding bike and carry it inside the bus (which holds more than my road bike anyway!) so we could fit their two bikes on the bus rack. We’d probably consider catching the bus upline, too.

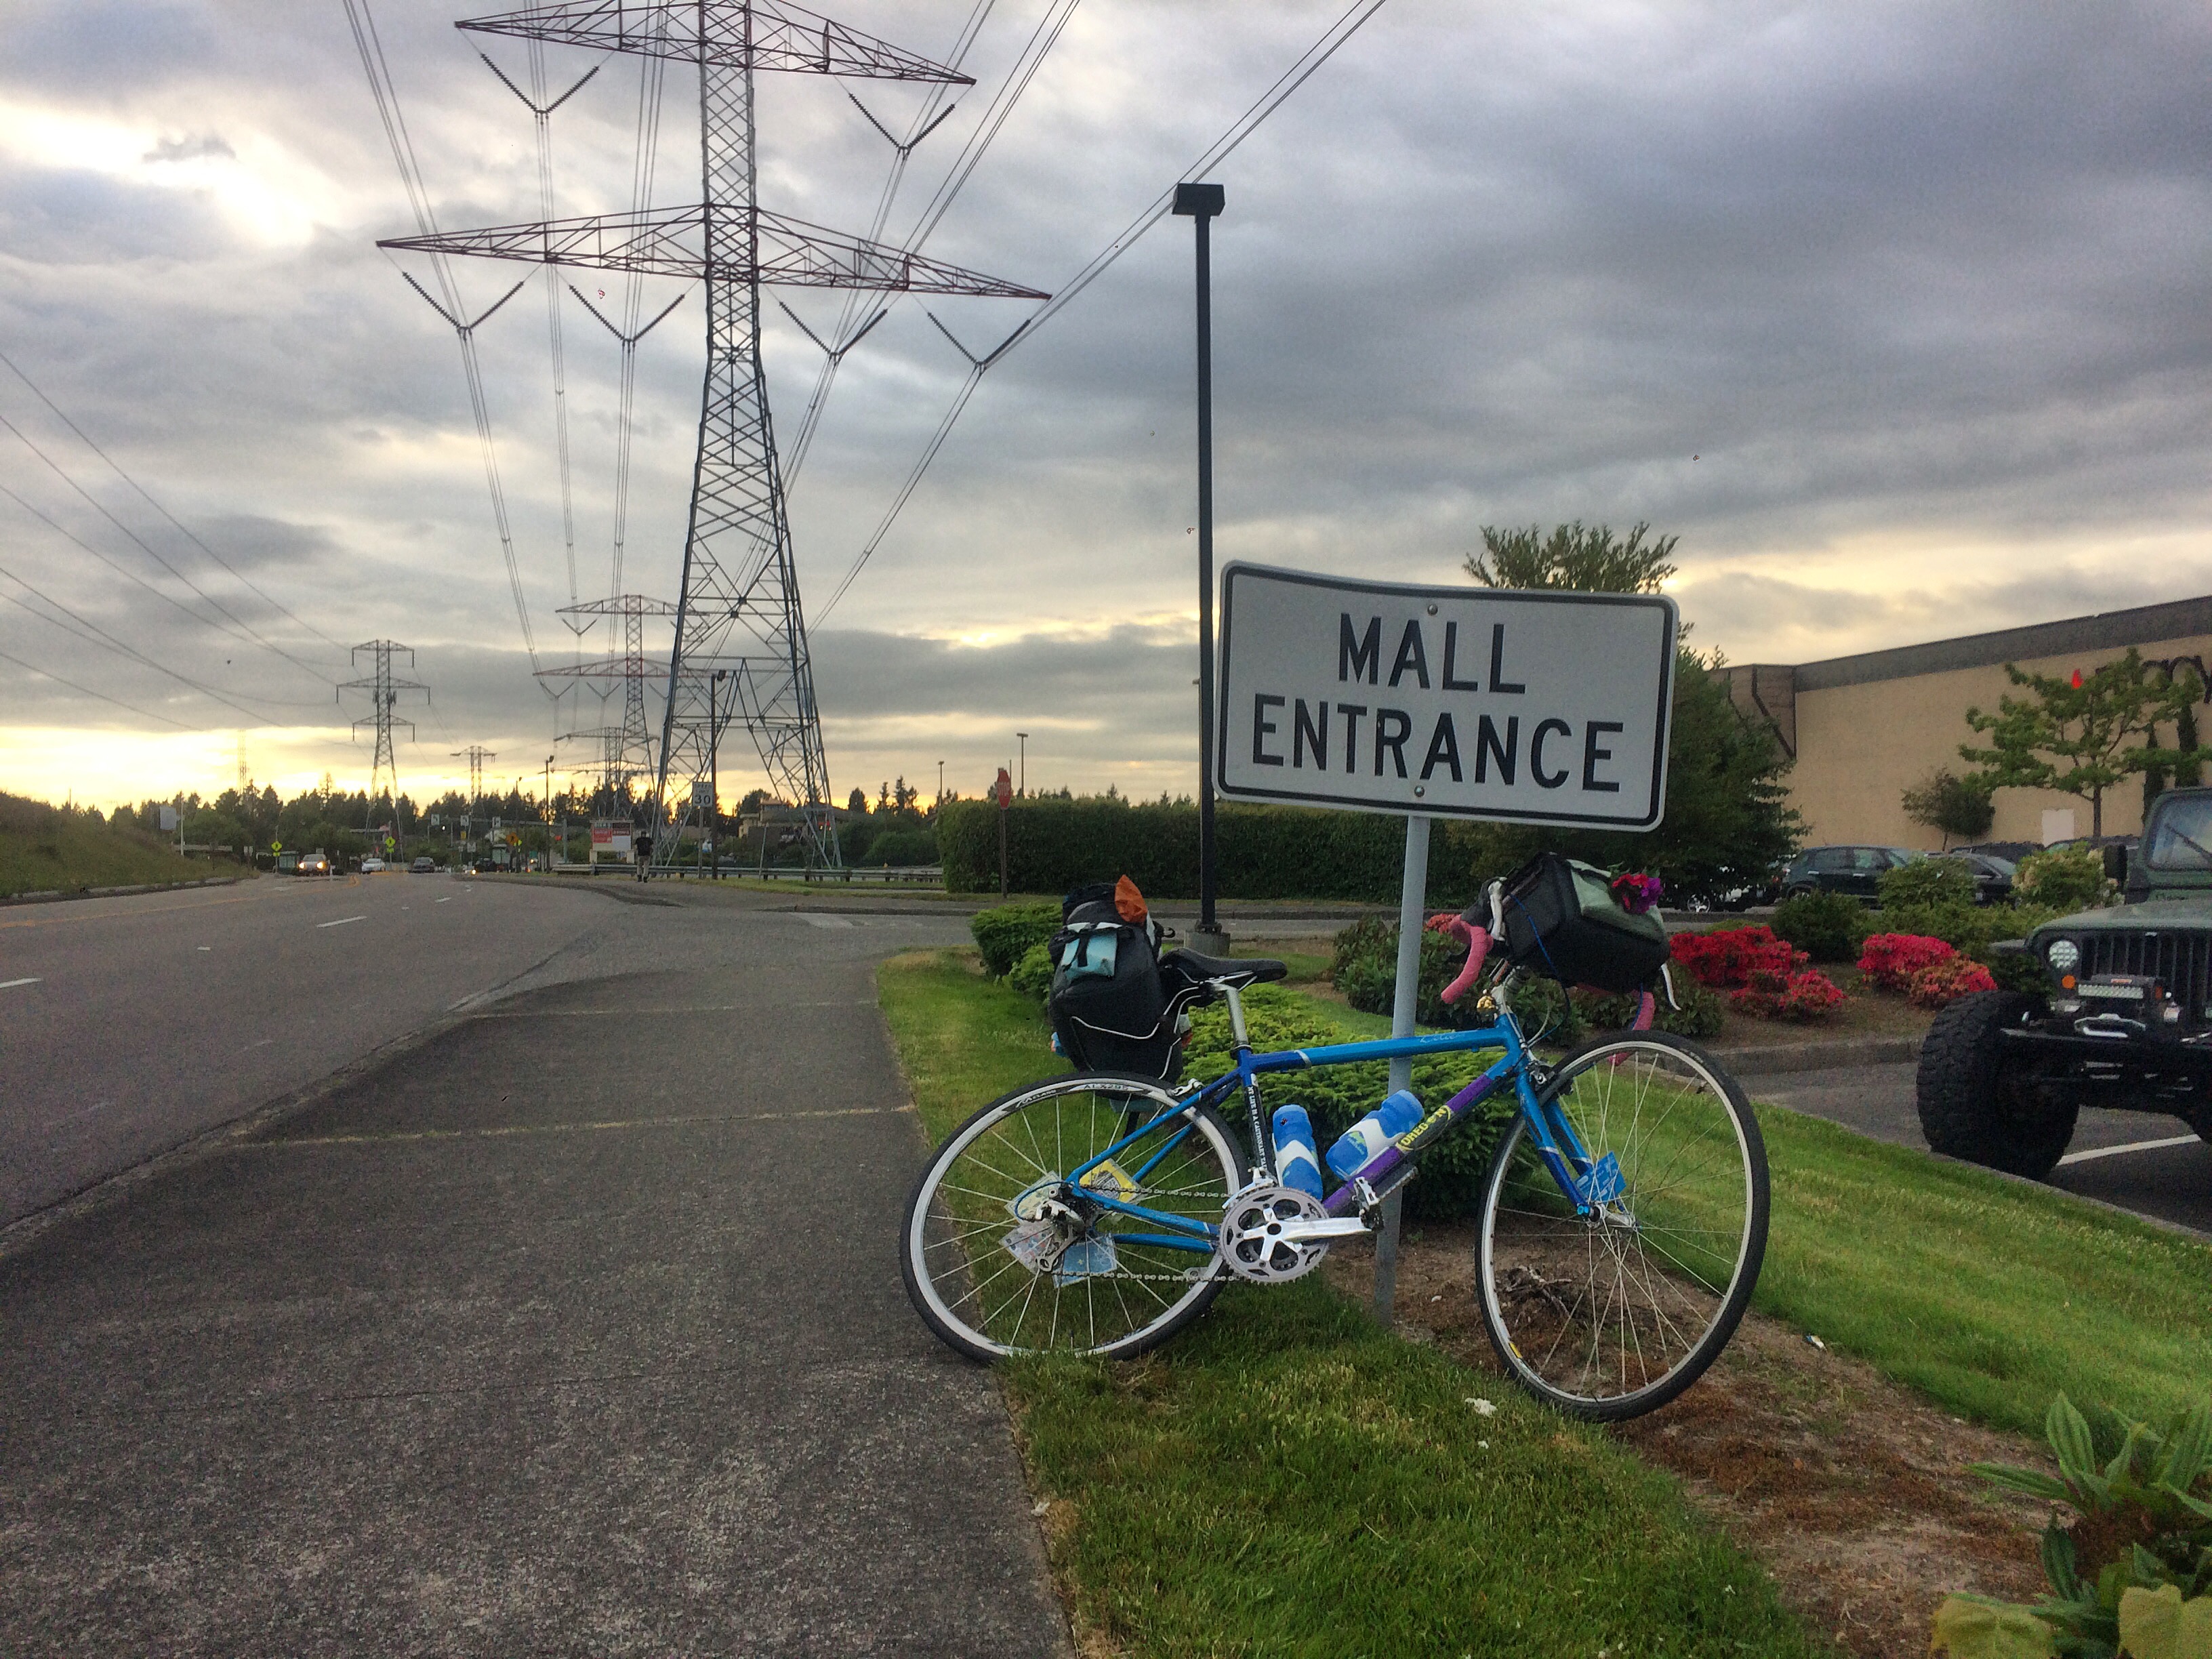
The bus let me off next to a big shopping mall, The Commons at Federal Way. Bike lockers have been on my mind thanks to my last BikePortland column: Family Biking: Taking kids and bikes on MAX light rail and I notice Federal Way TC has bike lockers. They seem expensive, but you already have a locker card, stowing bikes full of camping gear in one and then hitting the mall for lunch and window shopping could work.

The mall is surrounded by busy roads with no bike markings of any sort so I opted to skirt around it on the wide sidewalk. It might be more fun to cut through the parking lot, depending on time of day. For a Friday evening I figured I was better off on the sidewalk, which had no one walking on it anyway. These sorts of sidewalks really seem more like multi-use paths. FYI, it’s legal to bike on the sidewalk here. Happily, a bike lane appeared as soon as I was beyond the mall.

I saw several route options in Google maps and opted for the slightly longer one since it utilized a trail, which seemed especially smart for a Friday evening. Car traffic at the start of any weekend, and especially a holiday weekend, can be a little unfriendly. This route was 7.7 miles/50 minutes while the shorter two were 6.2 and 6.4 miles/both 38 minutes.

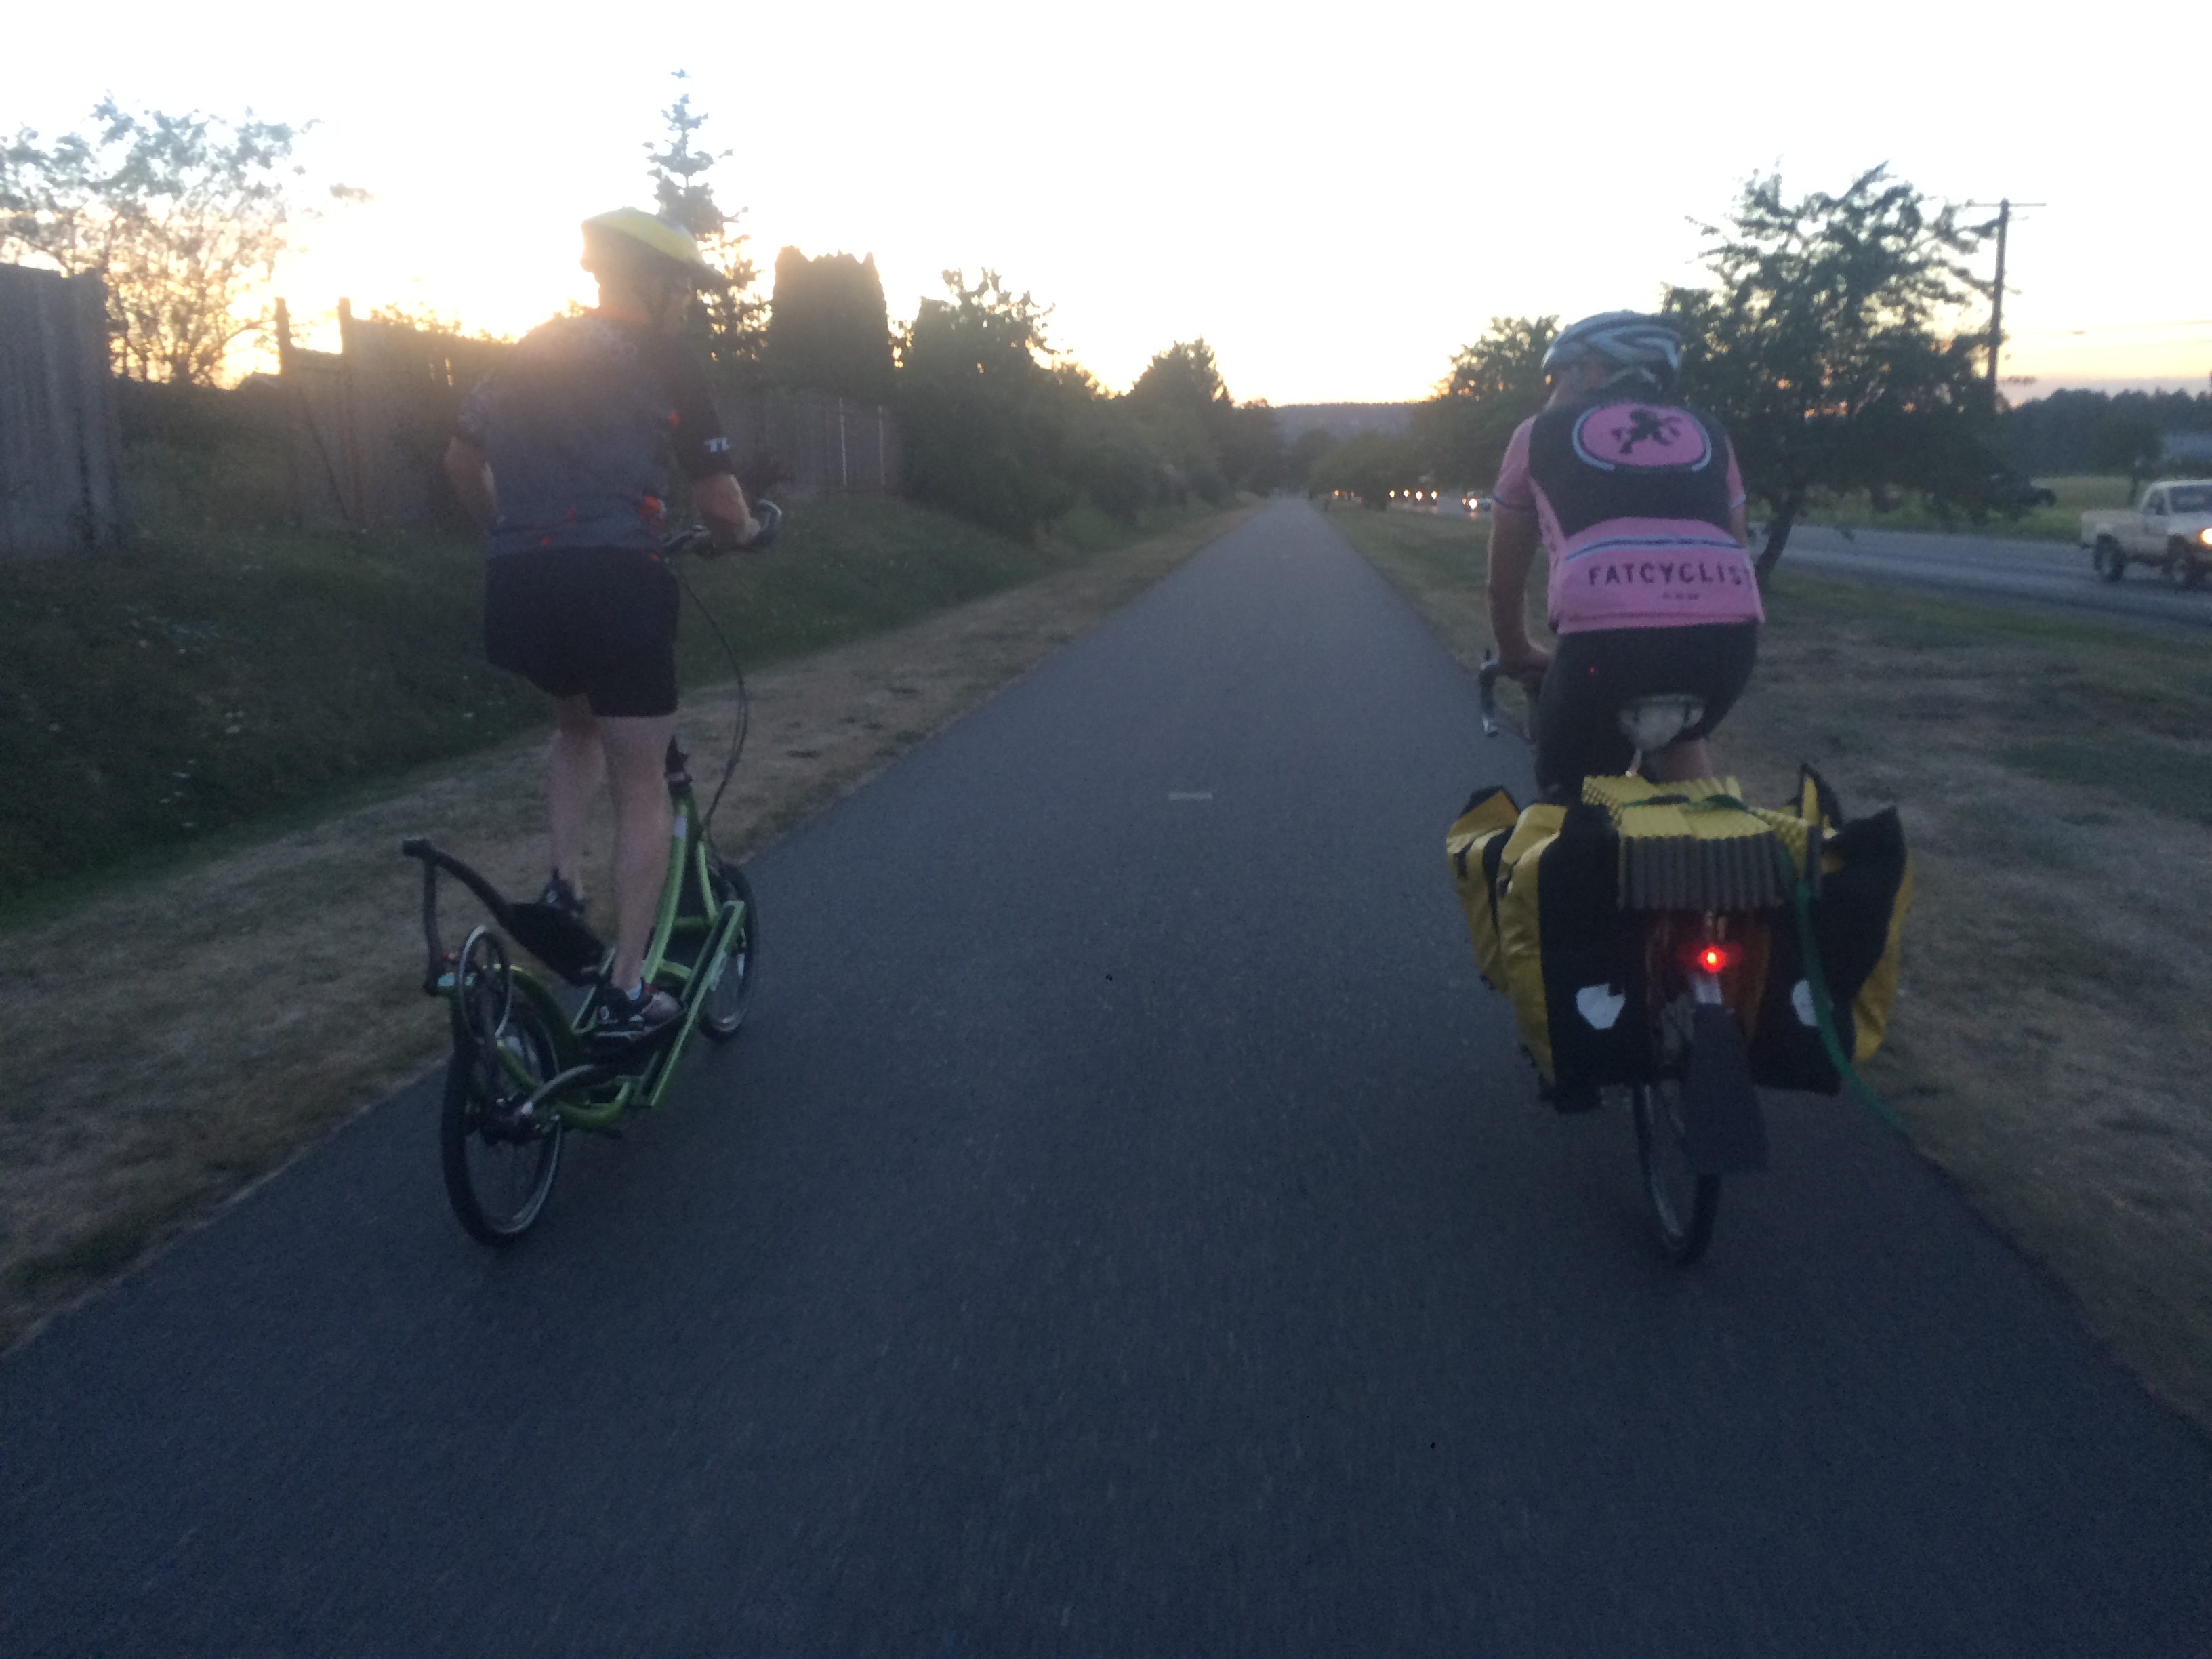
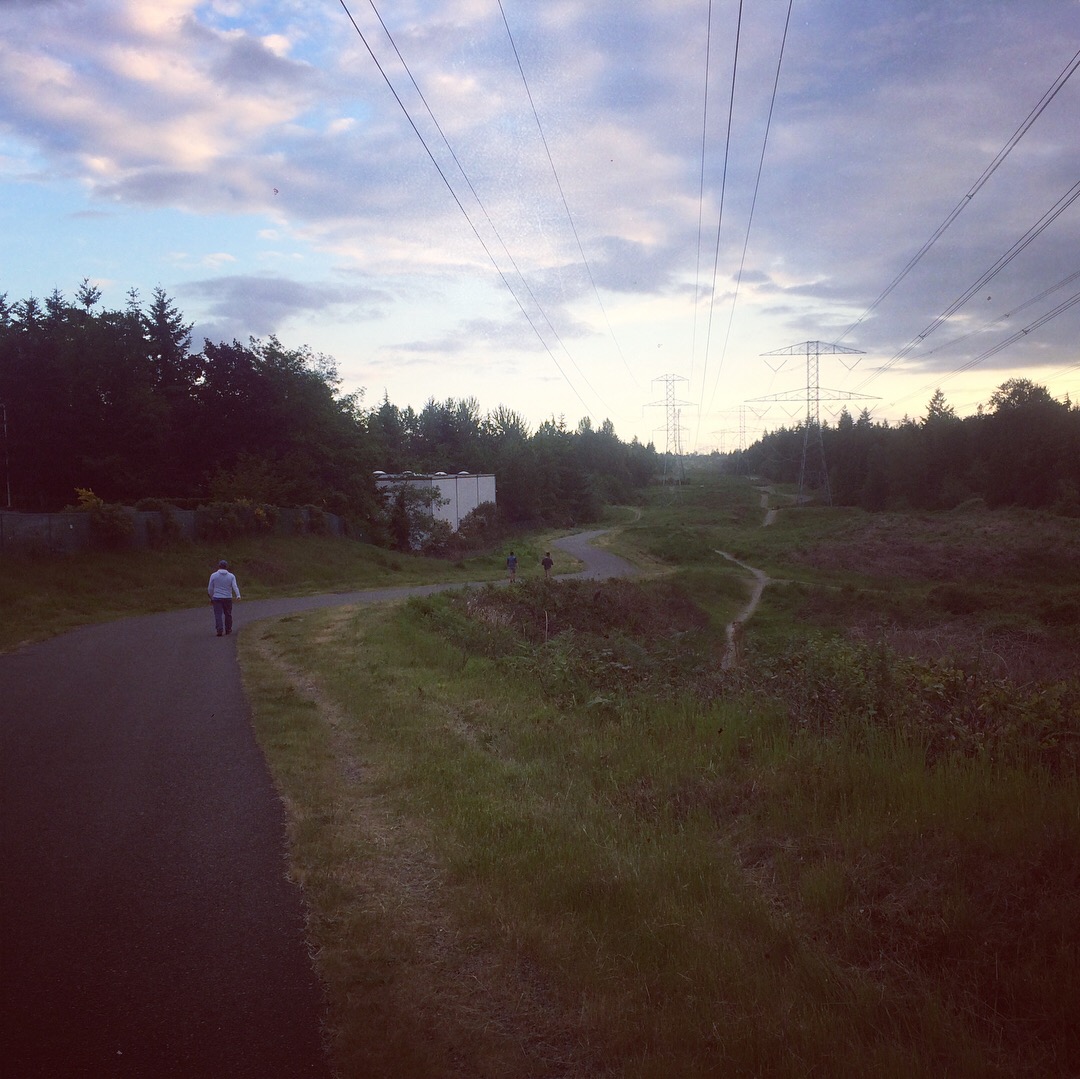
The BPA Trail, named for the Bonneville Power Administration, is something else! I saw so many people on it! In wheelchairs, on skateboards, walking with bags of groceries, walking dogs, on bikes, jogging, bird watching. I stuck to the main paved trail, but there are multiple well-used parallel gravel trails. What a gem! If you have kids who are cool with walking a mile and then hiking, it’d be worth bus here without bikes: The Mountaineers: BPA Trail (“optional, short, dirt side trail goes to a lake in a wildlife refuge” !!! ). The Mountaineers call it “minimal elevation gain,” but I’m pretty sure my kids would consider it very uppy-downy.

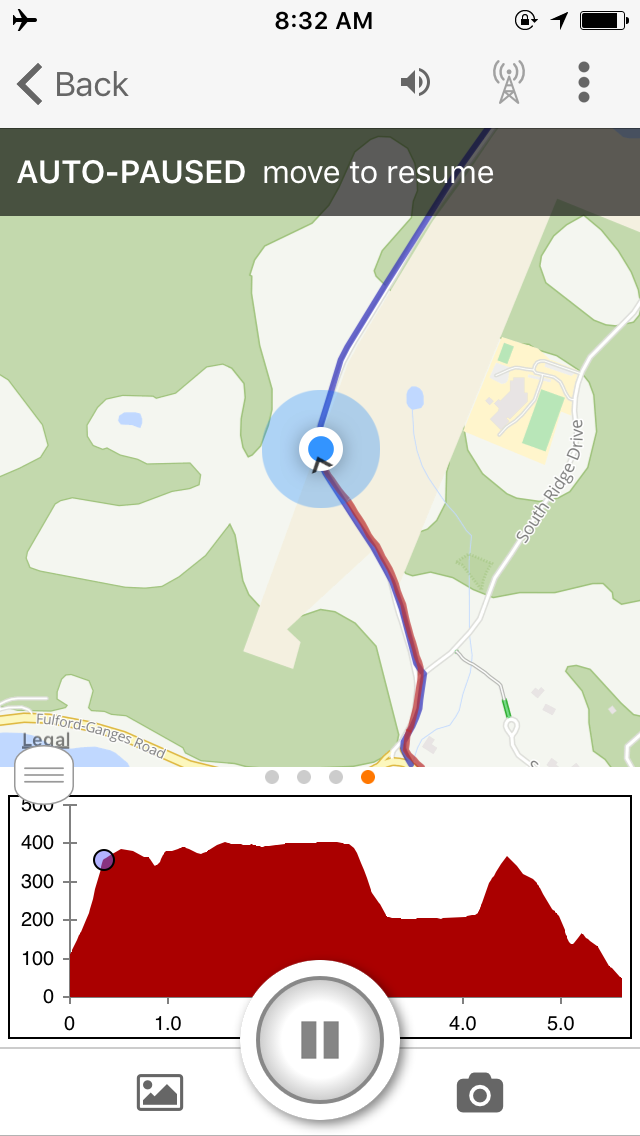
A couple street crossing were tricky — I had to zoom way in on my saved Ride with GPS route map to figure out the trail continuation and I was thankful it wasn’t dark out yet. Also, some of the bollards at street crossings were a bit of a tight squeeze. On any ride I think about how it could work for any sort of bike and wide cargo bikes would have to be careful in these spots.

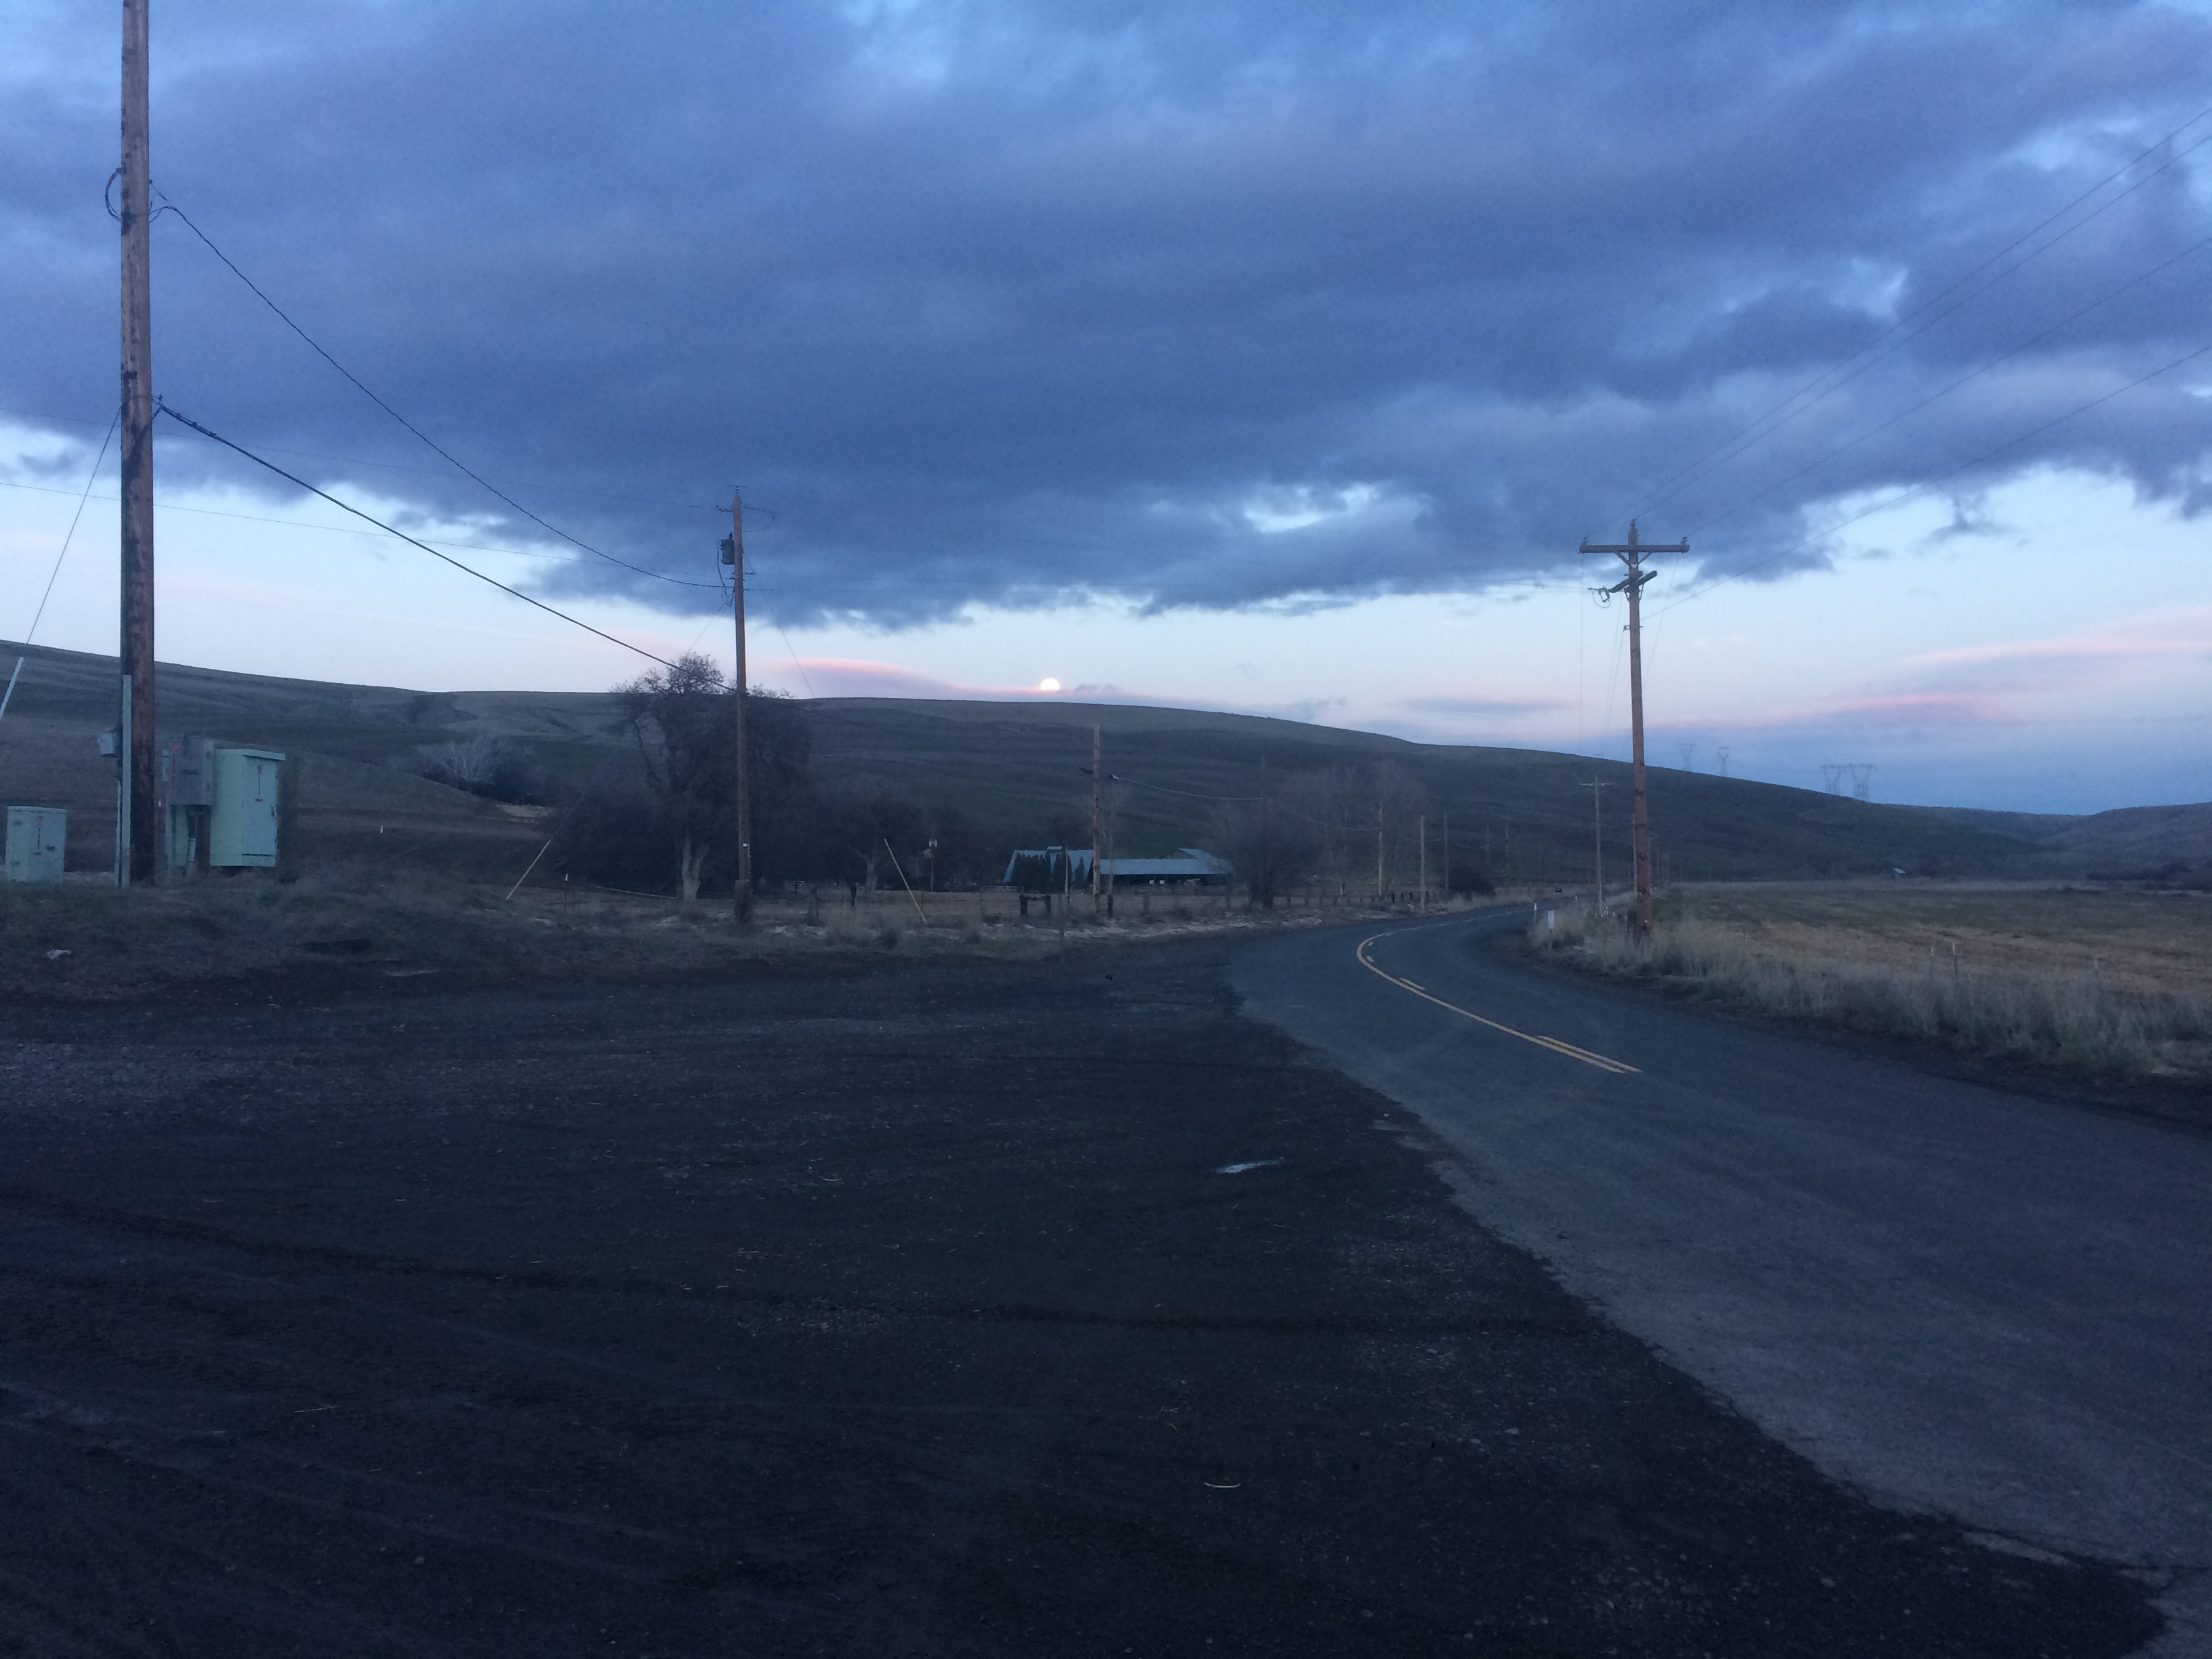
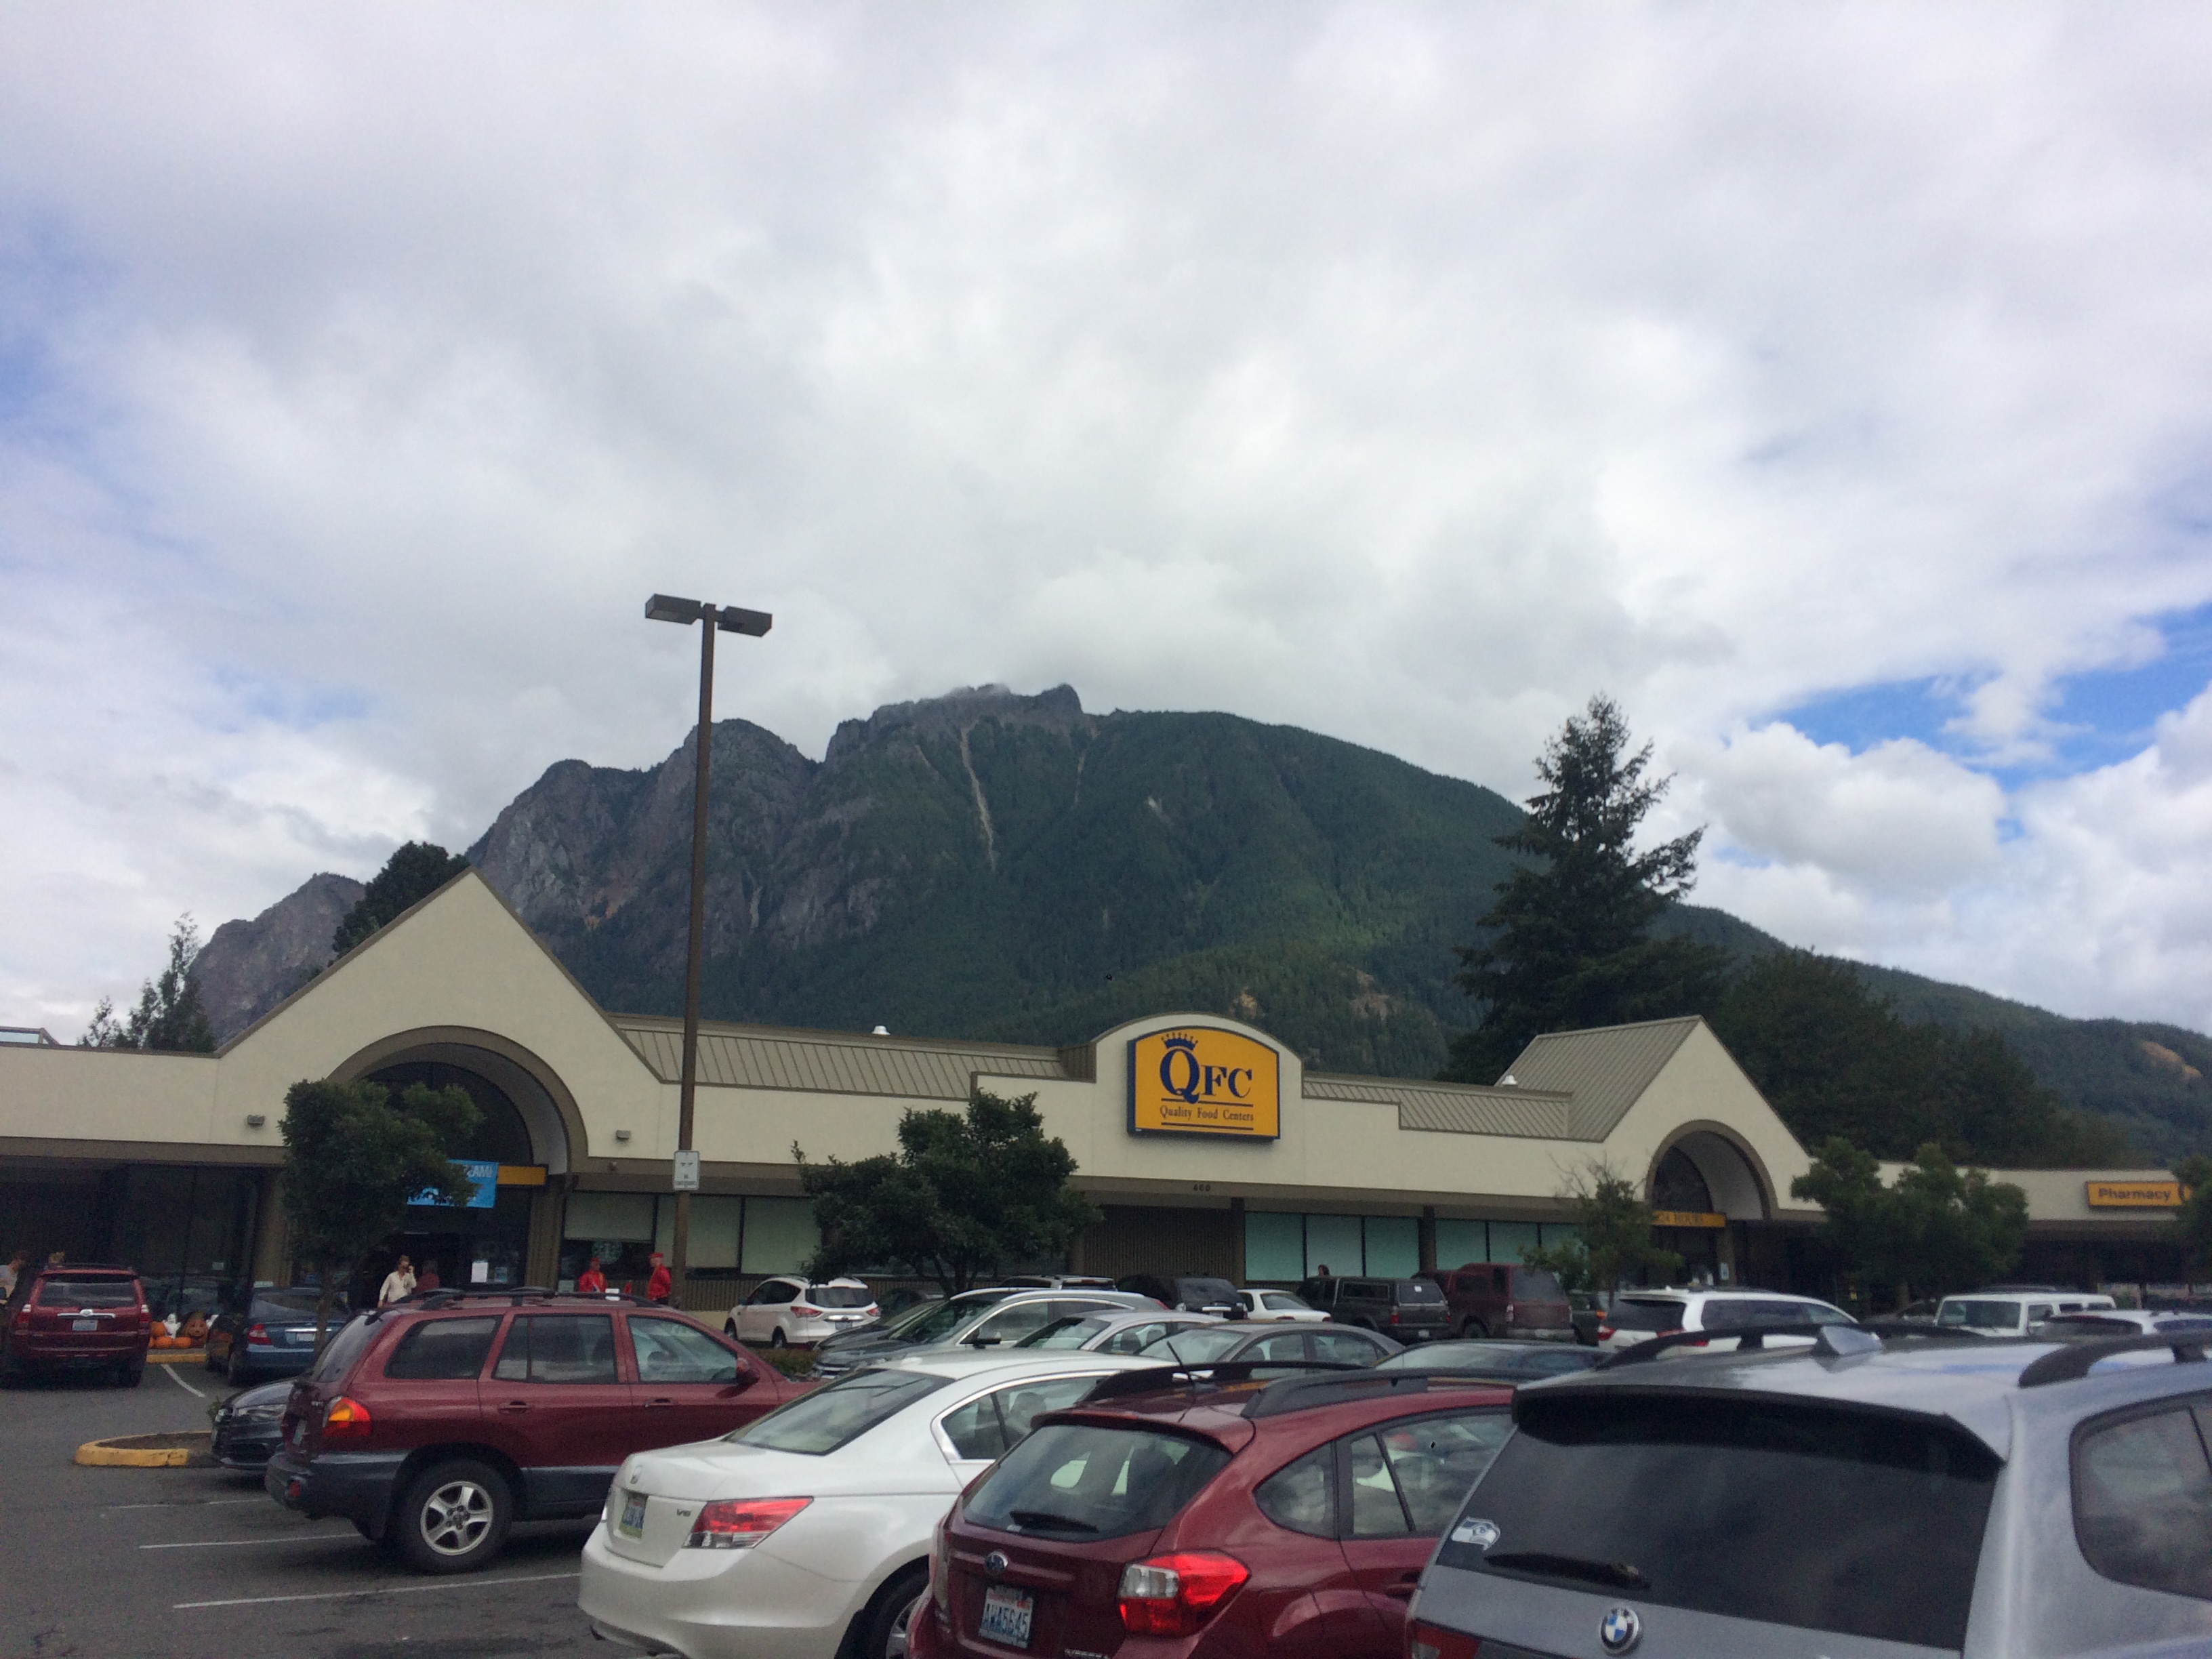
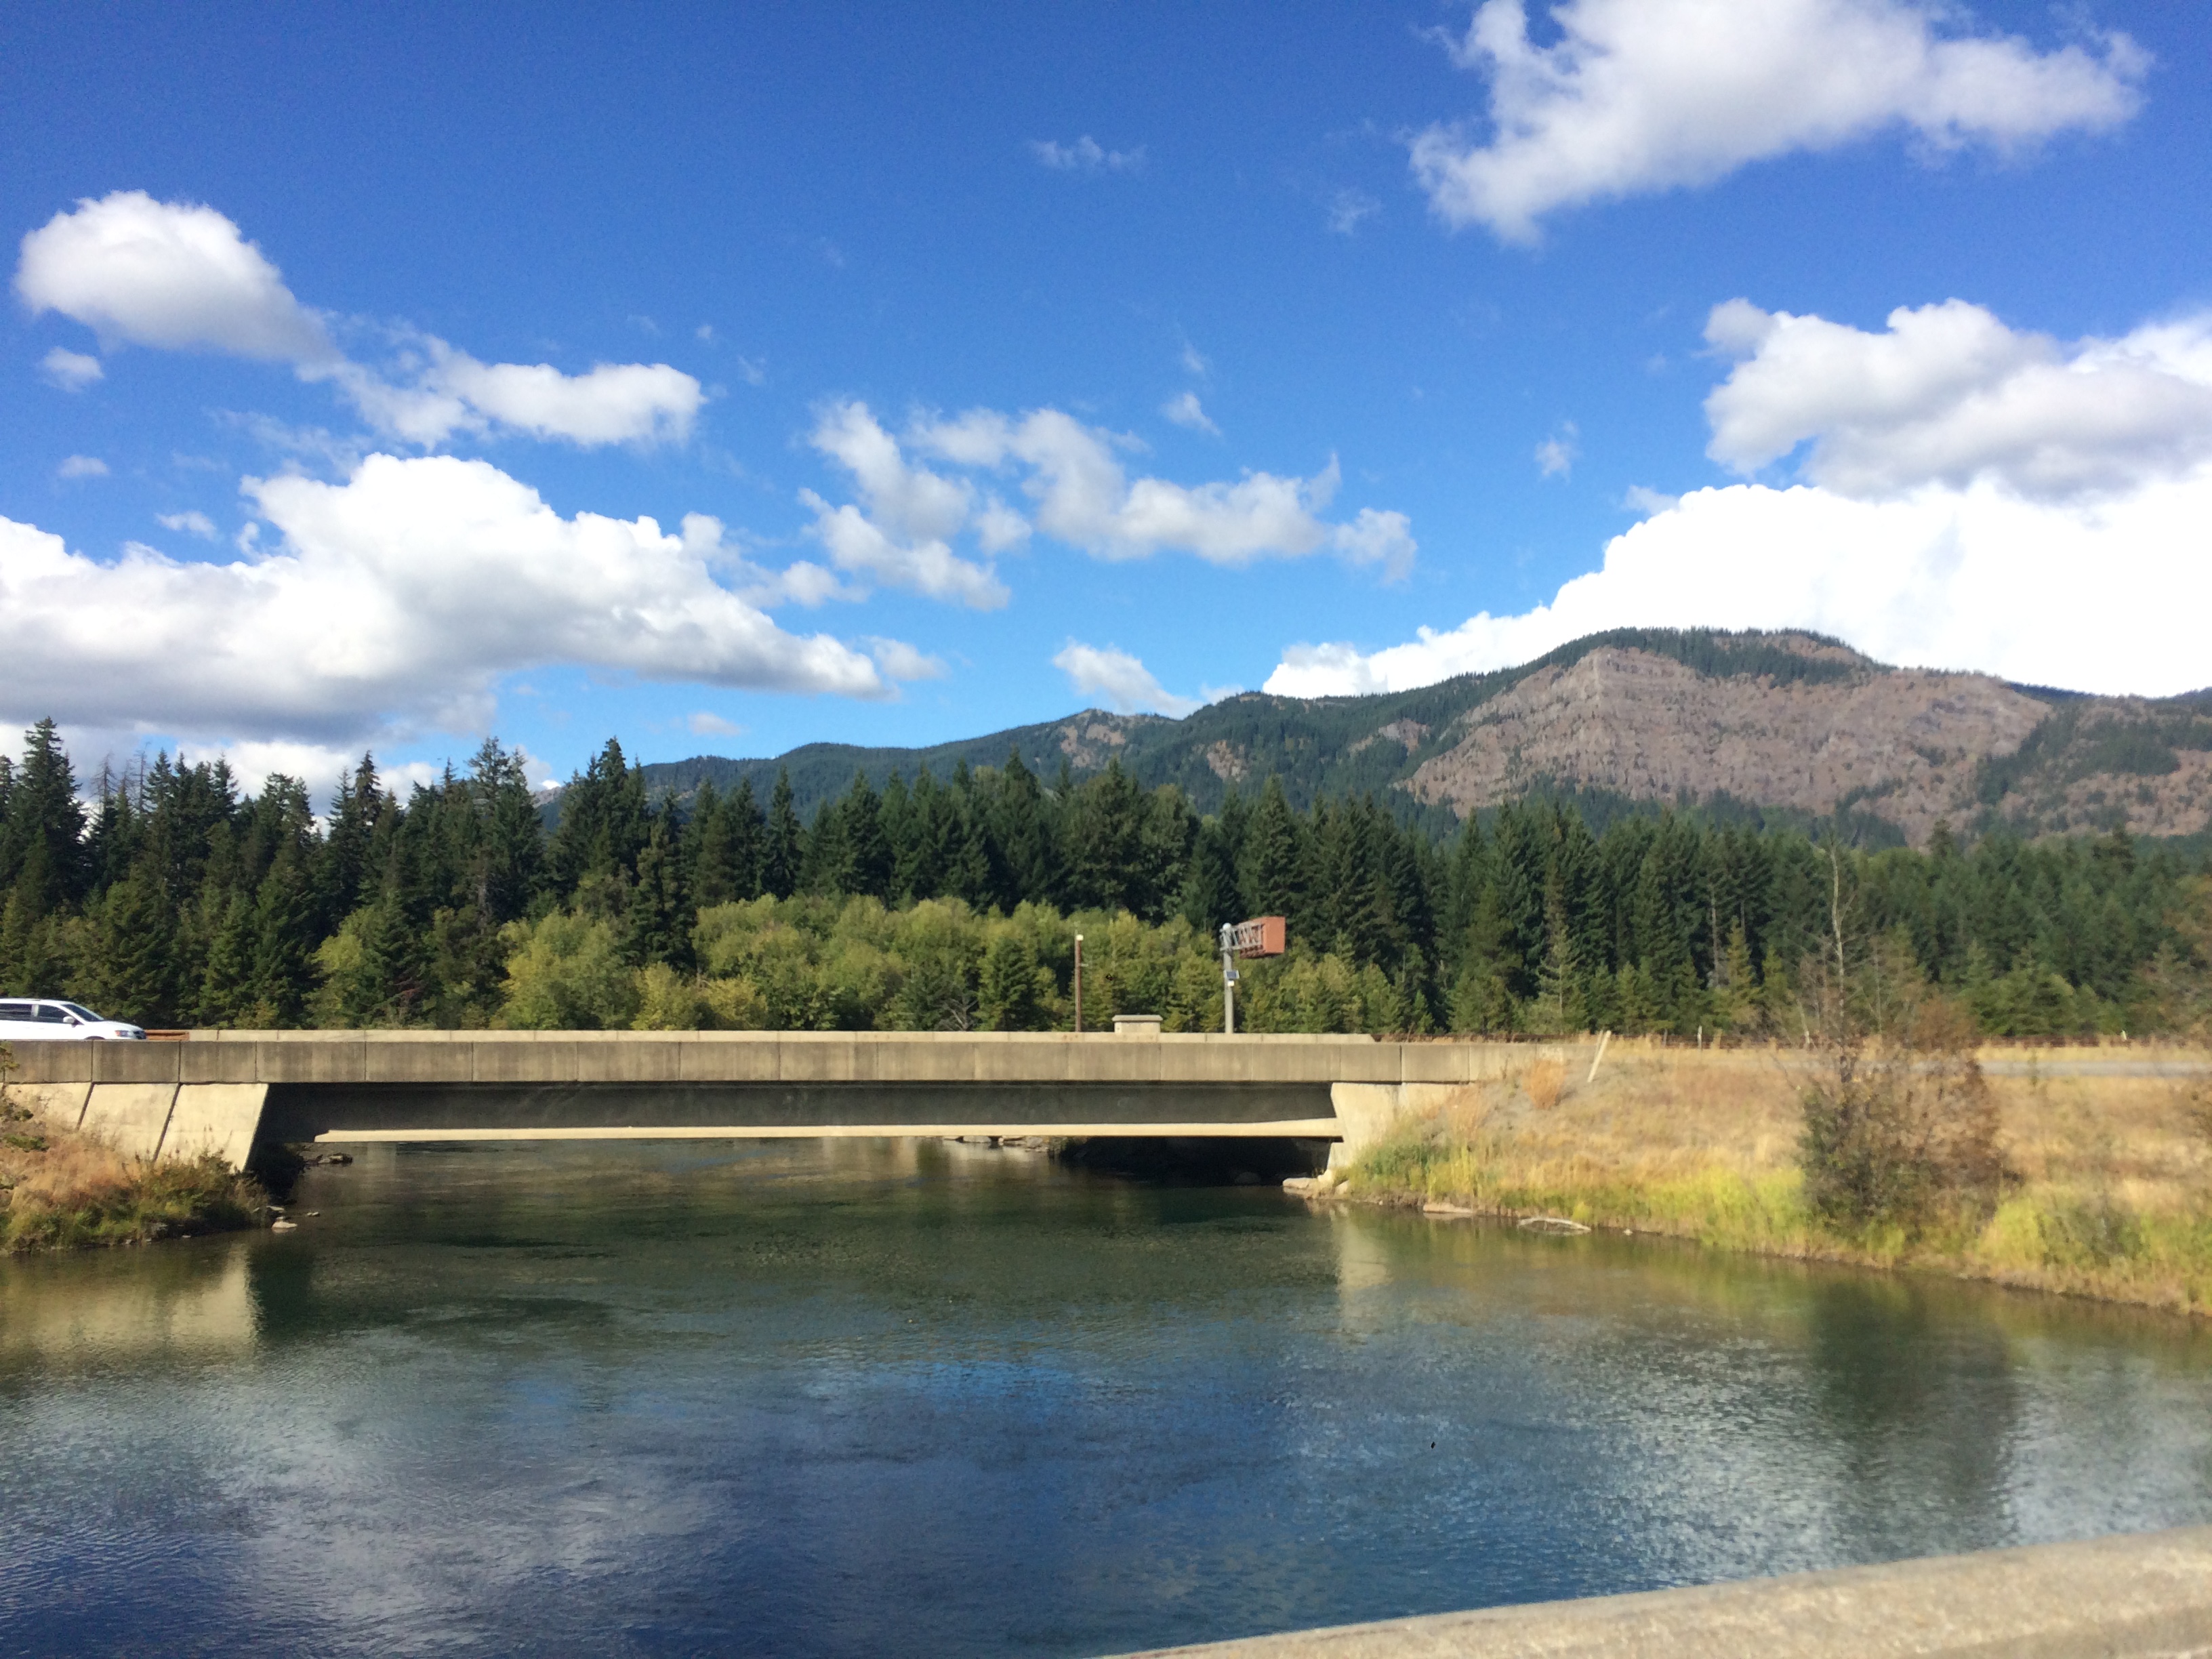
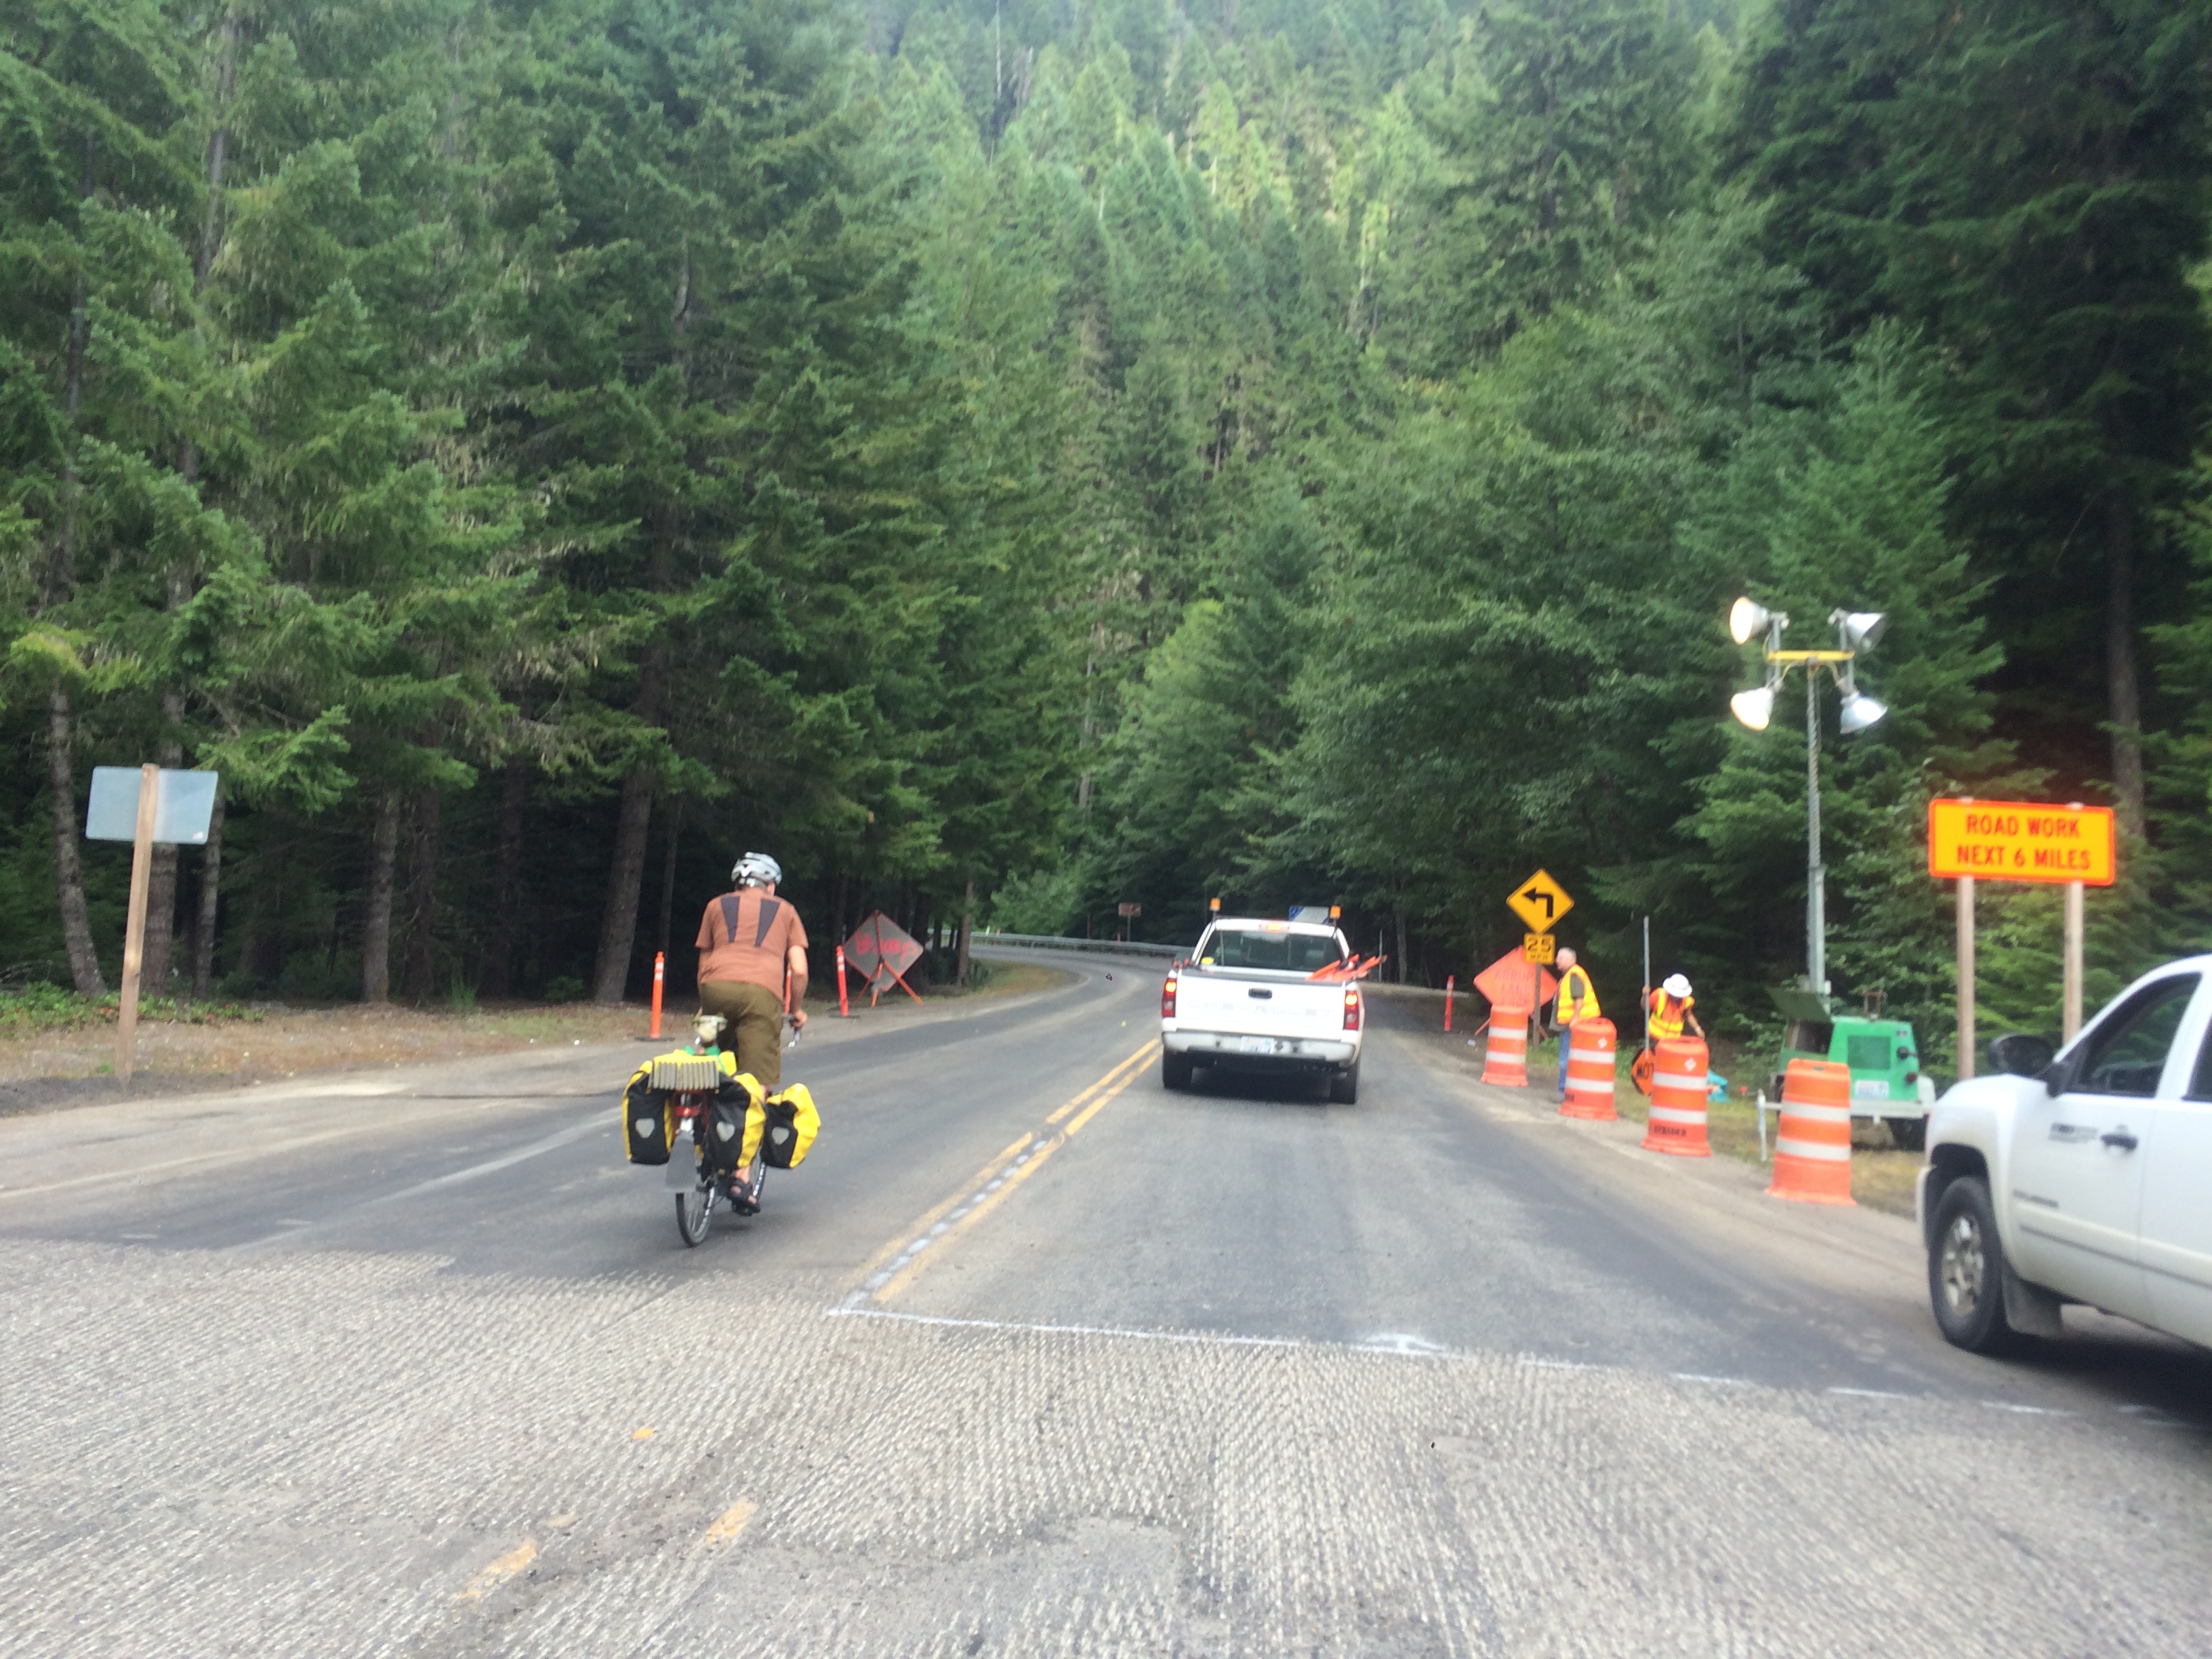
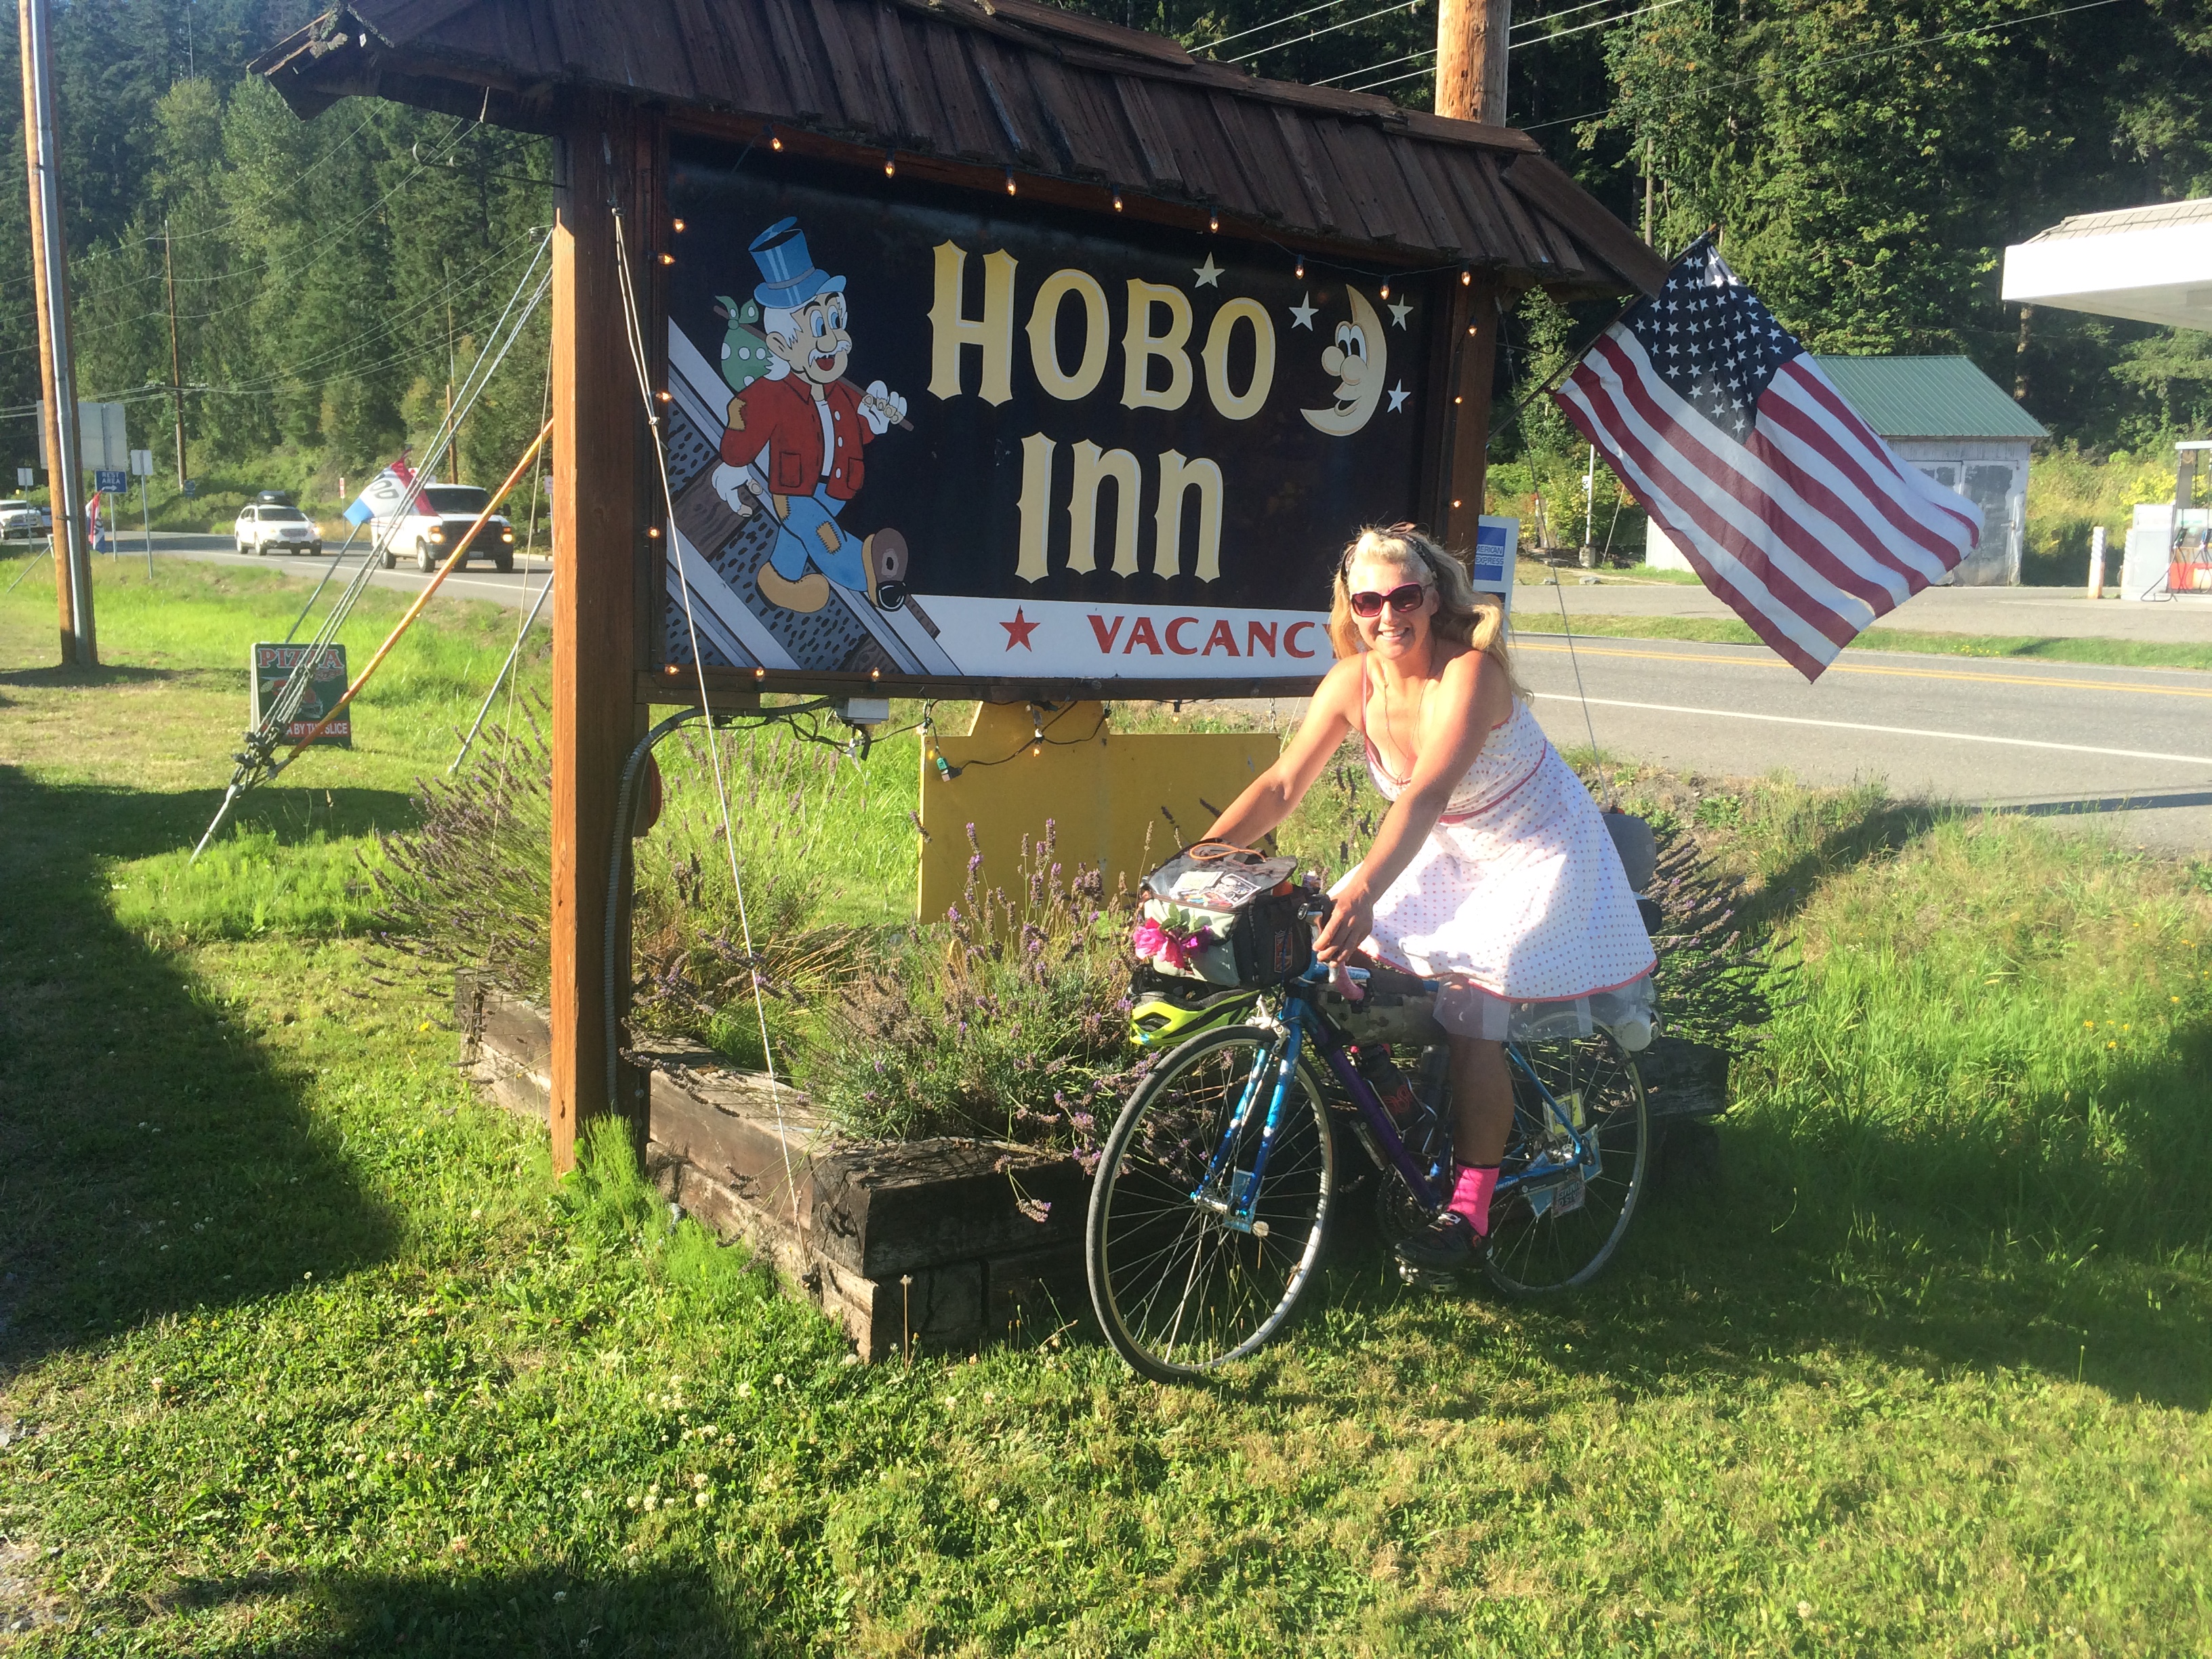
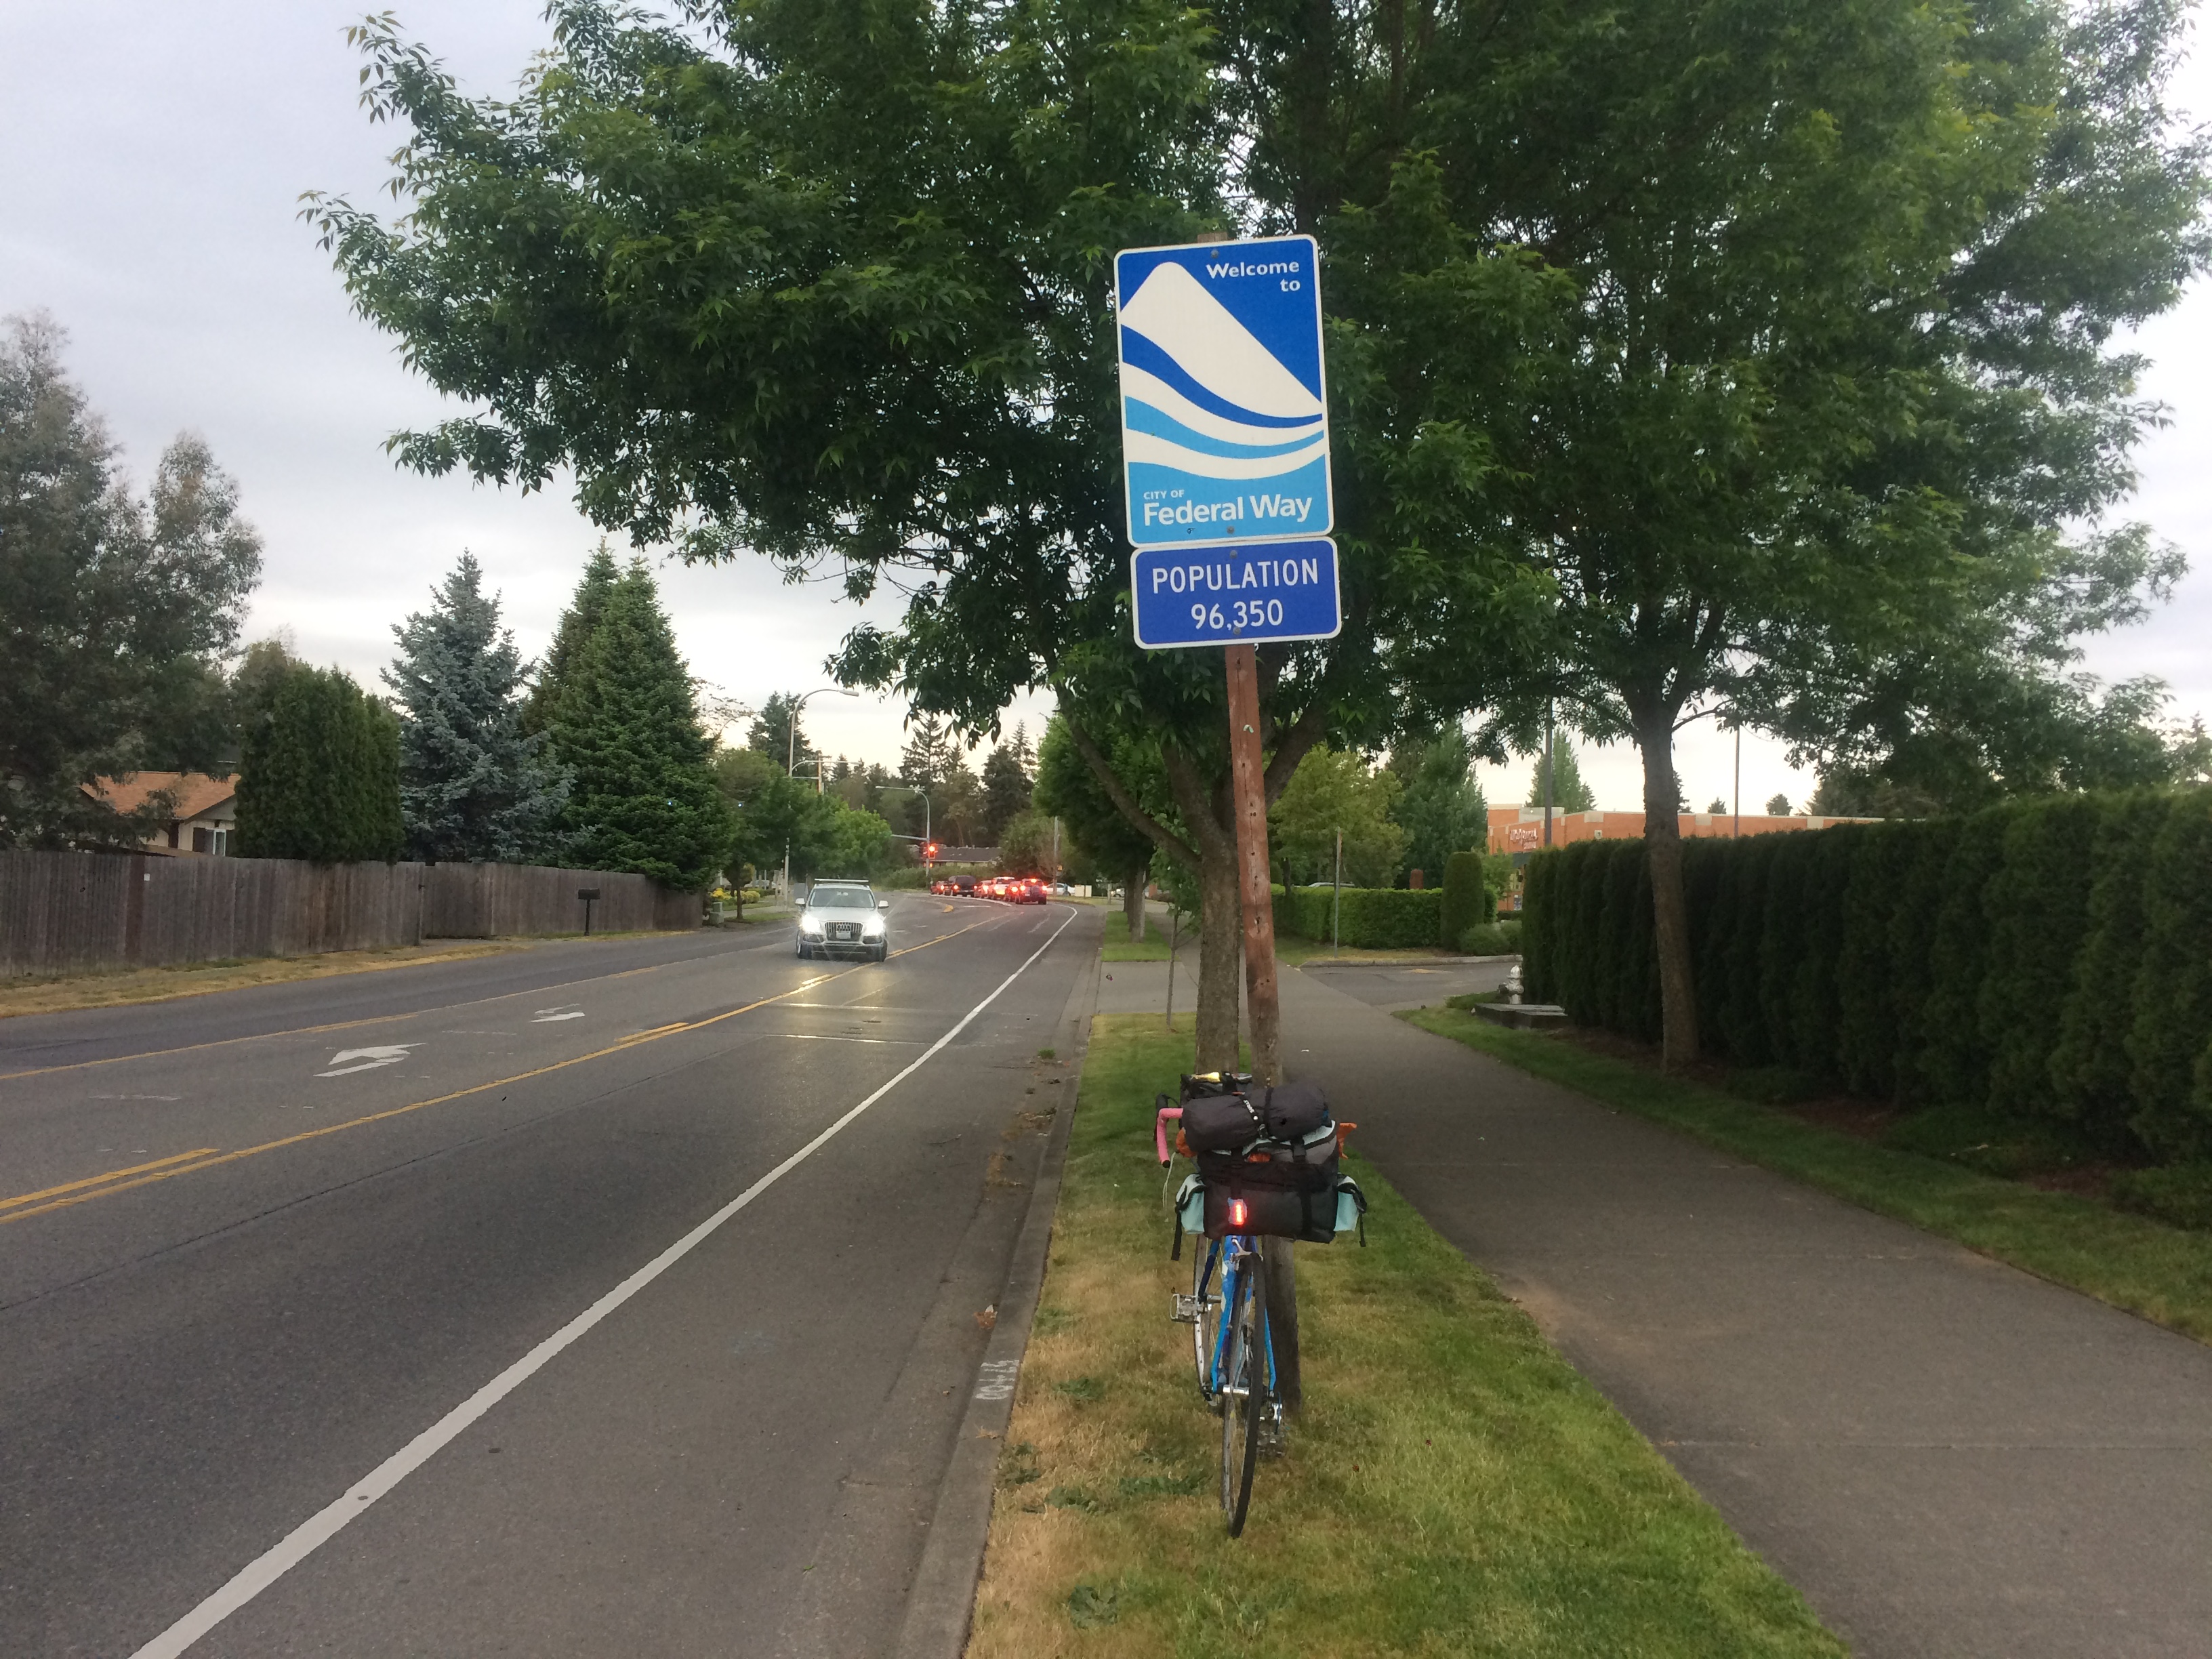
The roads after the BPA Trail had shoulders of varying width, but mostly wide. It was a pleasant ride. 5.5 miles of the way (out of 7.7 miles) I passed a shopping center (where Northshore Parkway and Hoyt Road SW meet) that would have yielded good options for sit-down dinner or grocery supplies. You’ll find it right after the “Welcome to Federal Way” sign where you probably just stopped for a photo op:

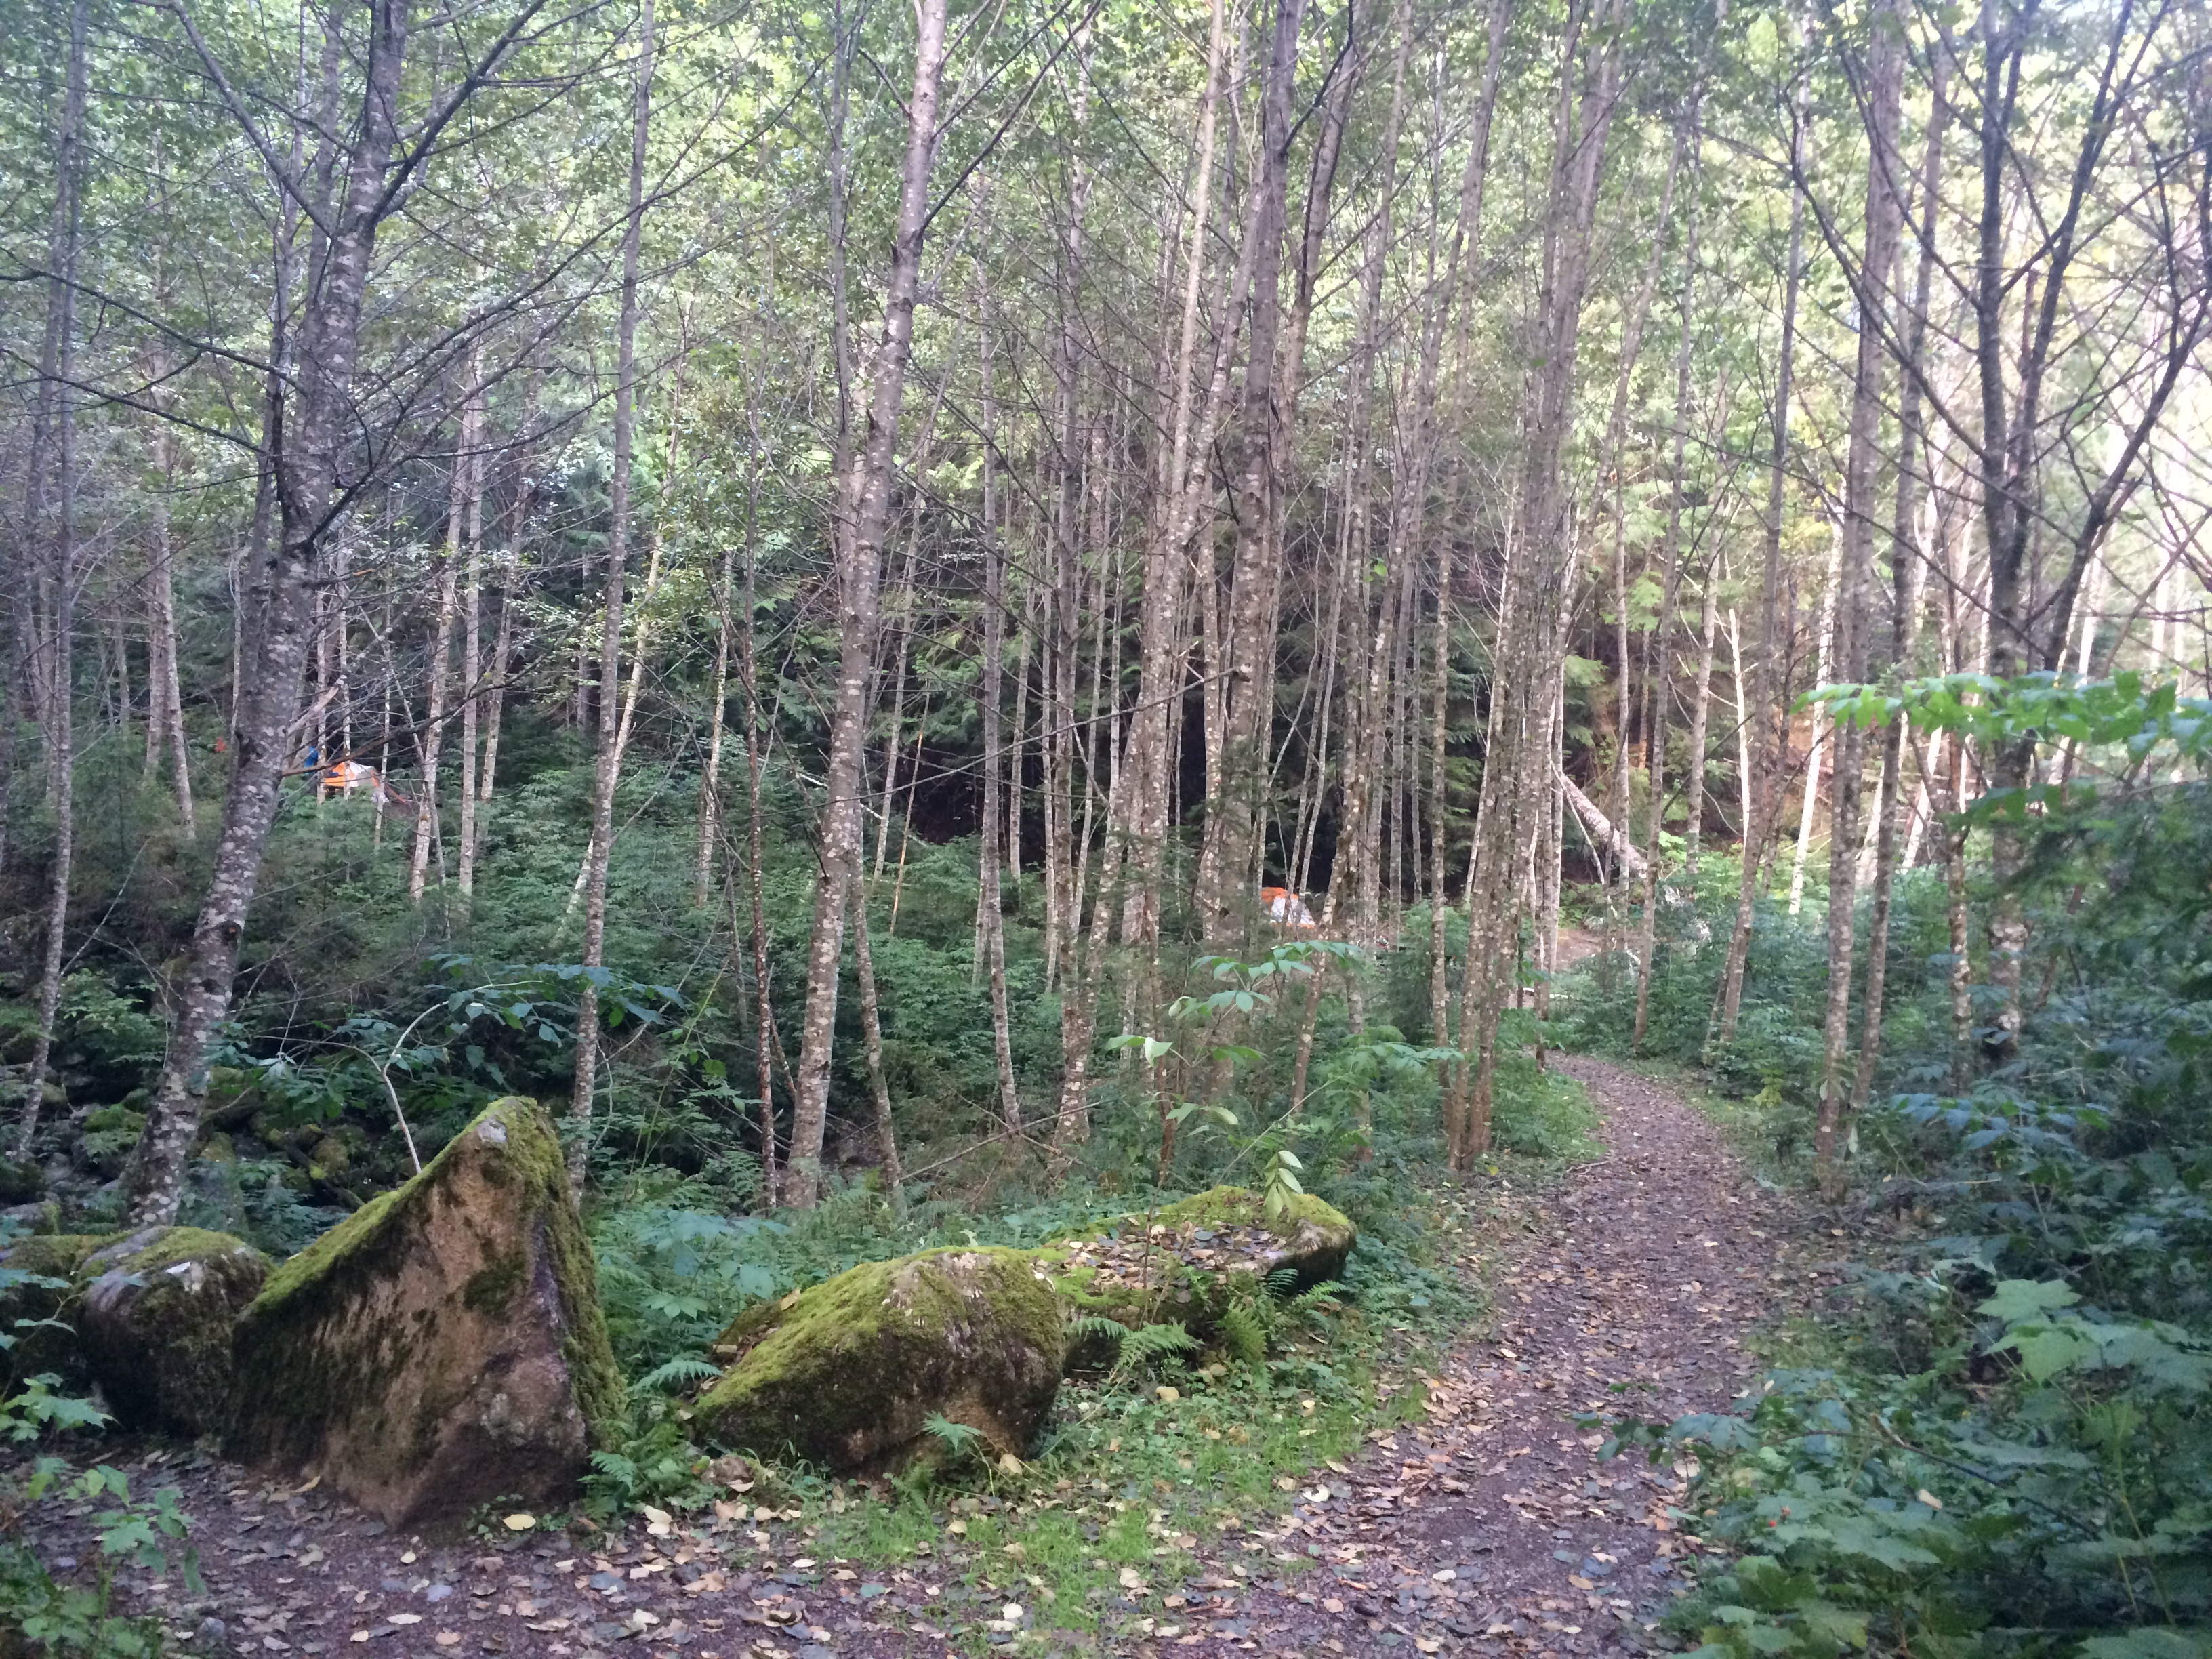
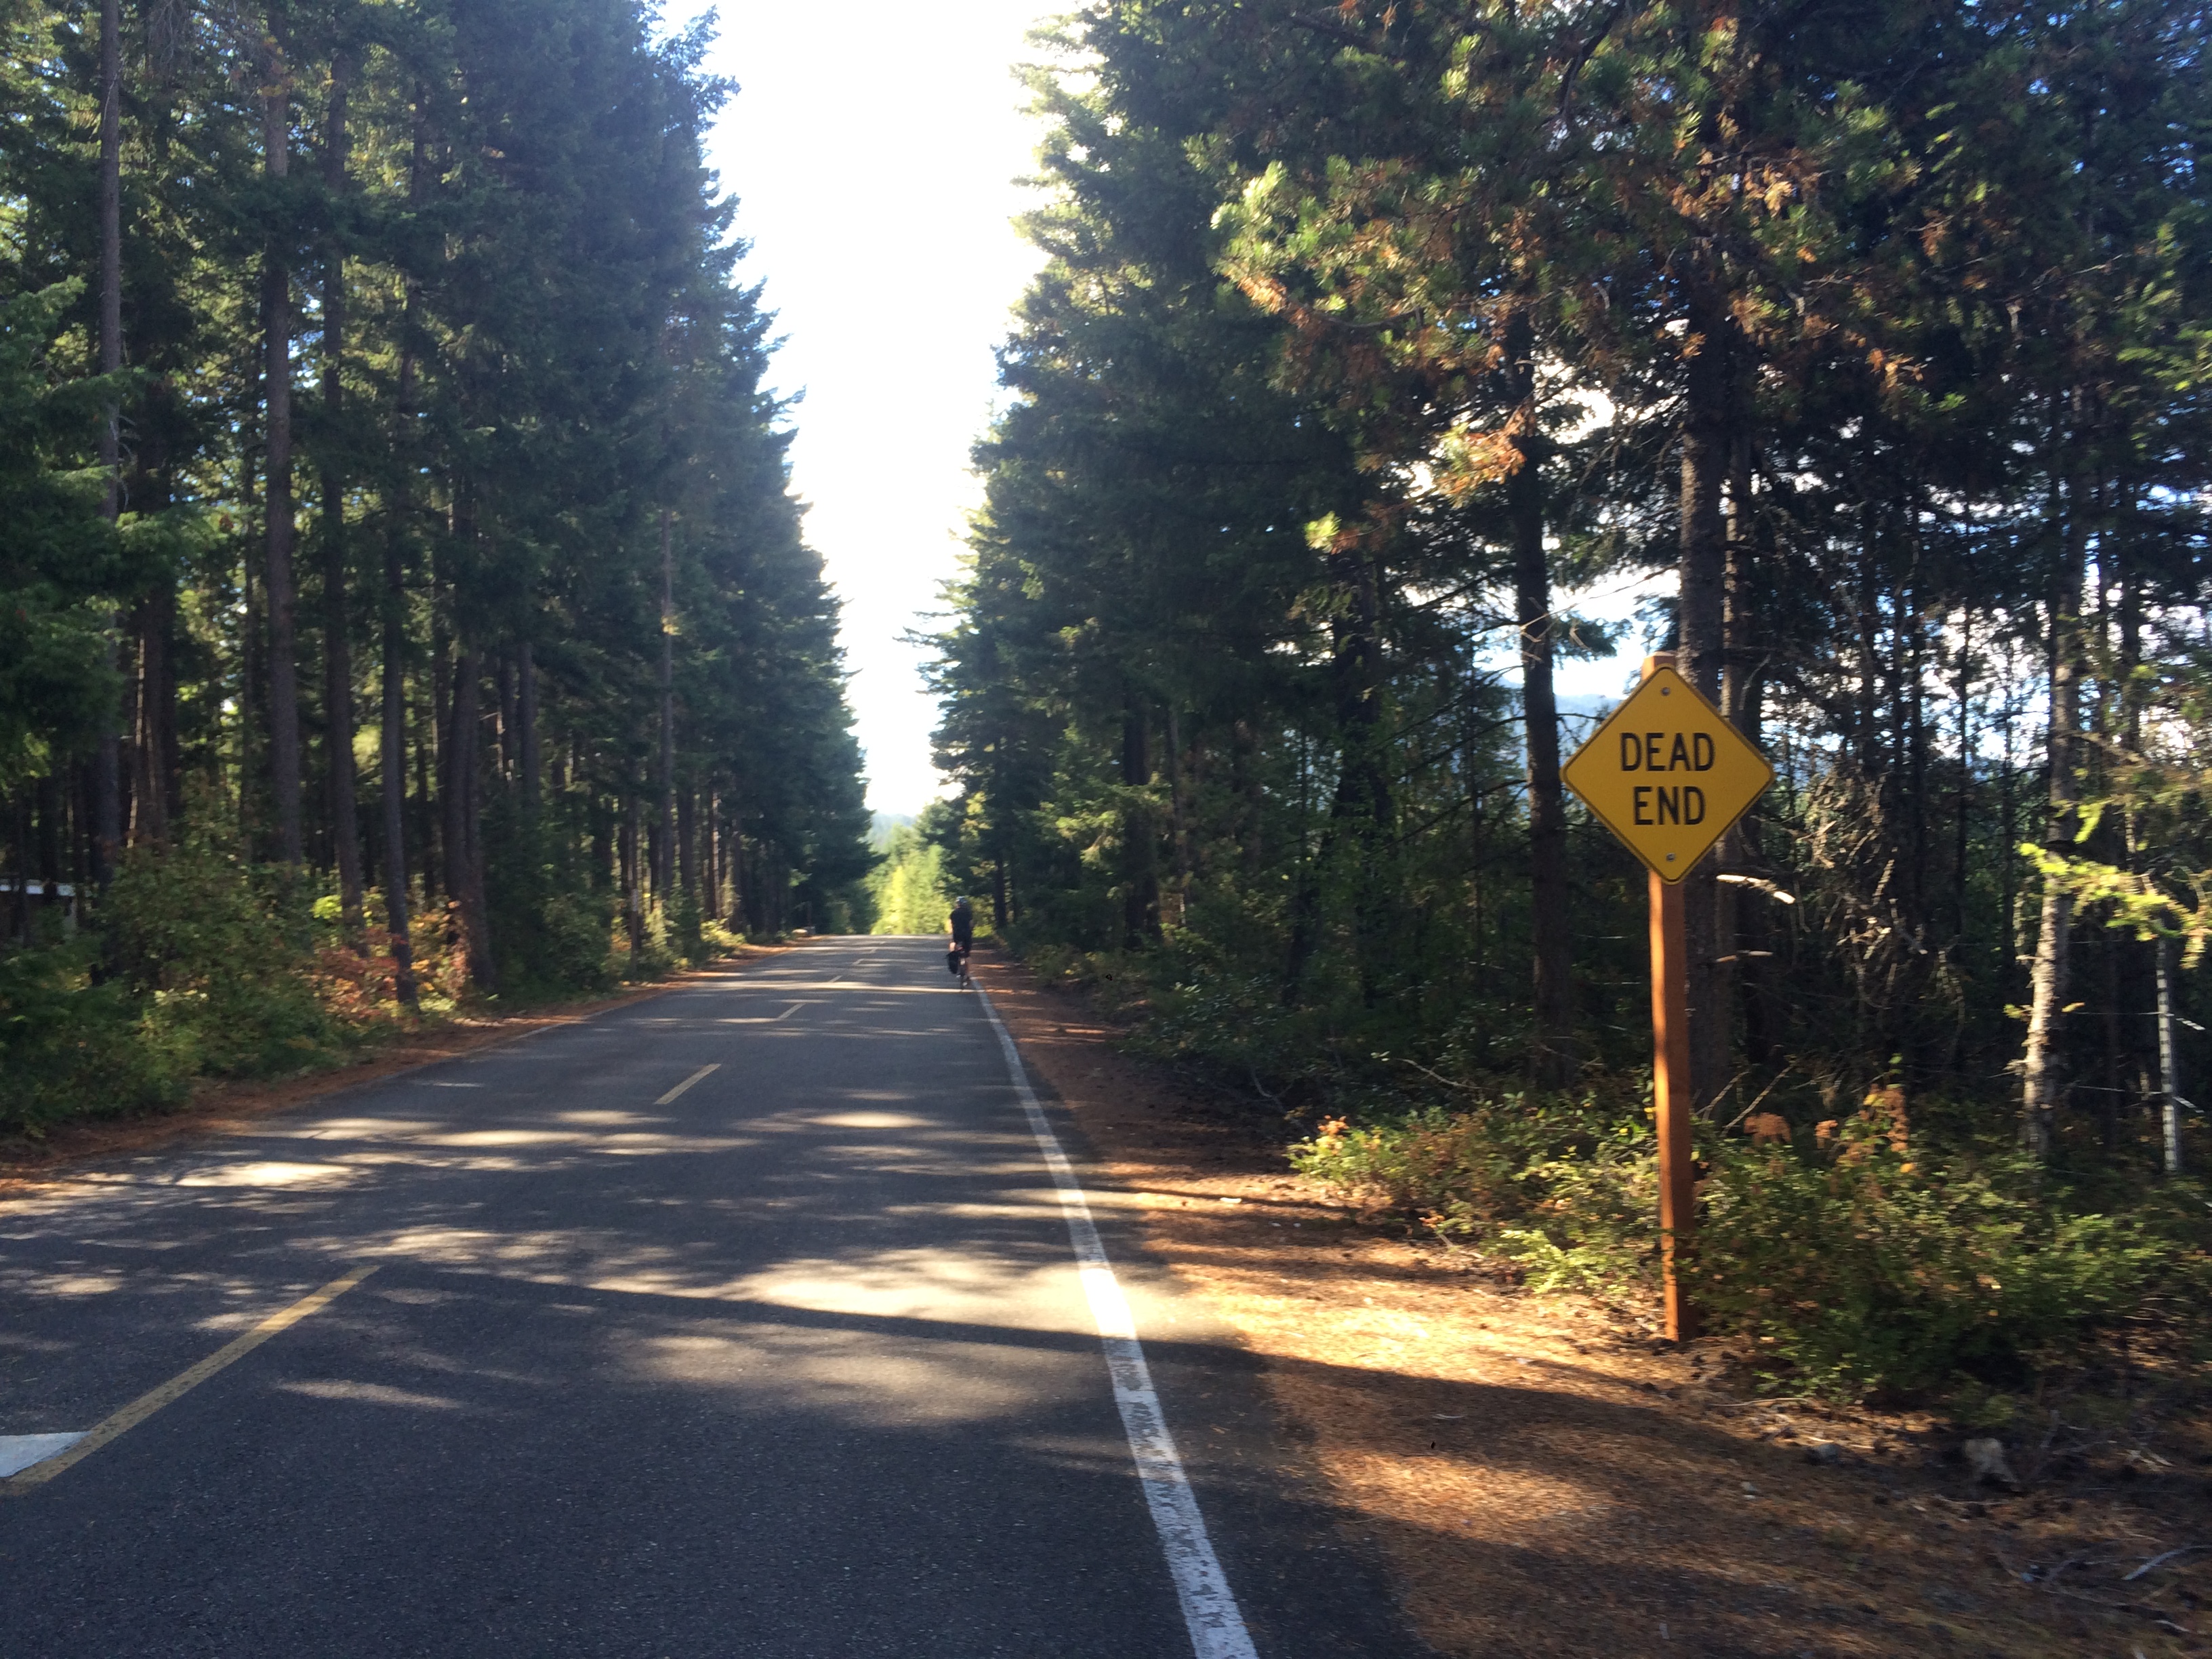
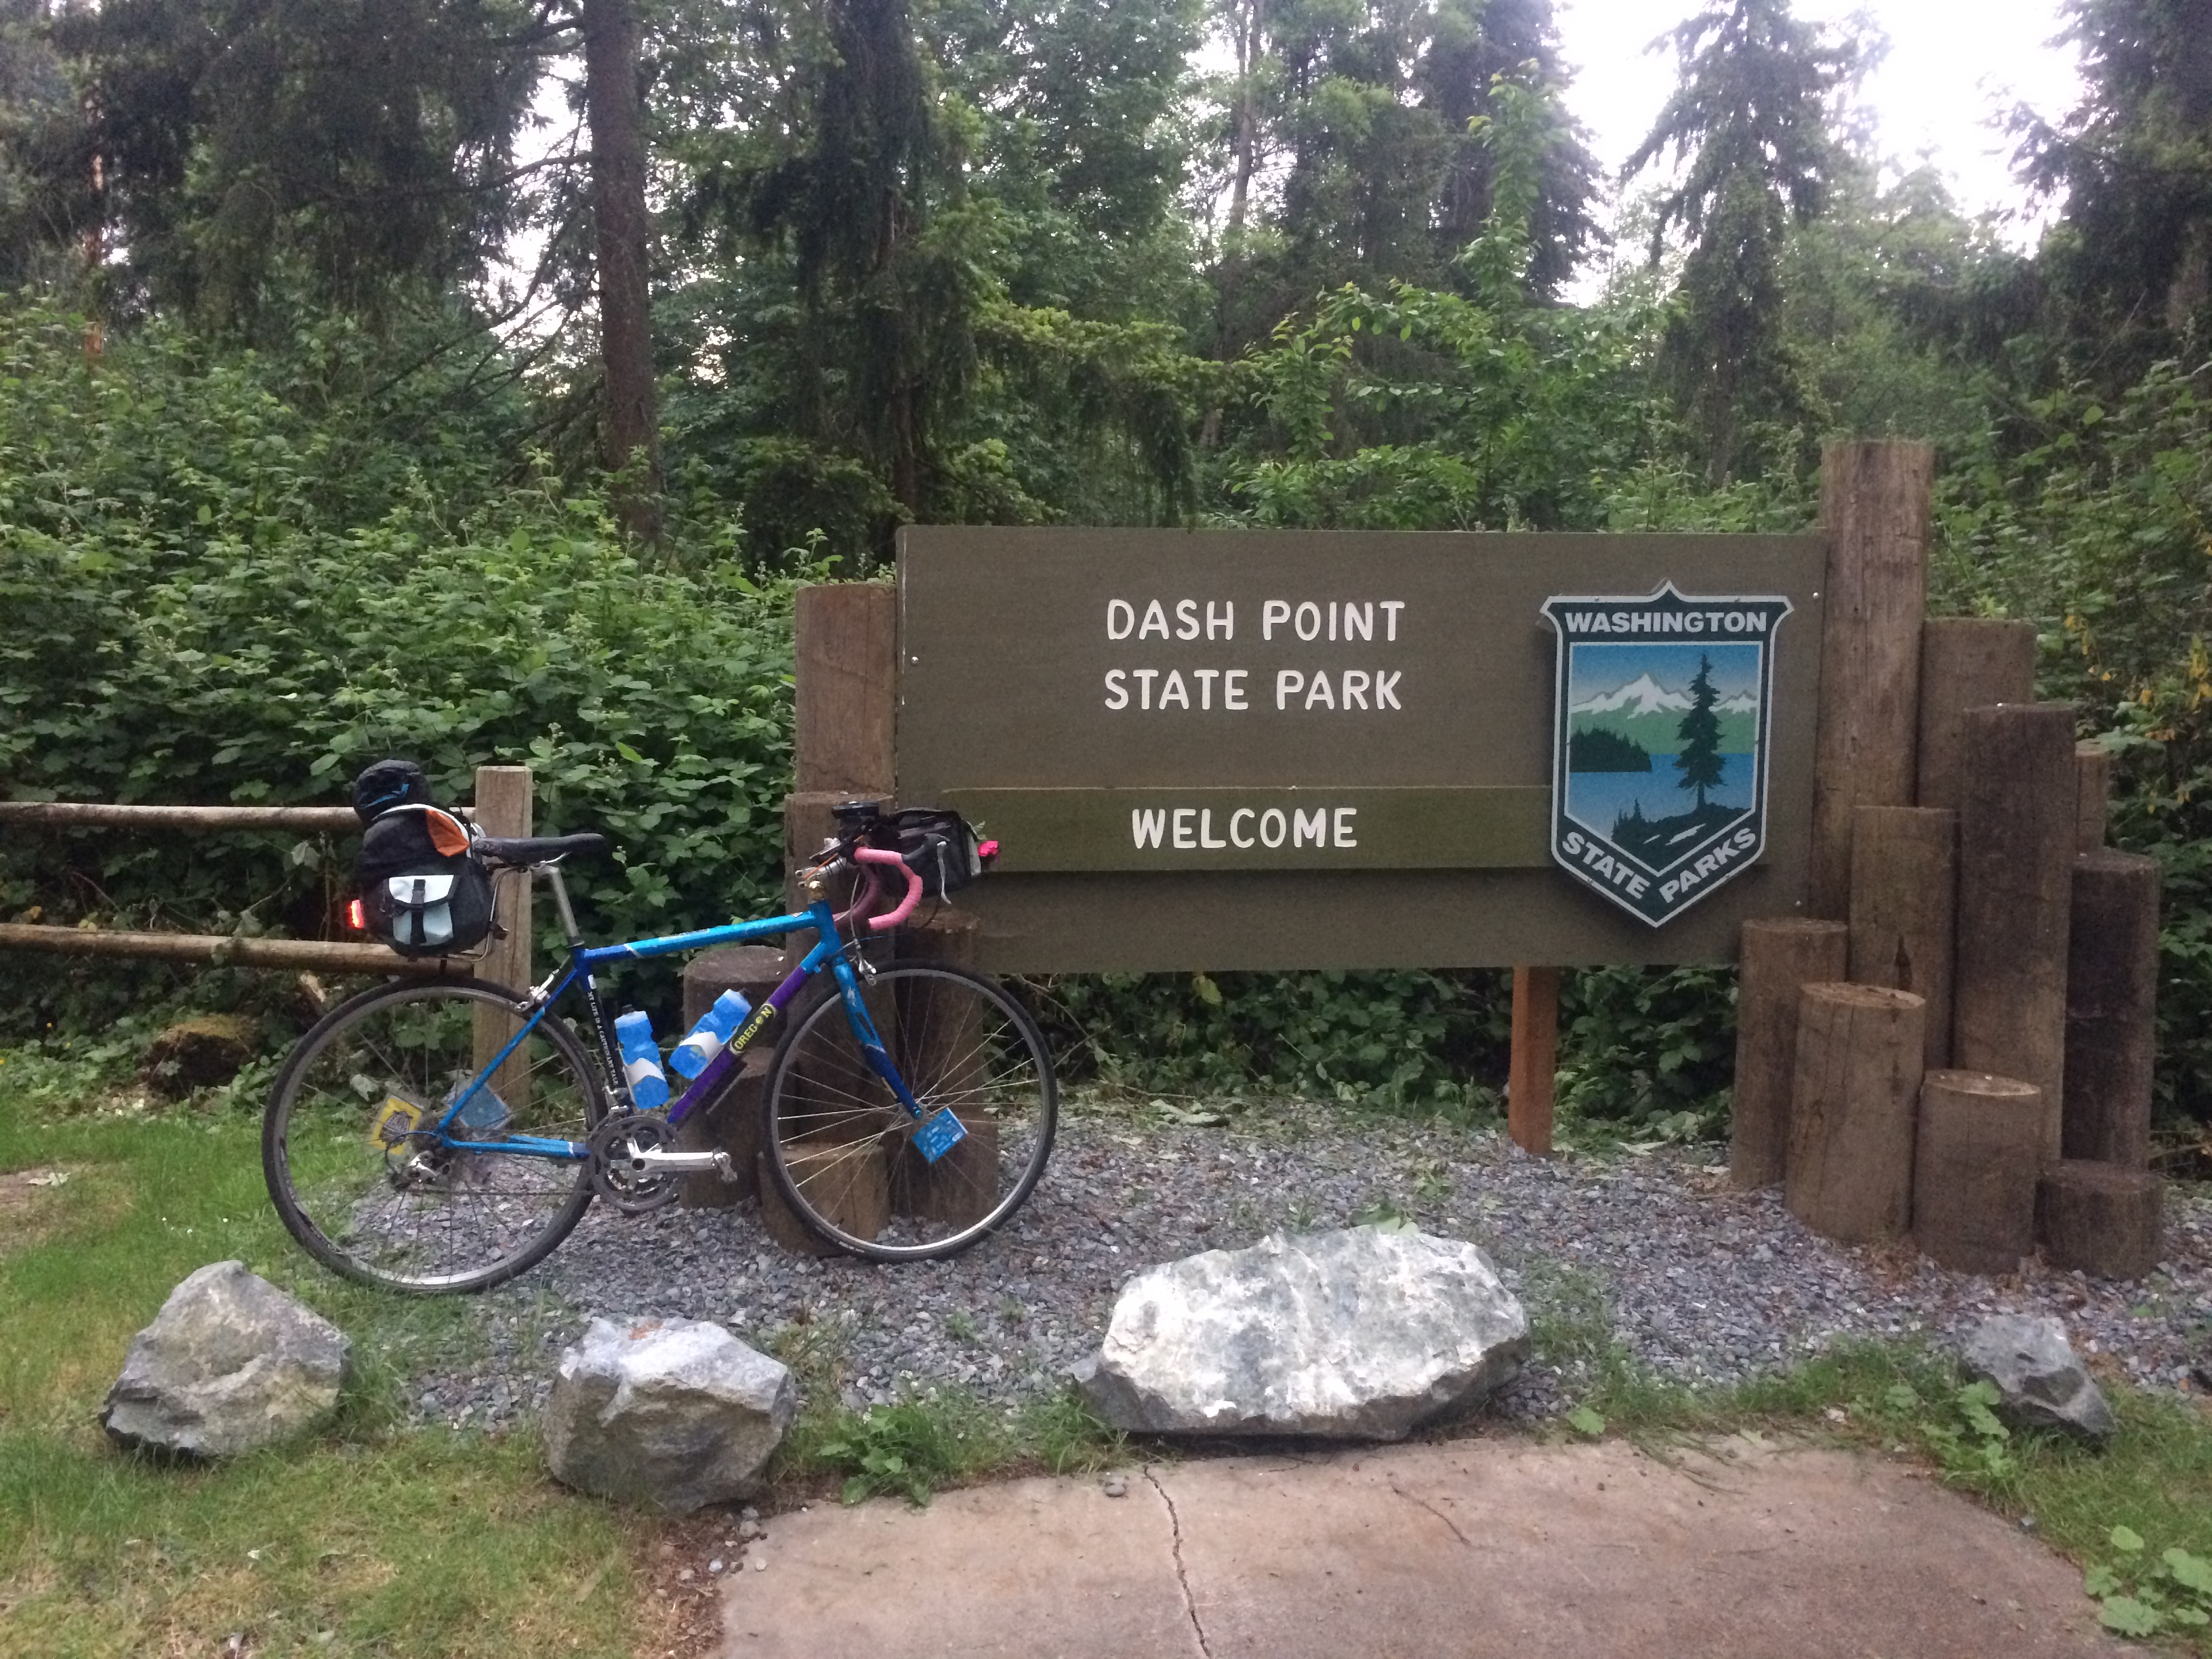
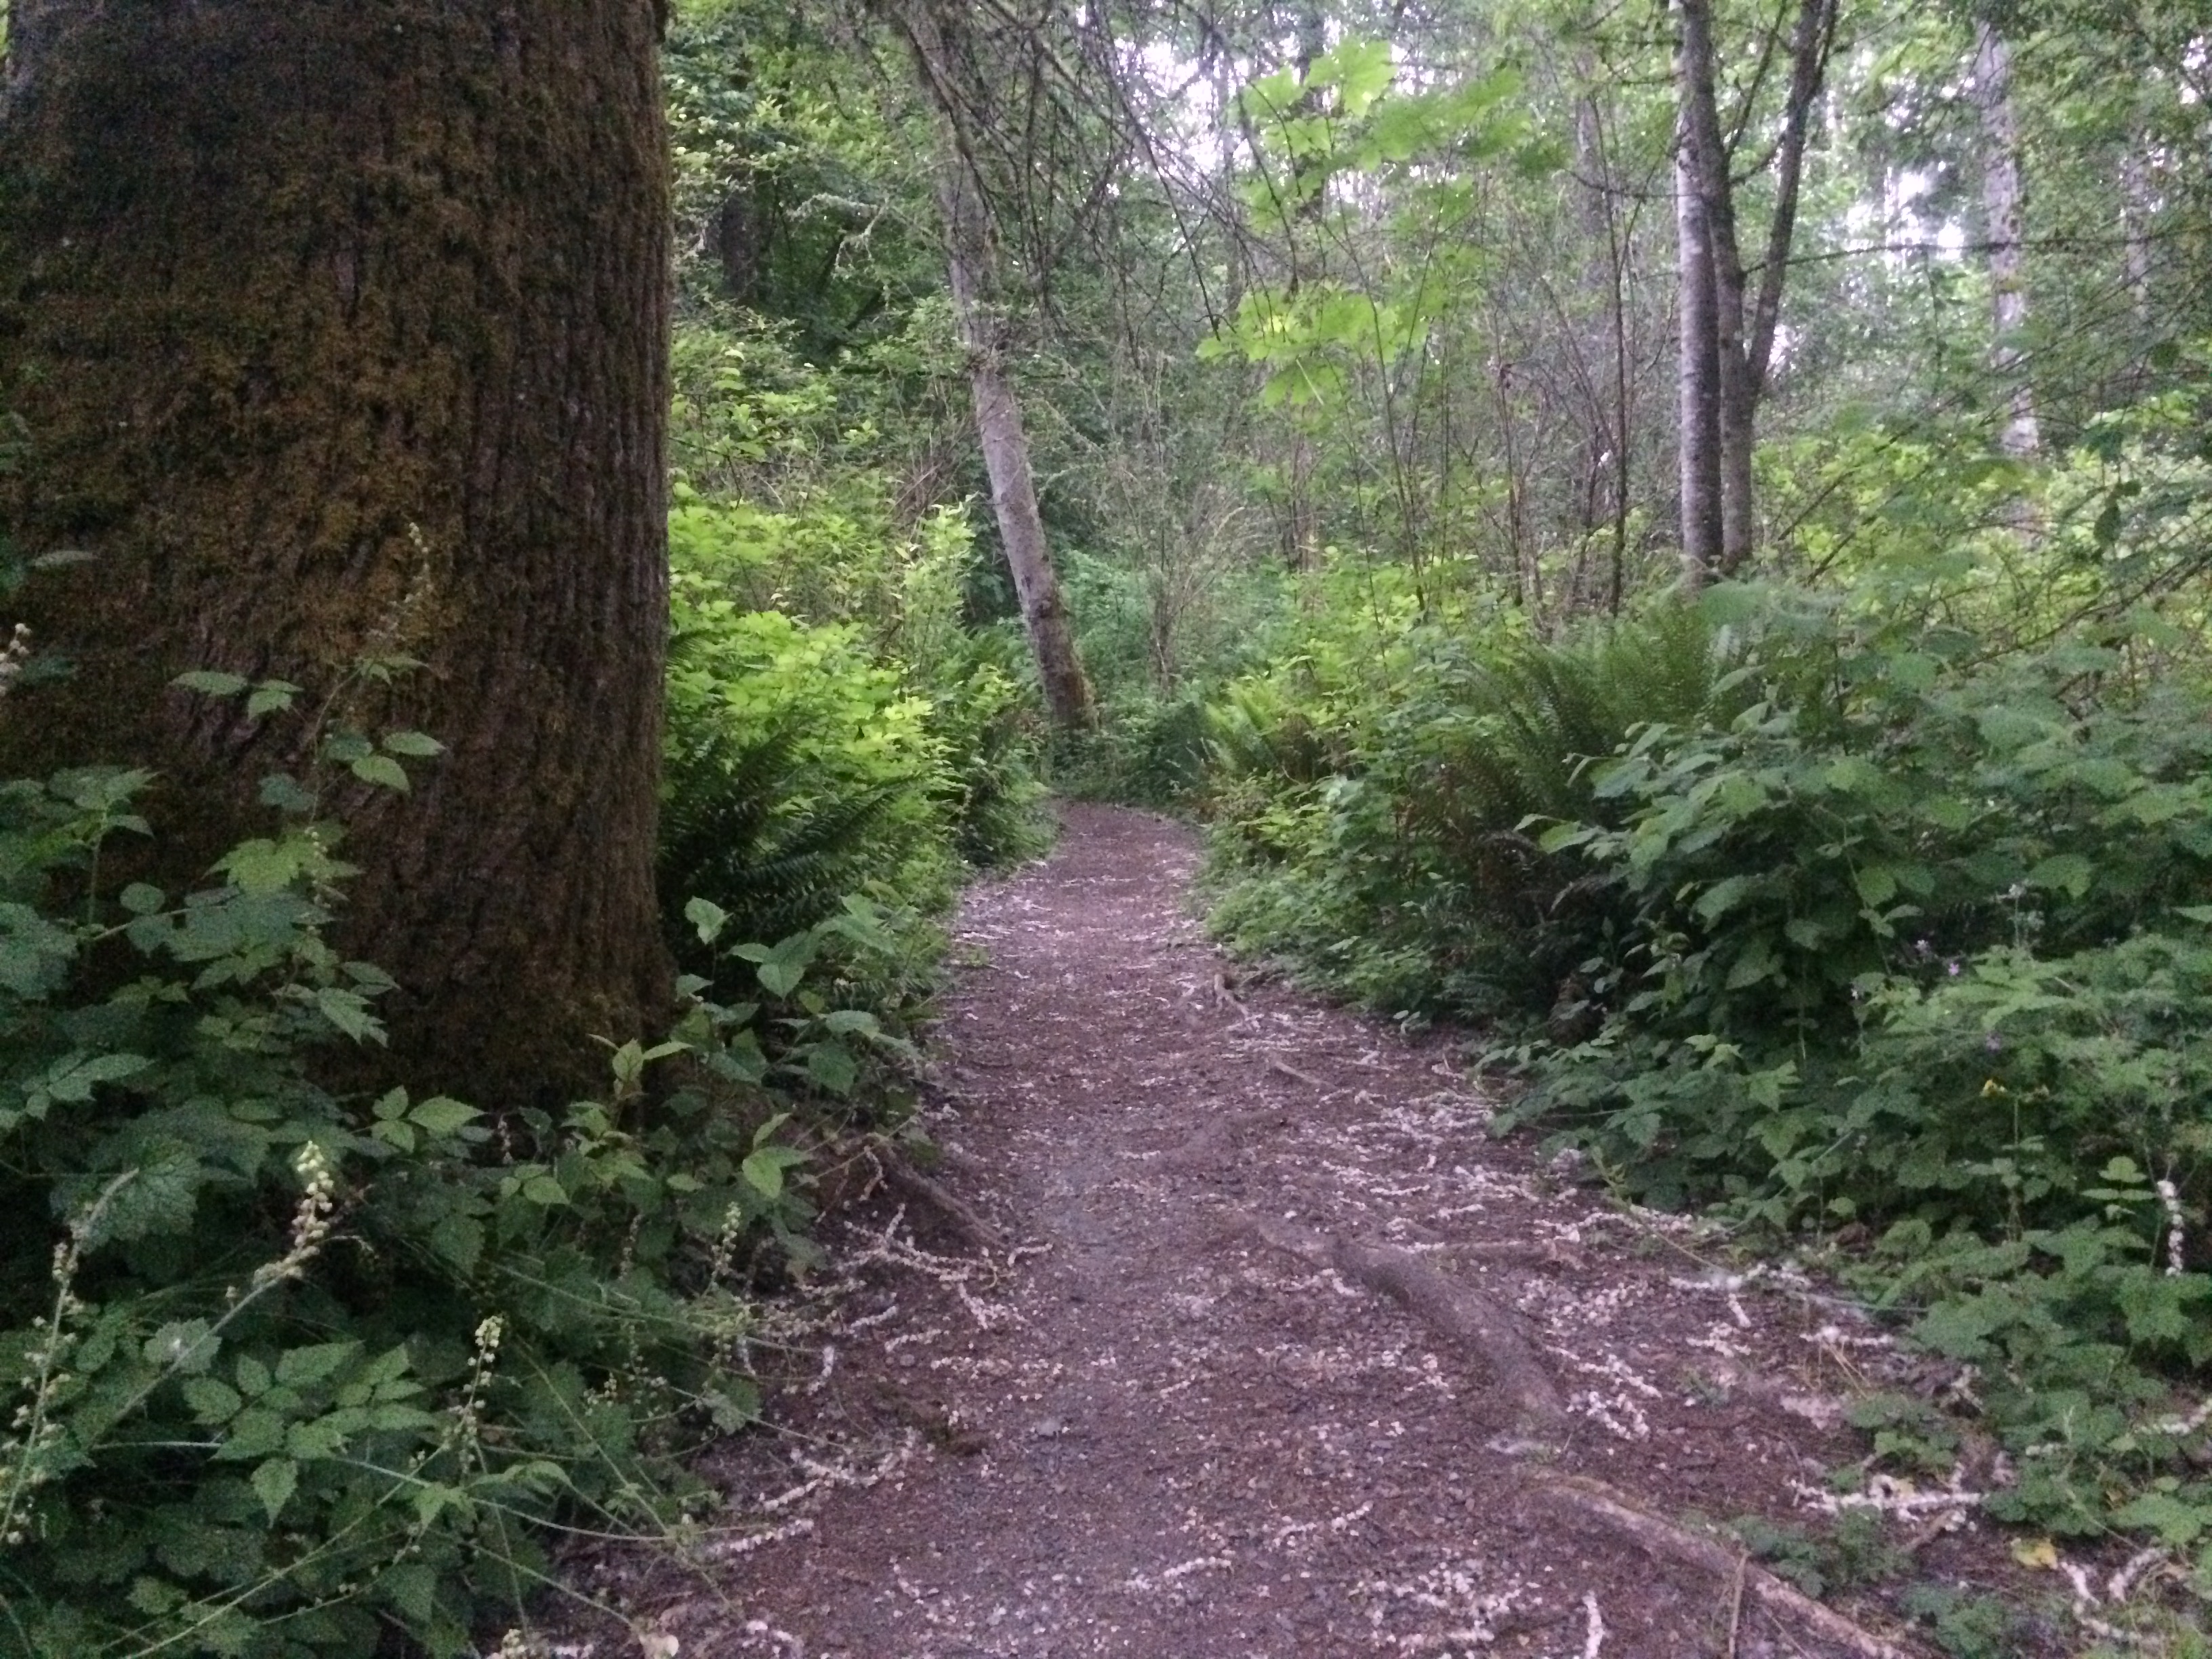
I love that Google Maps’ bike directions routed me into Dash Point State Park via a trail! I would not have loved this had it been darker, though. As it was, some of the tree canopy made it quite dark, but after dazzling a hiker with my bike light, I turned it off. This is definitely more of a walking path, but there was no “no bikes” sign so slow-moving bikes are OK. I was fine on my road bike with 25mm slick tires, even with some tree roots poking out here and there.

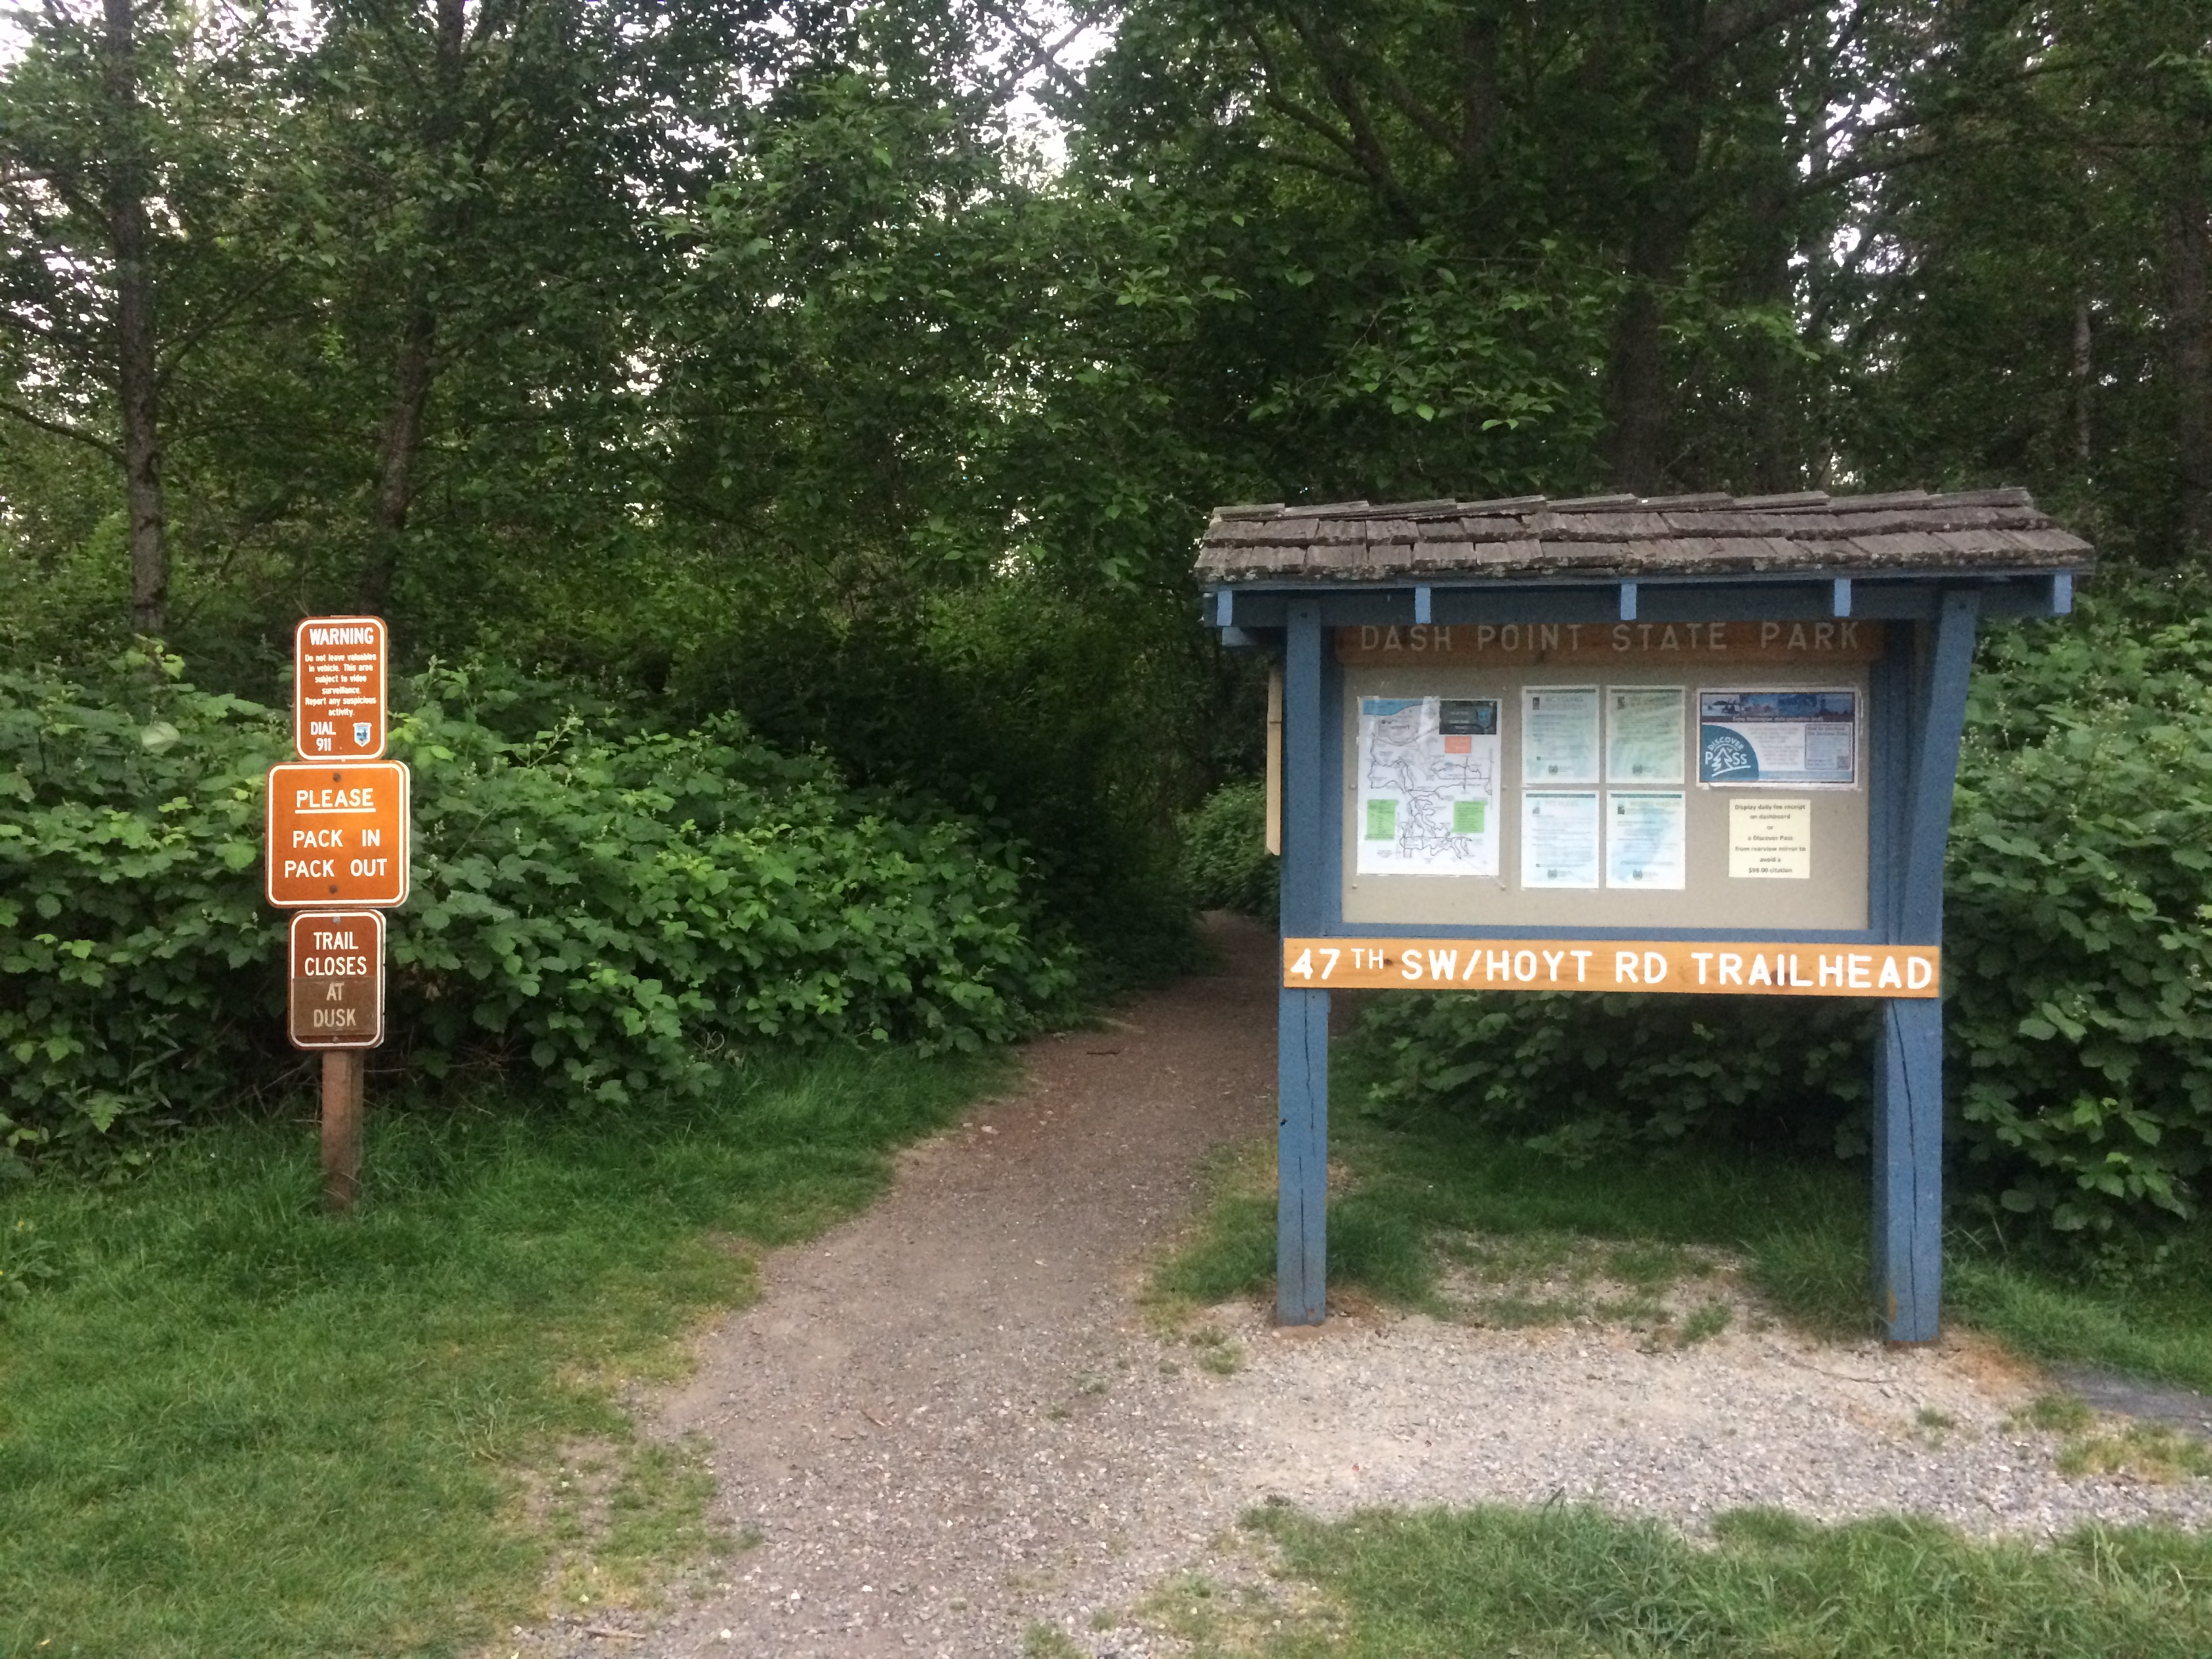
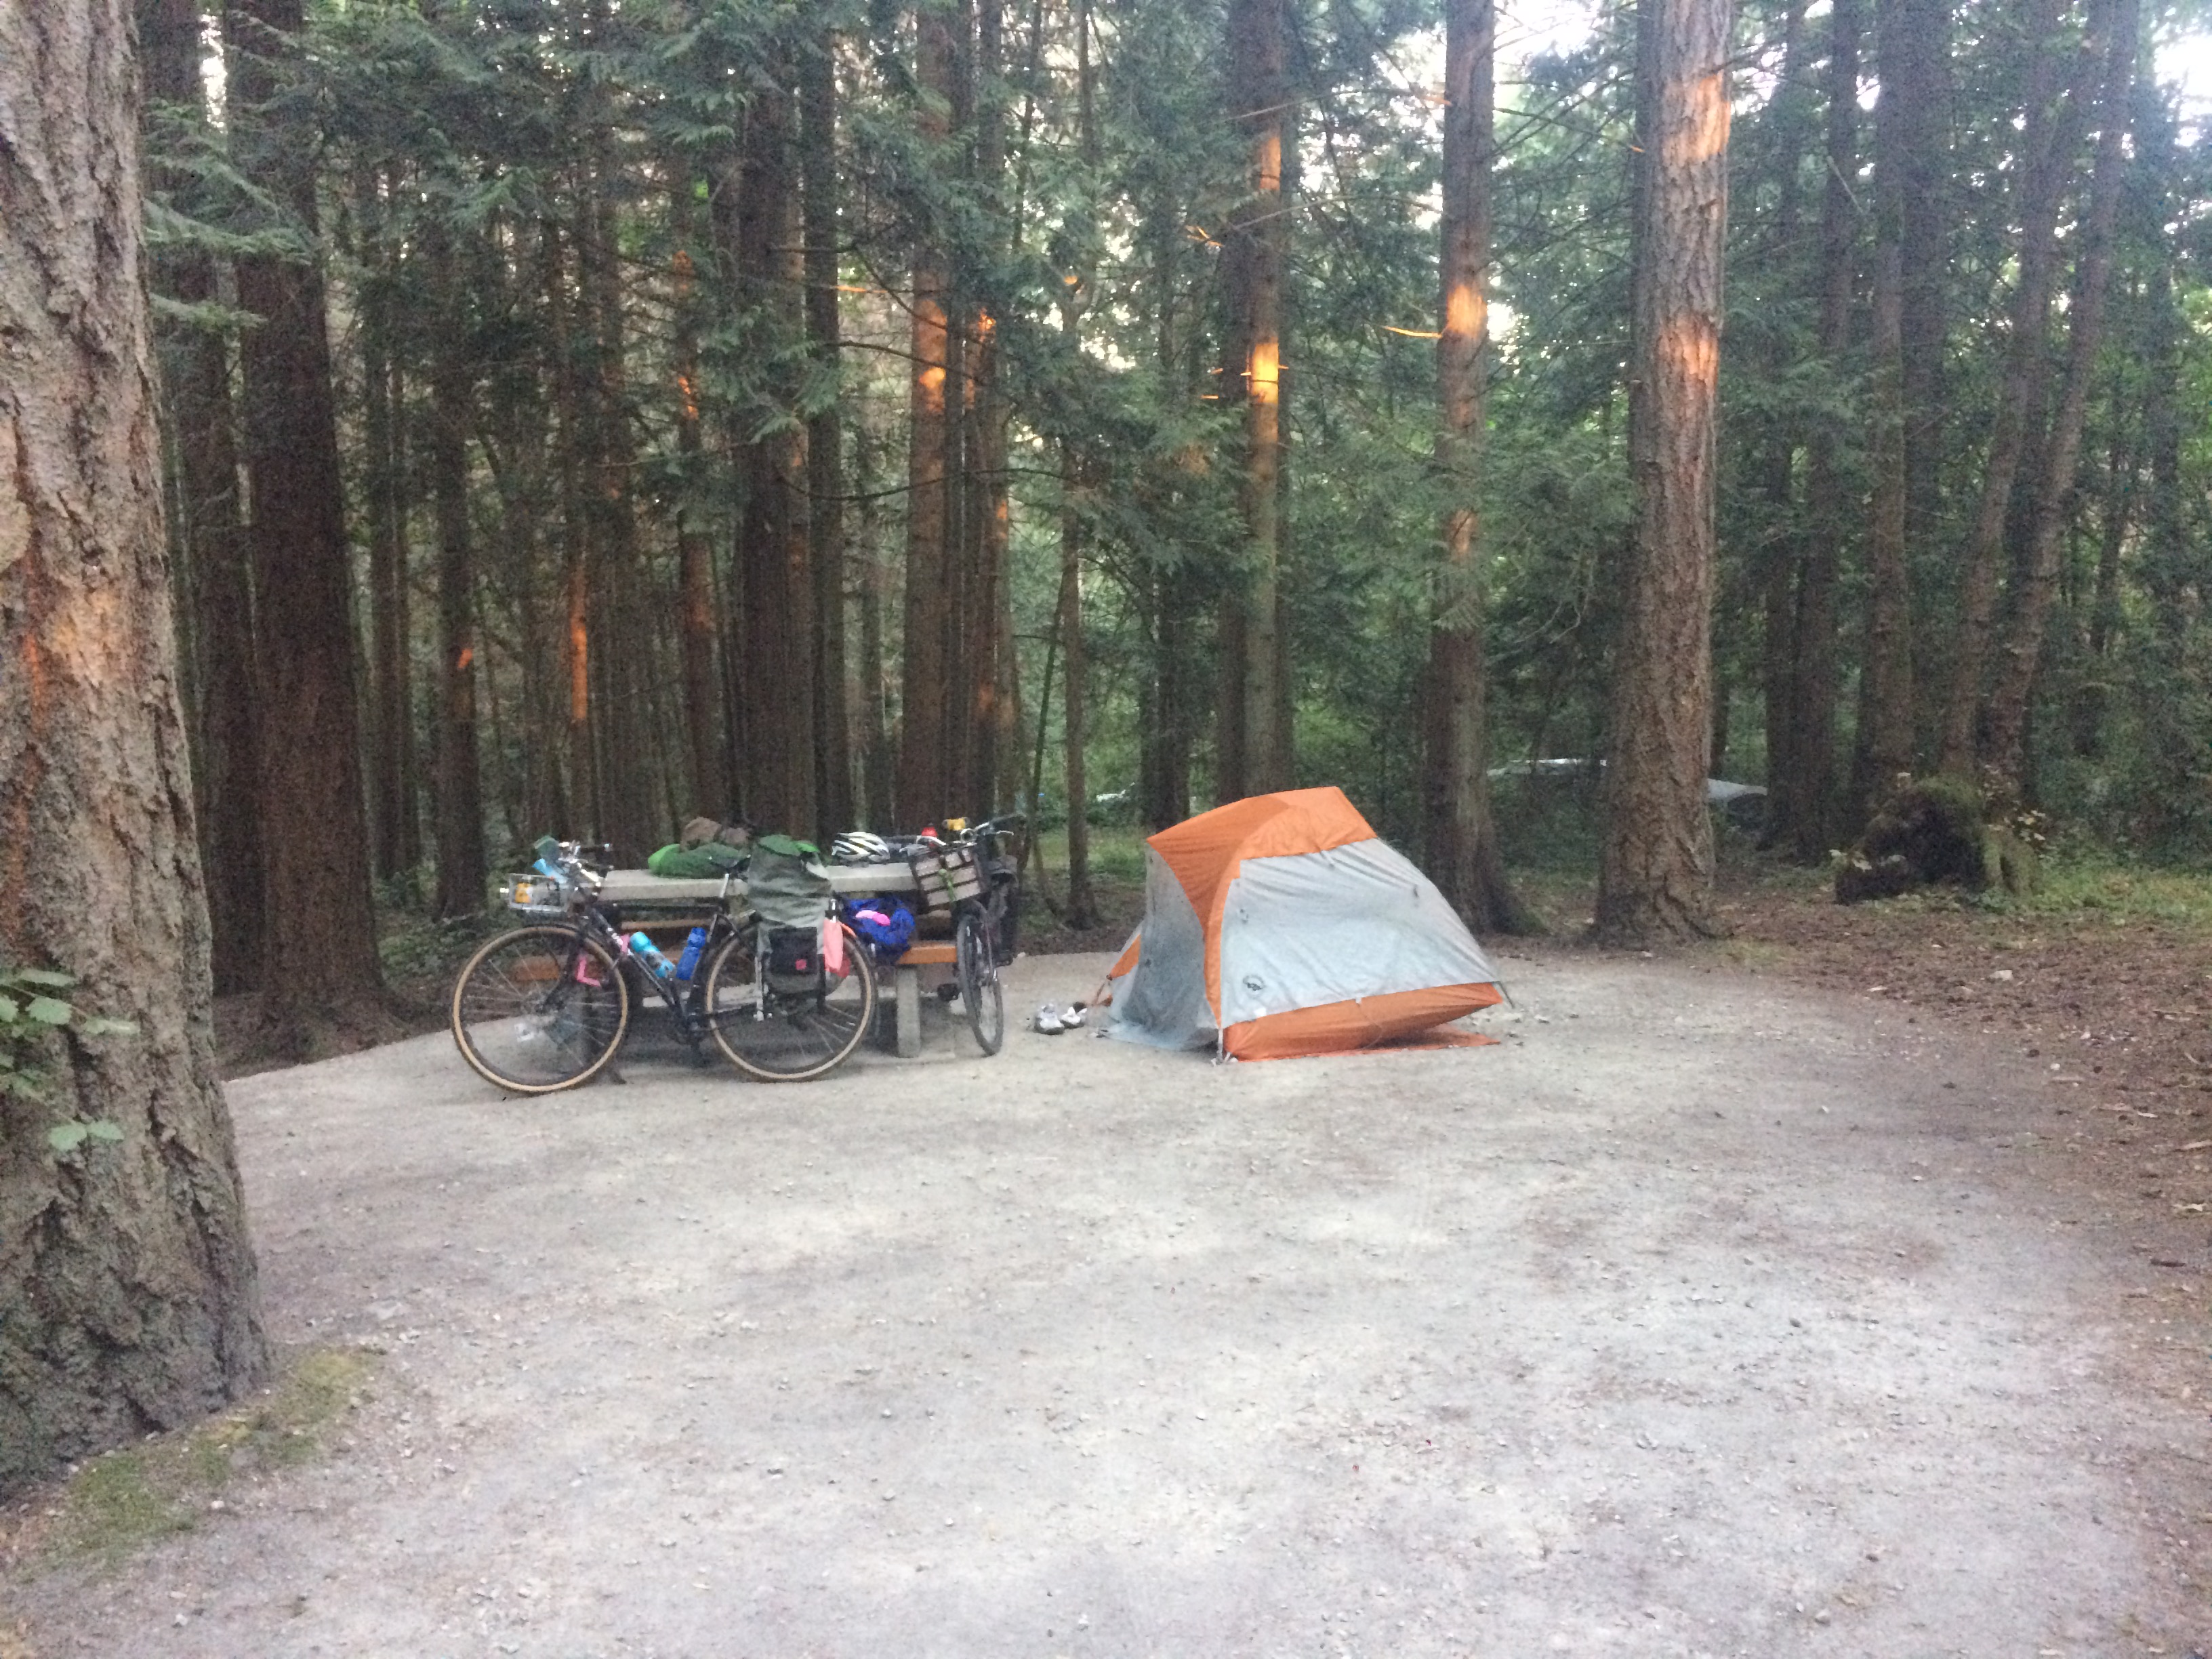
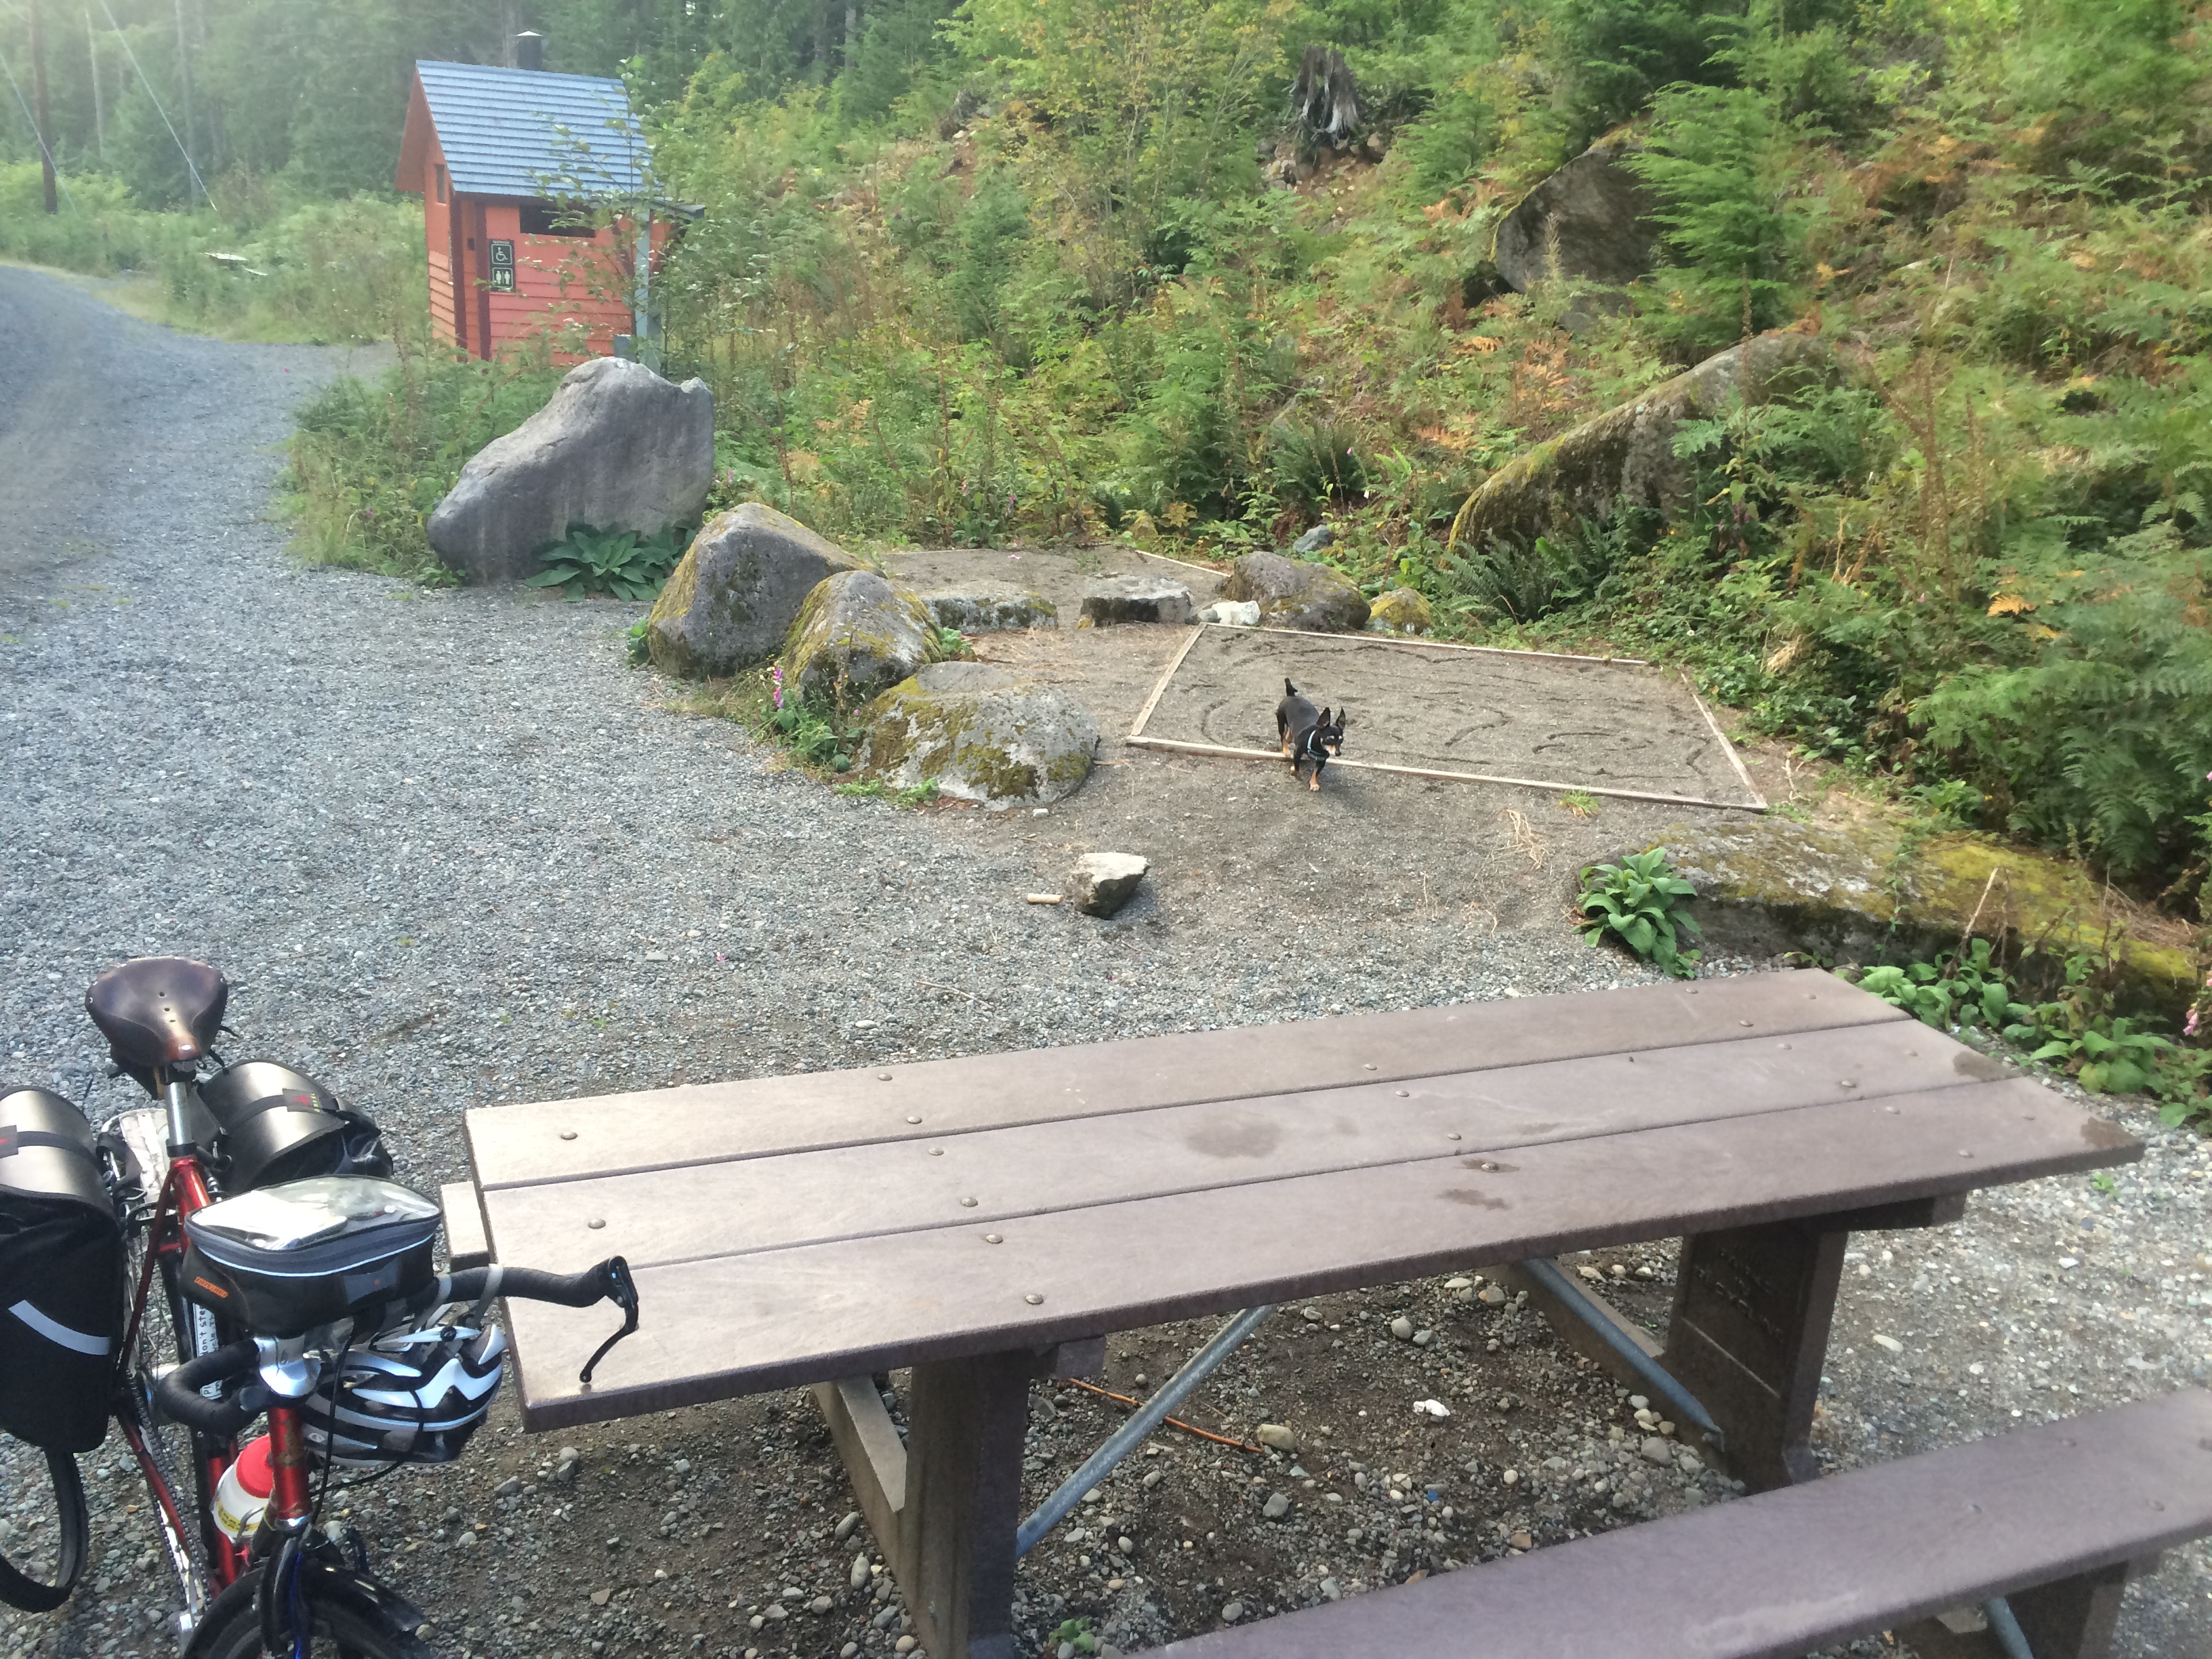
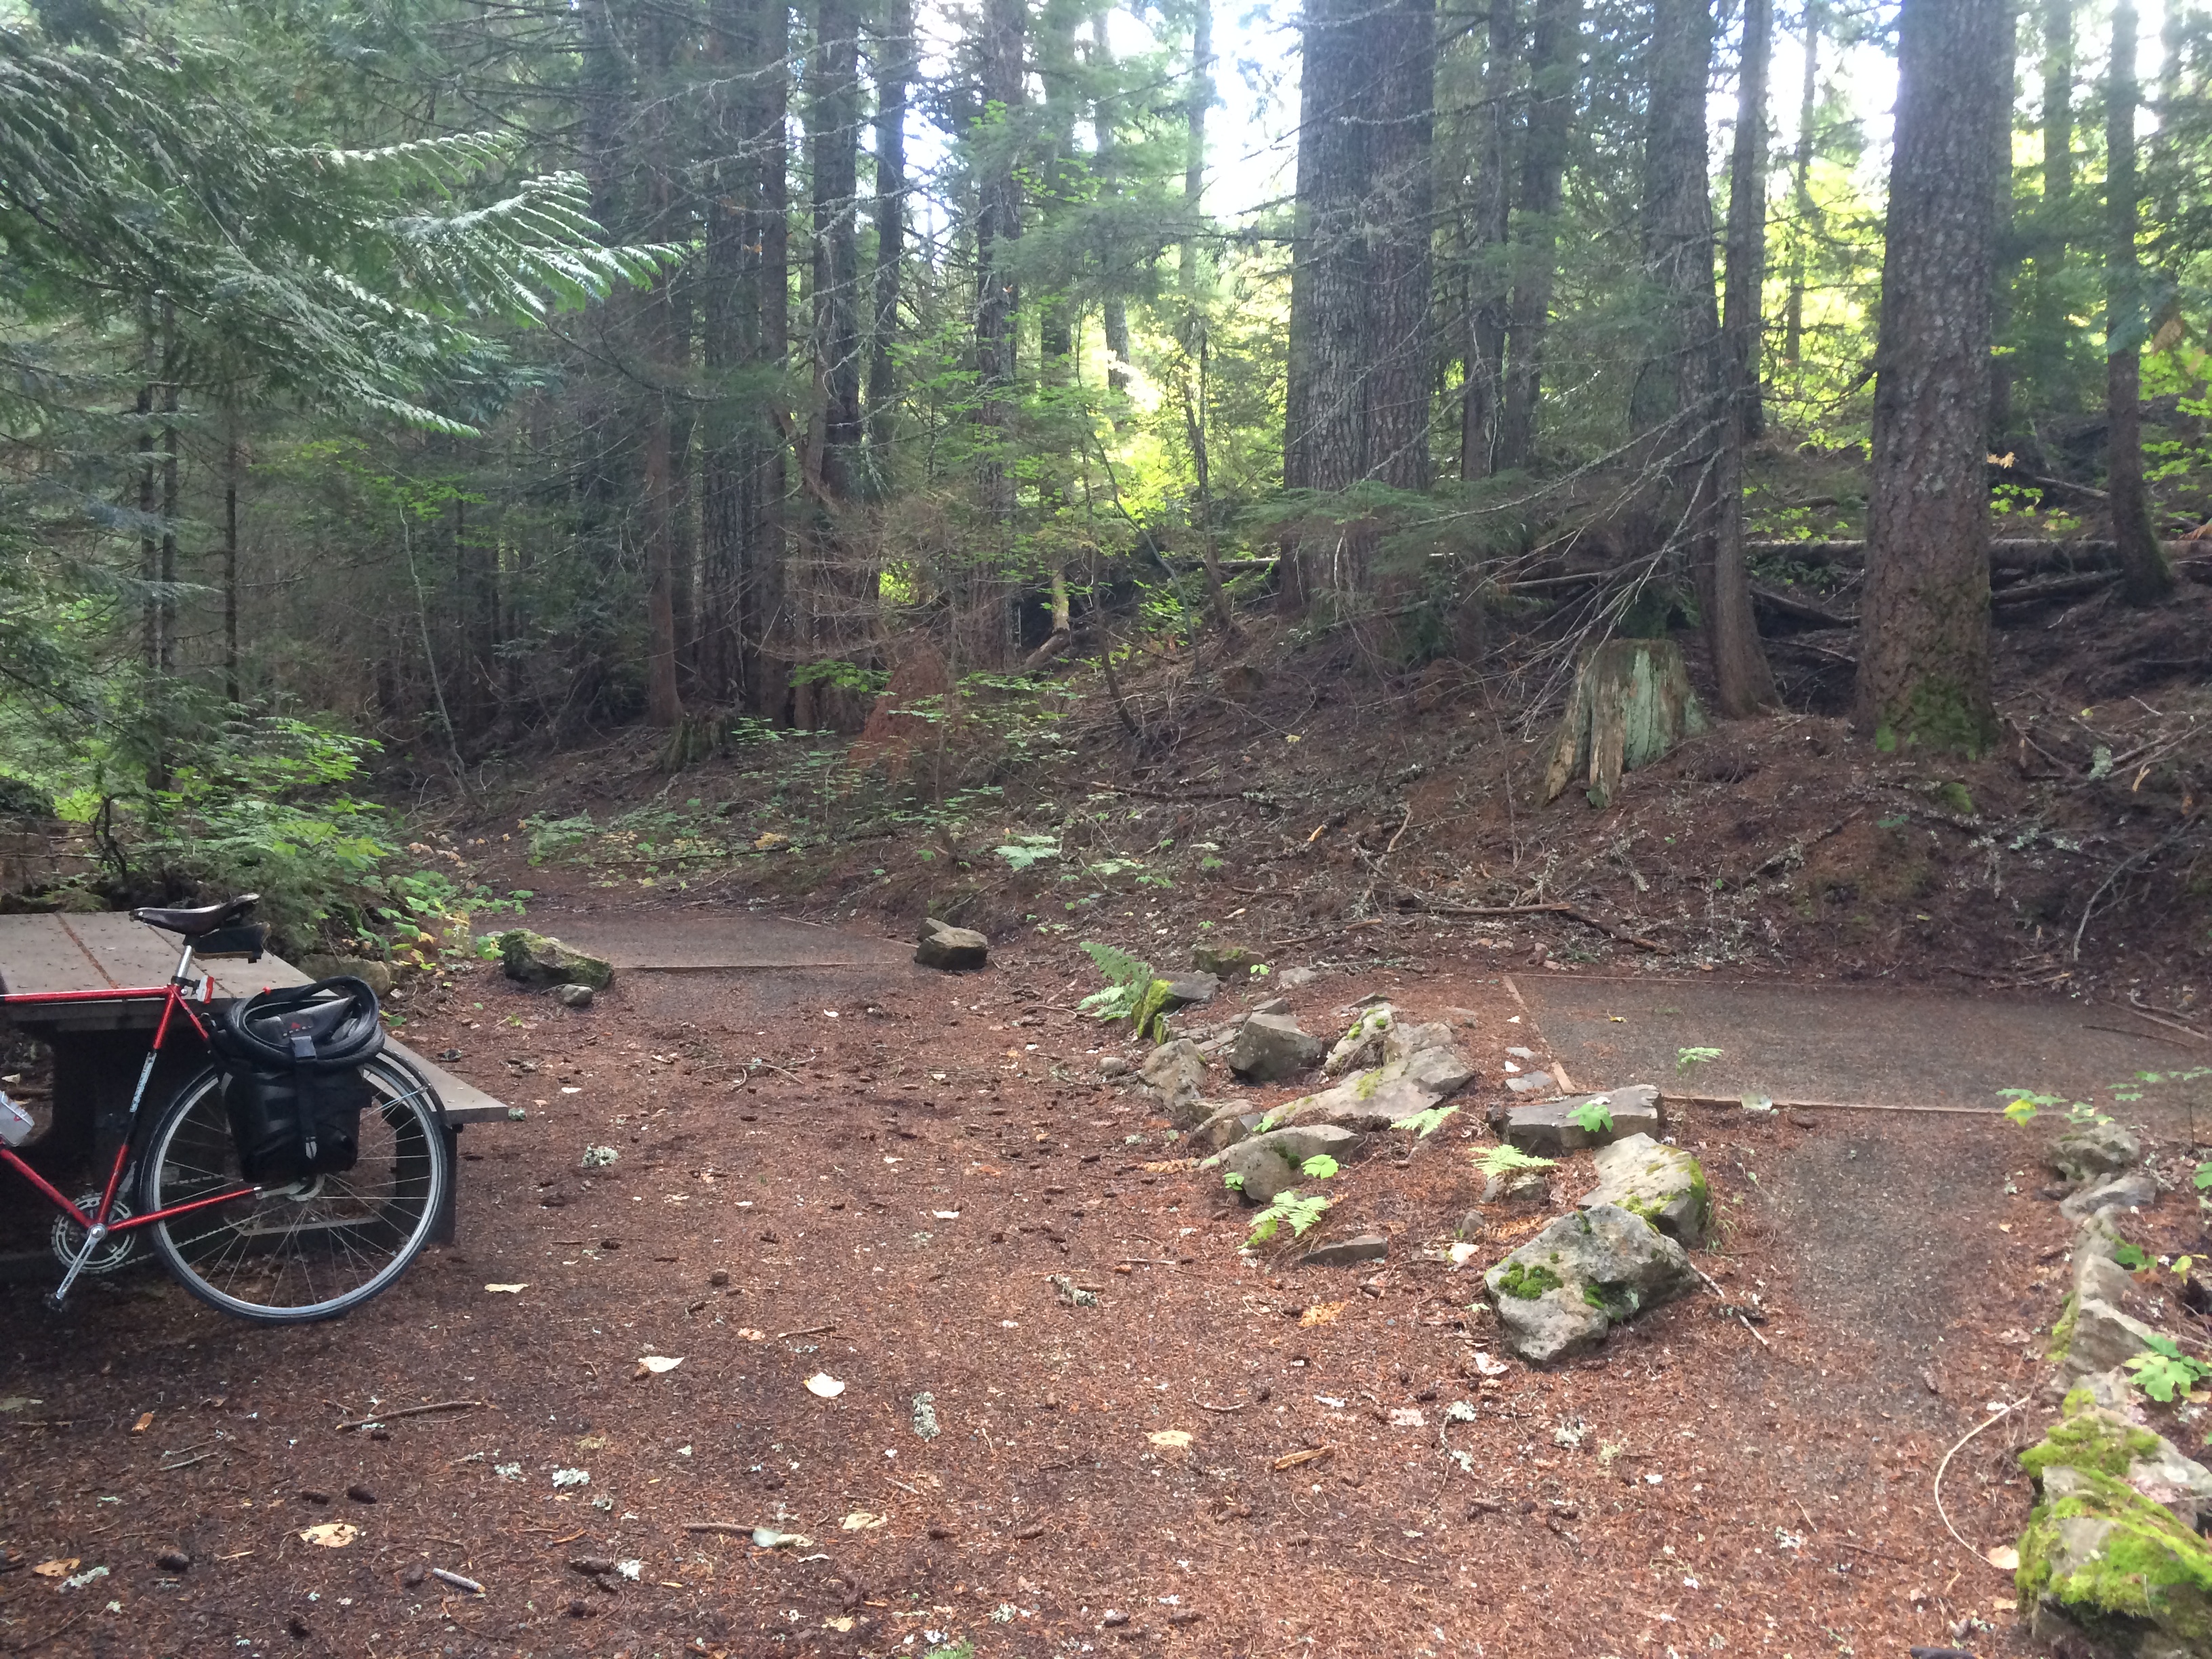
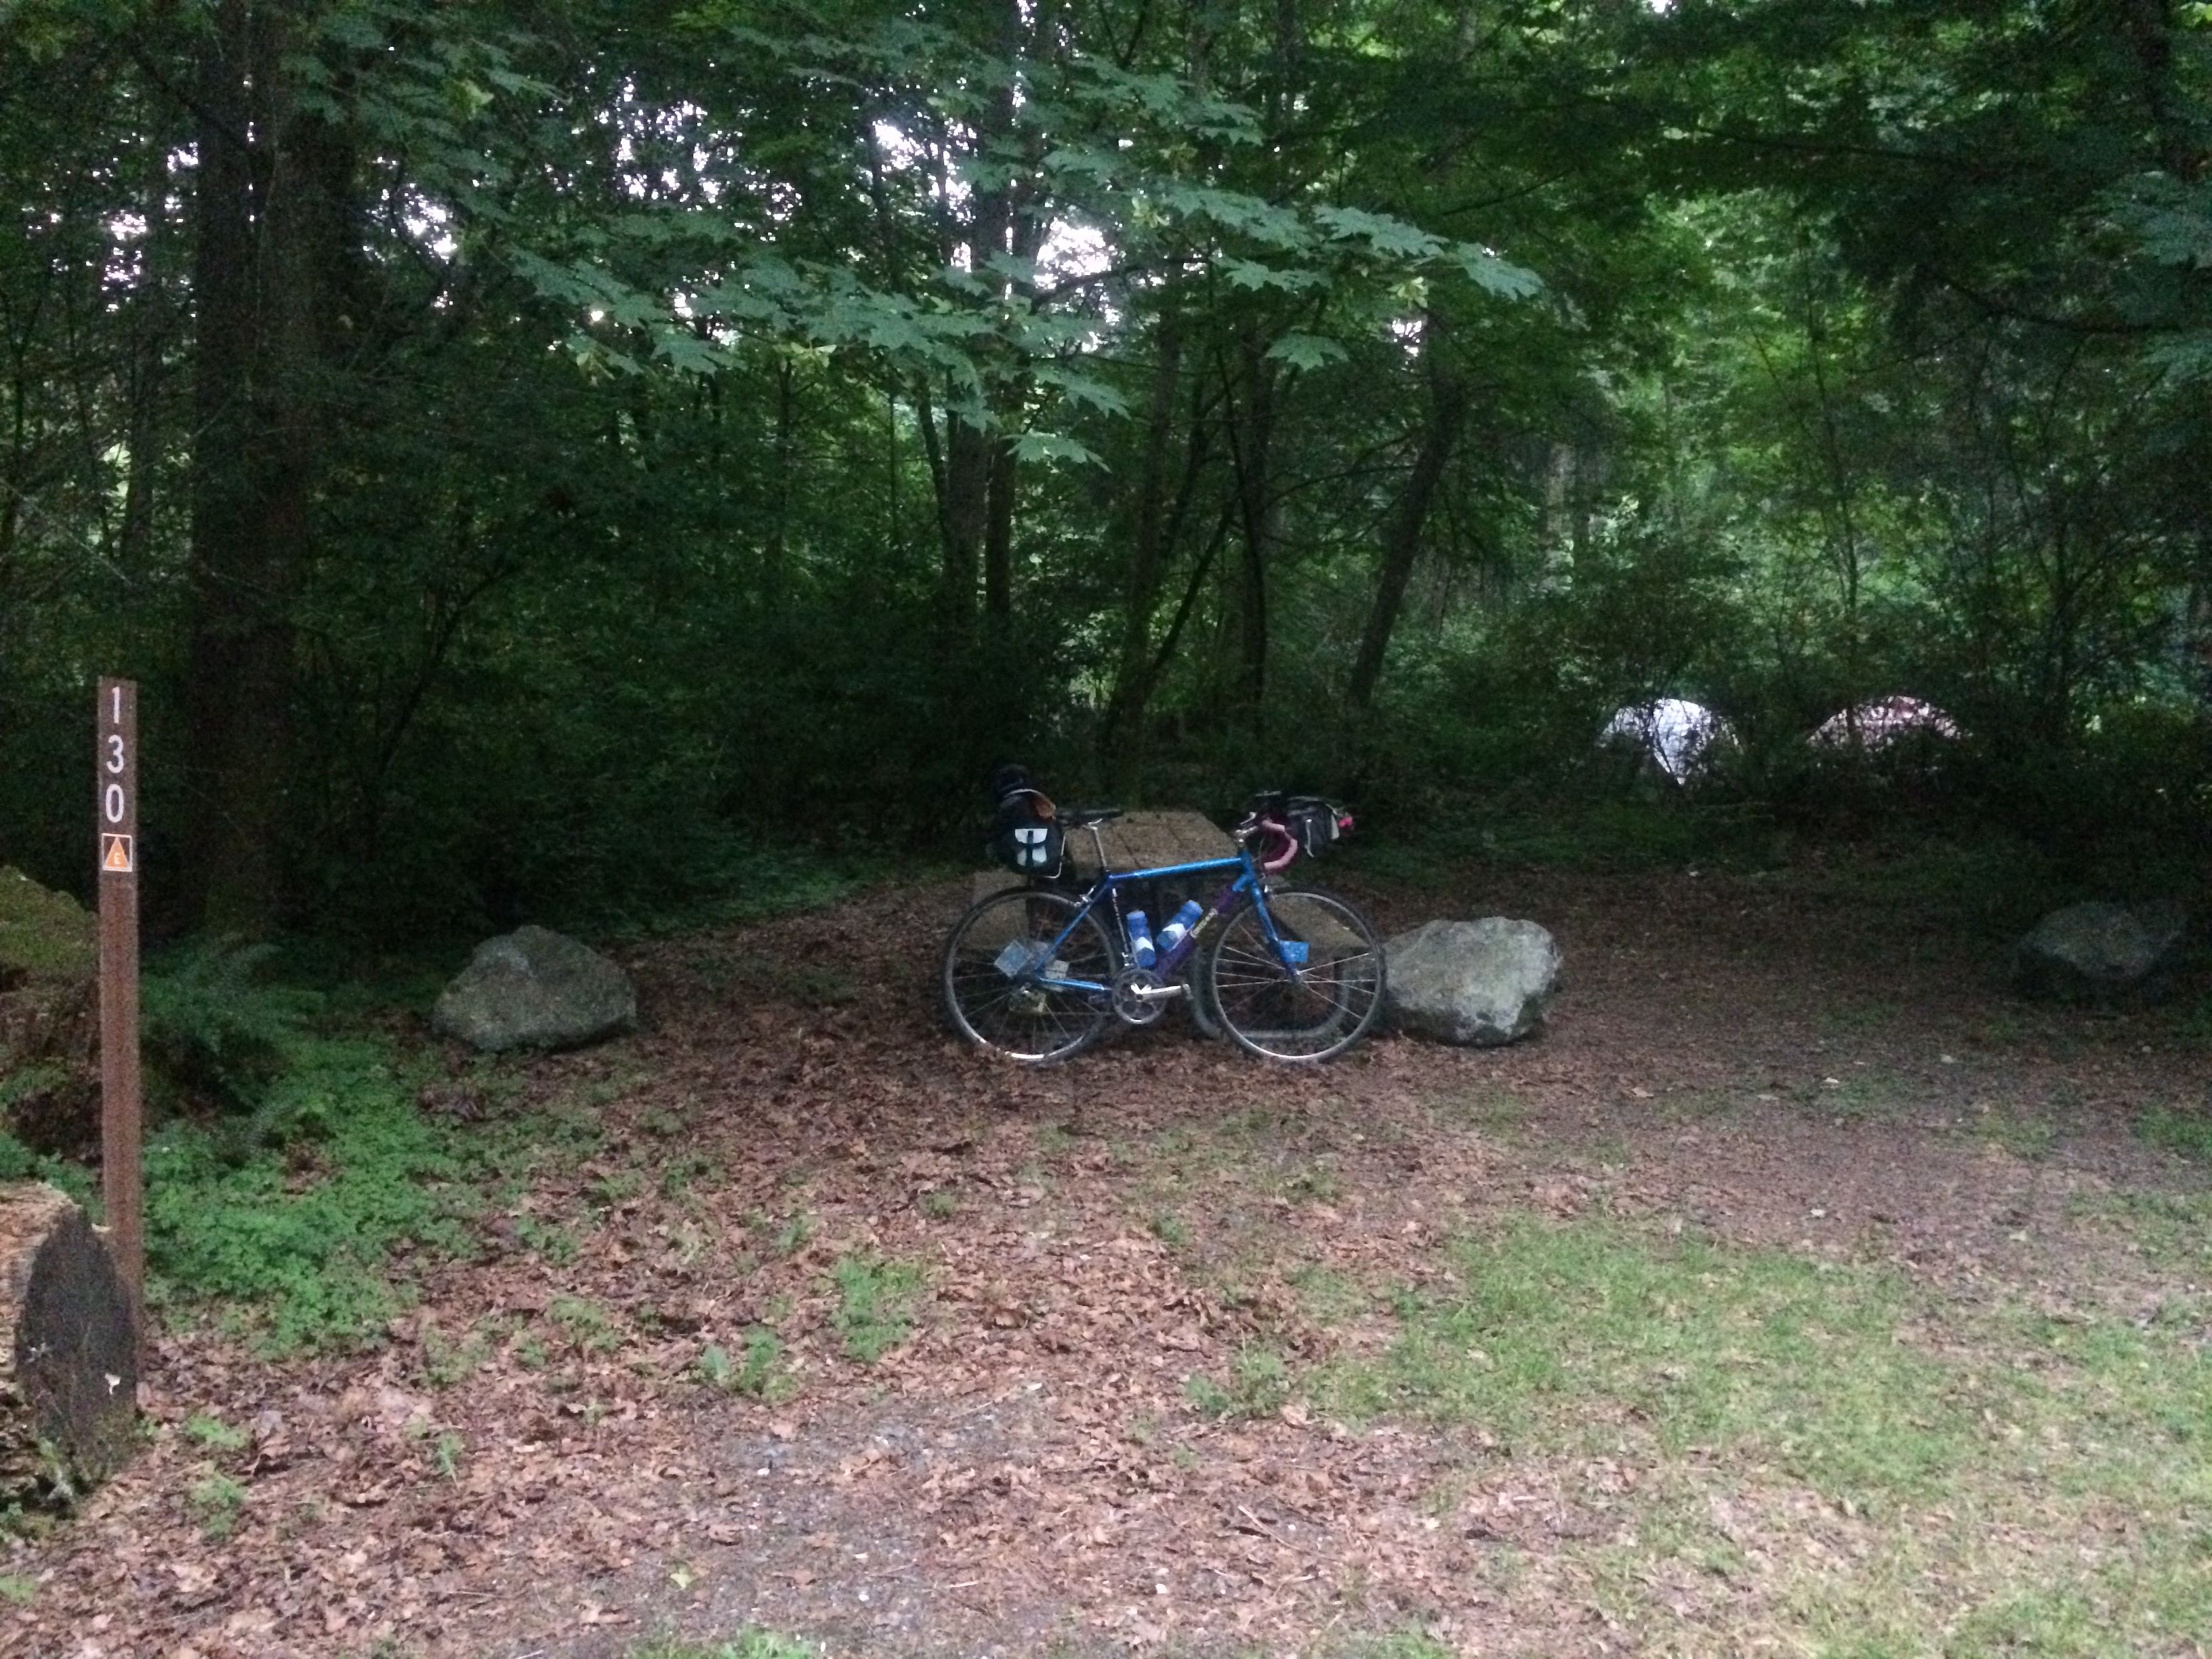
Dash Point State Park doesn’t have hiker/biker (a.k.a. primitive) sites which are $12 and not reservable, plus I felt safer paying ahead of time so I secured a $25 economy site that looked safely in the middle of everything. Some of the economy sites have space for two tents and the regular sites are only $5 more. I biked through the whole campground as I looked for my site and loved the look of the place! Large bathrooms with showers and sinks for washing dishes on the outside, a cute campfire area, and cute cabins. The sign near the other (real) entrance to the park said camping was full, and I saw tons of families with little kids, groups of happy teenagers, and even a French camper van.

Here’s some more about the park on Outdoor Project and TripAdvisor.

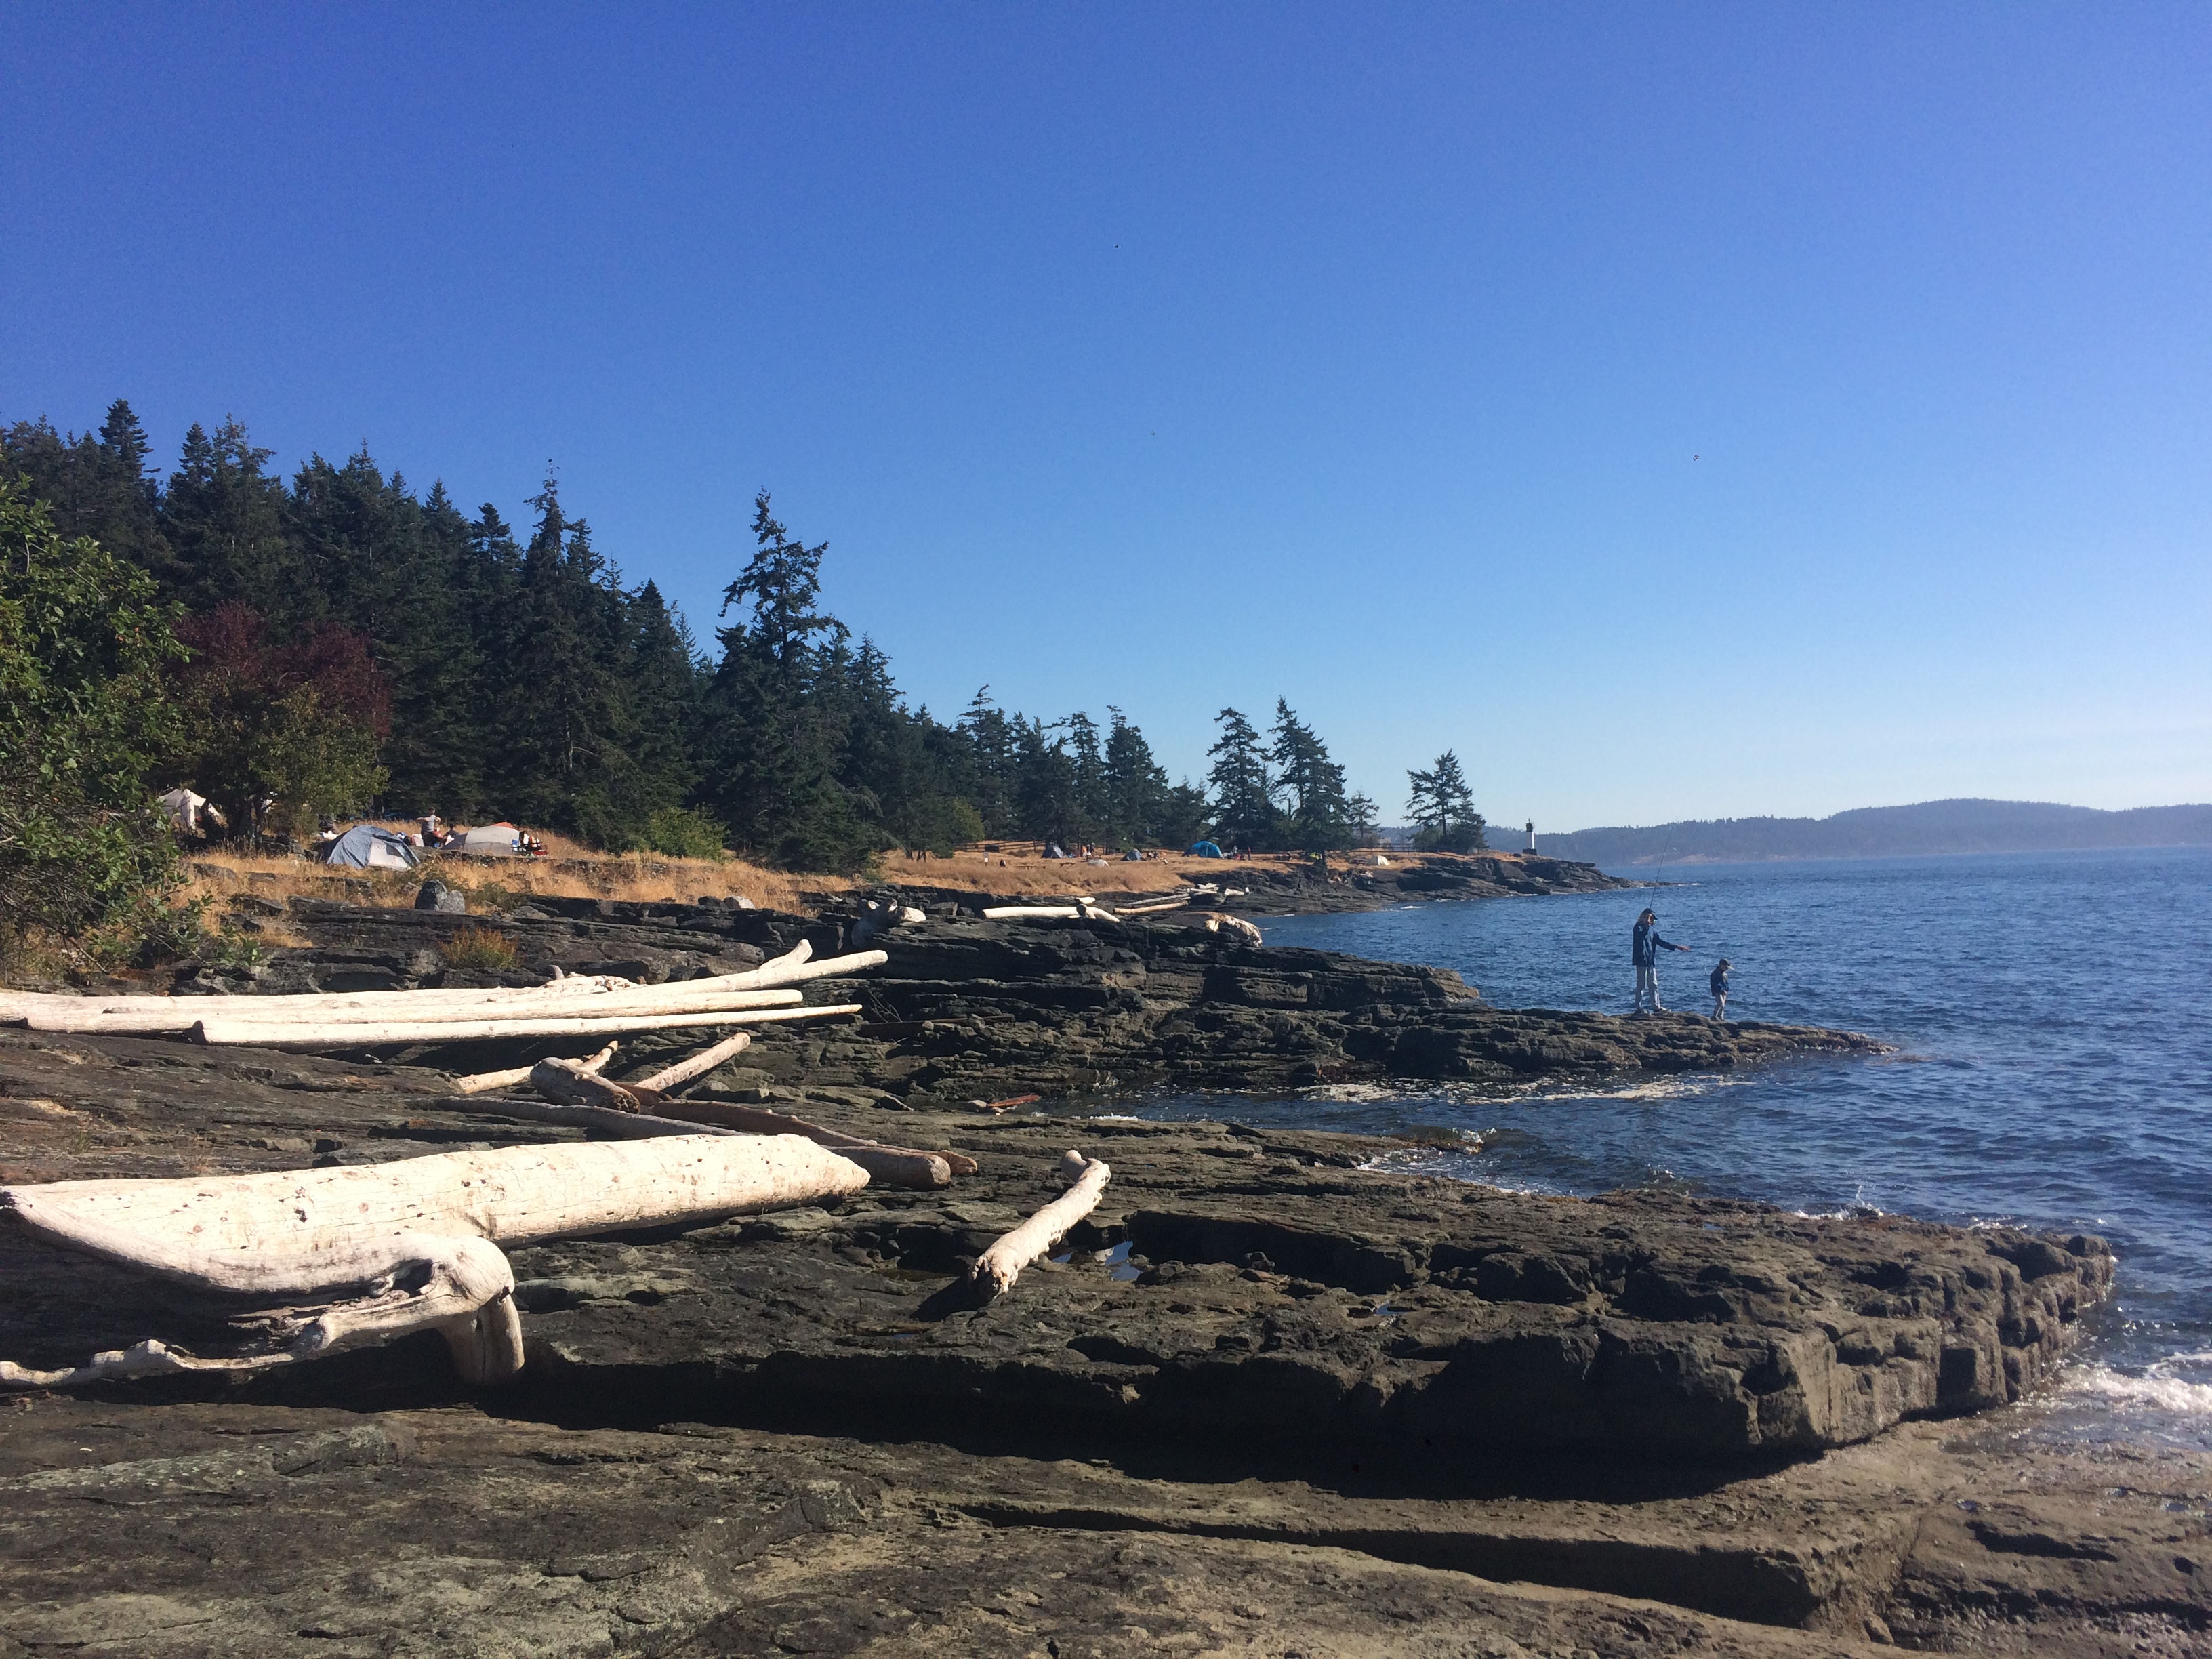
I didn’t visit the beach, but I know it’s great and well worth biking down and then back up the hill. Not that I’ve biked to it before, mind you, but when the kids were 2 years old and 3 weeks old and I had a car, I drove there for a day visit with friends.

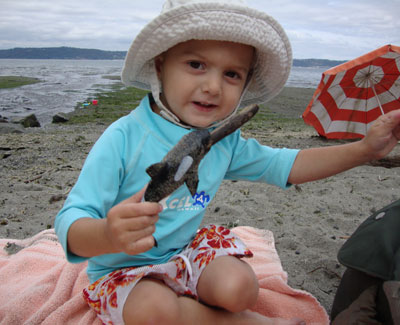
Dash Point State Park beach nine years ago

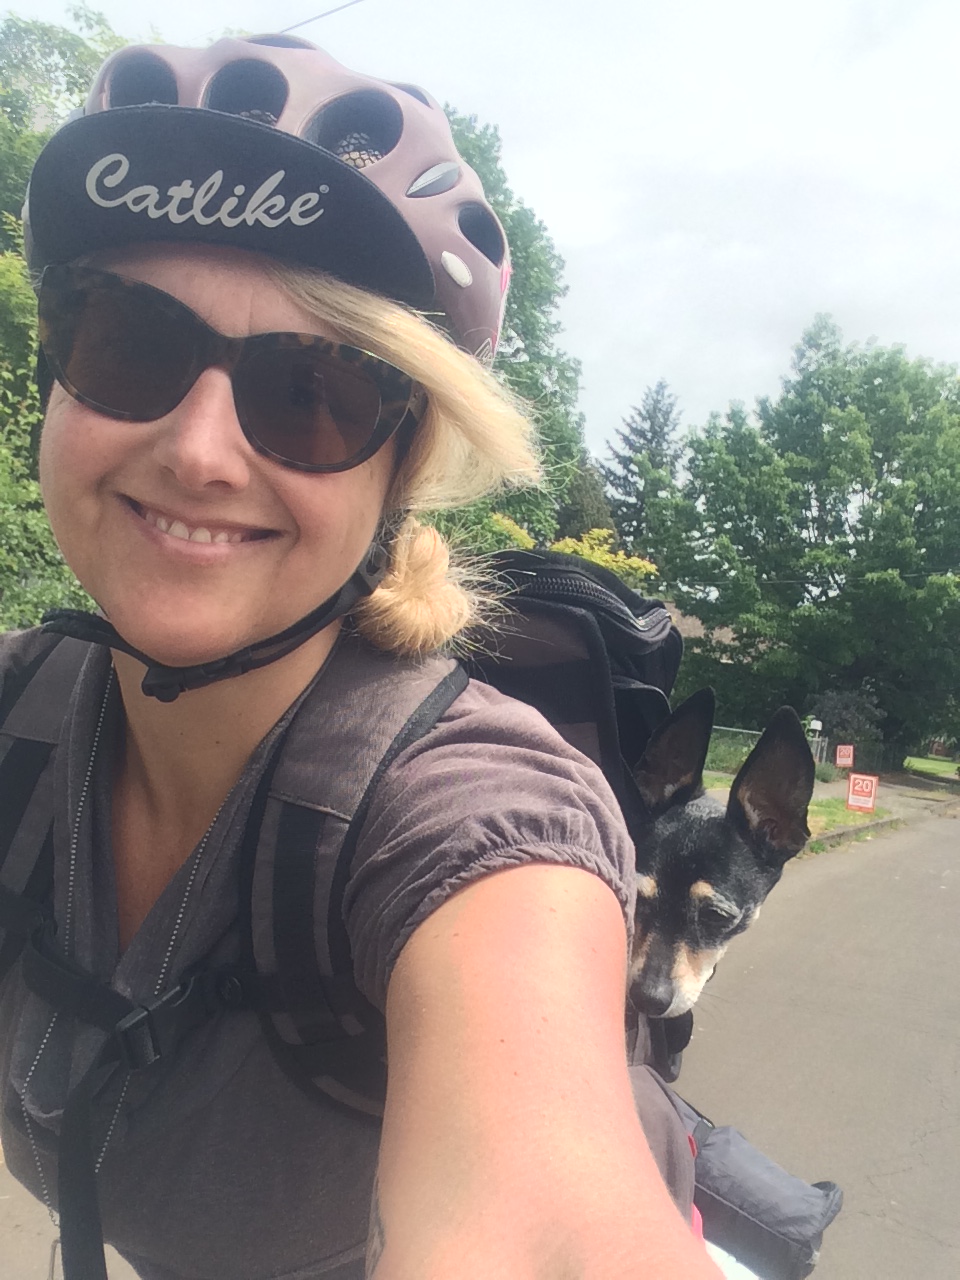
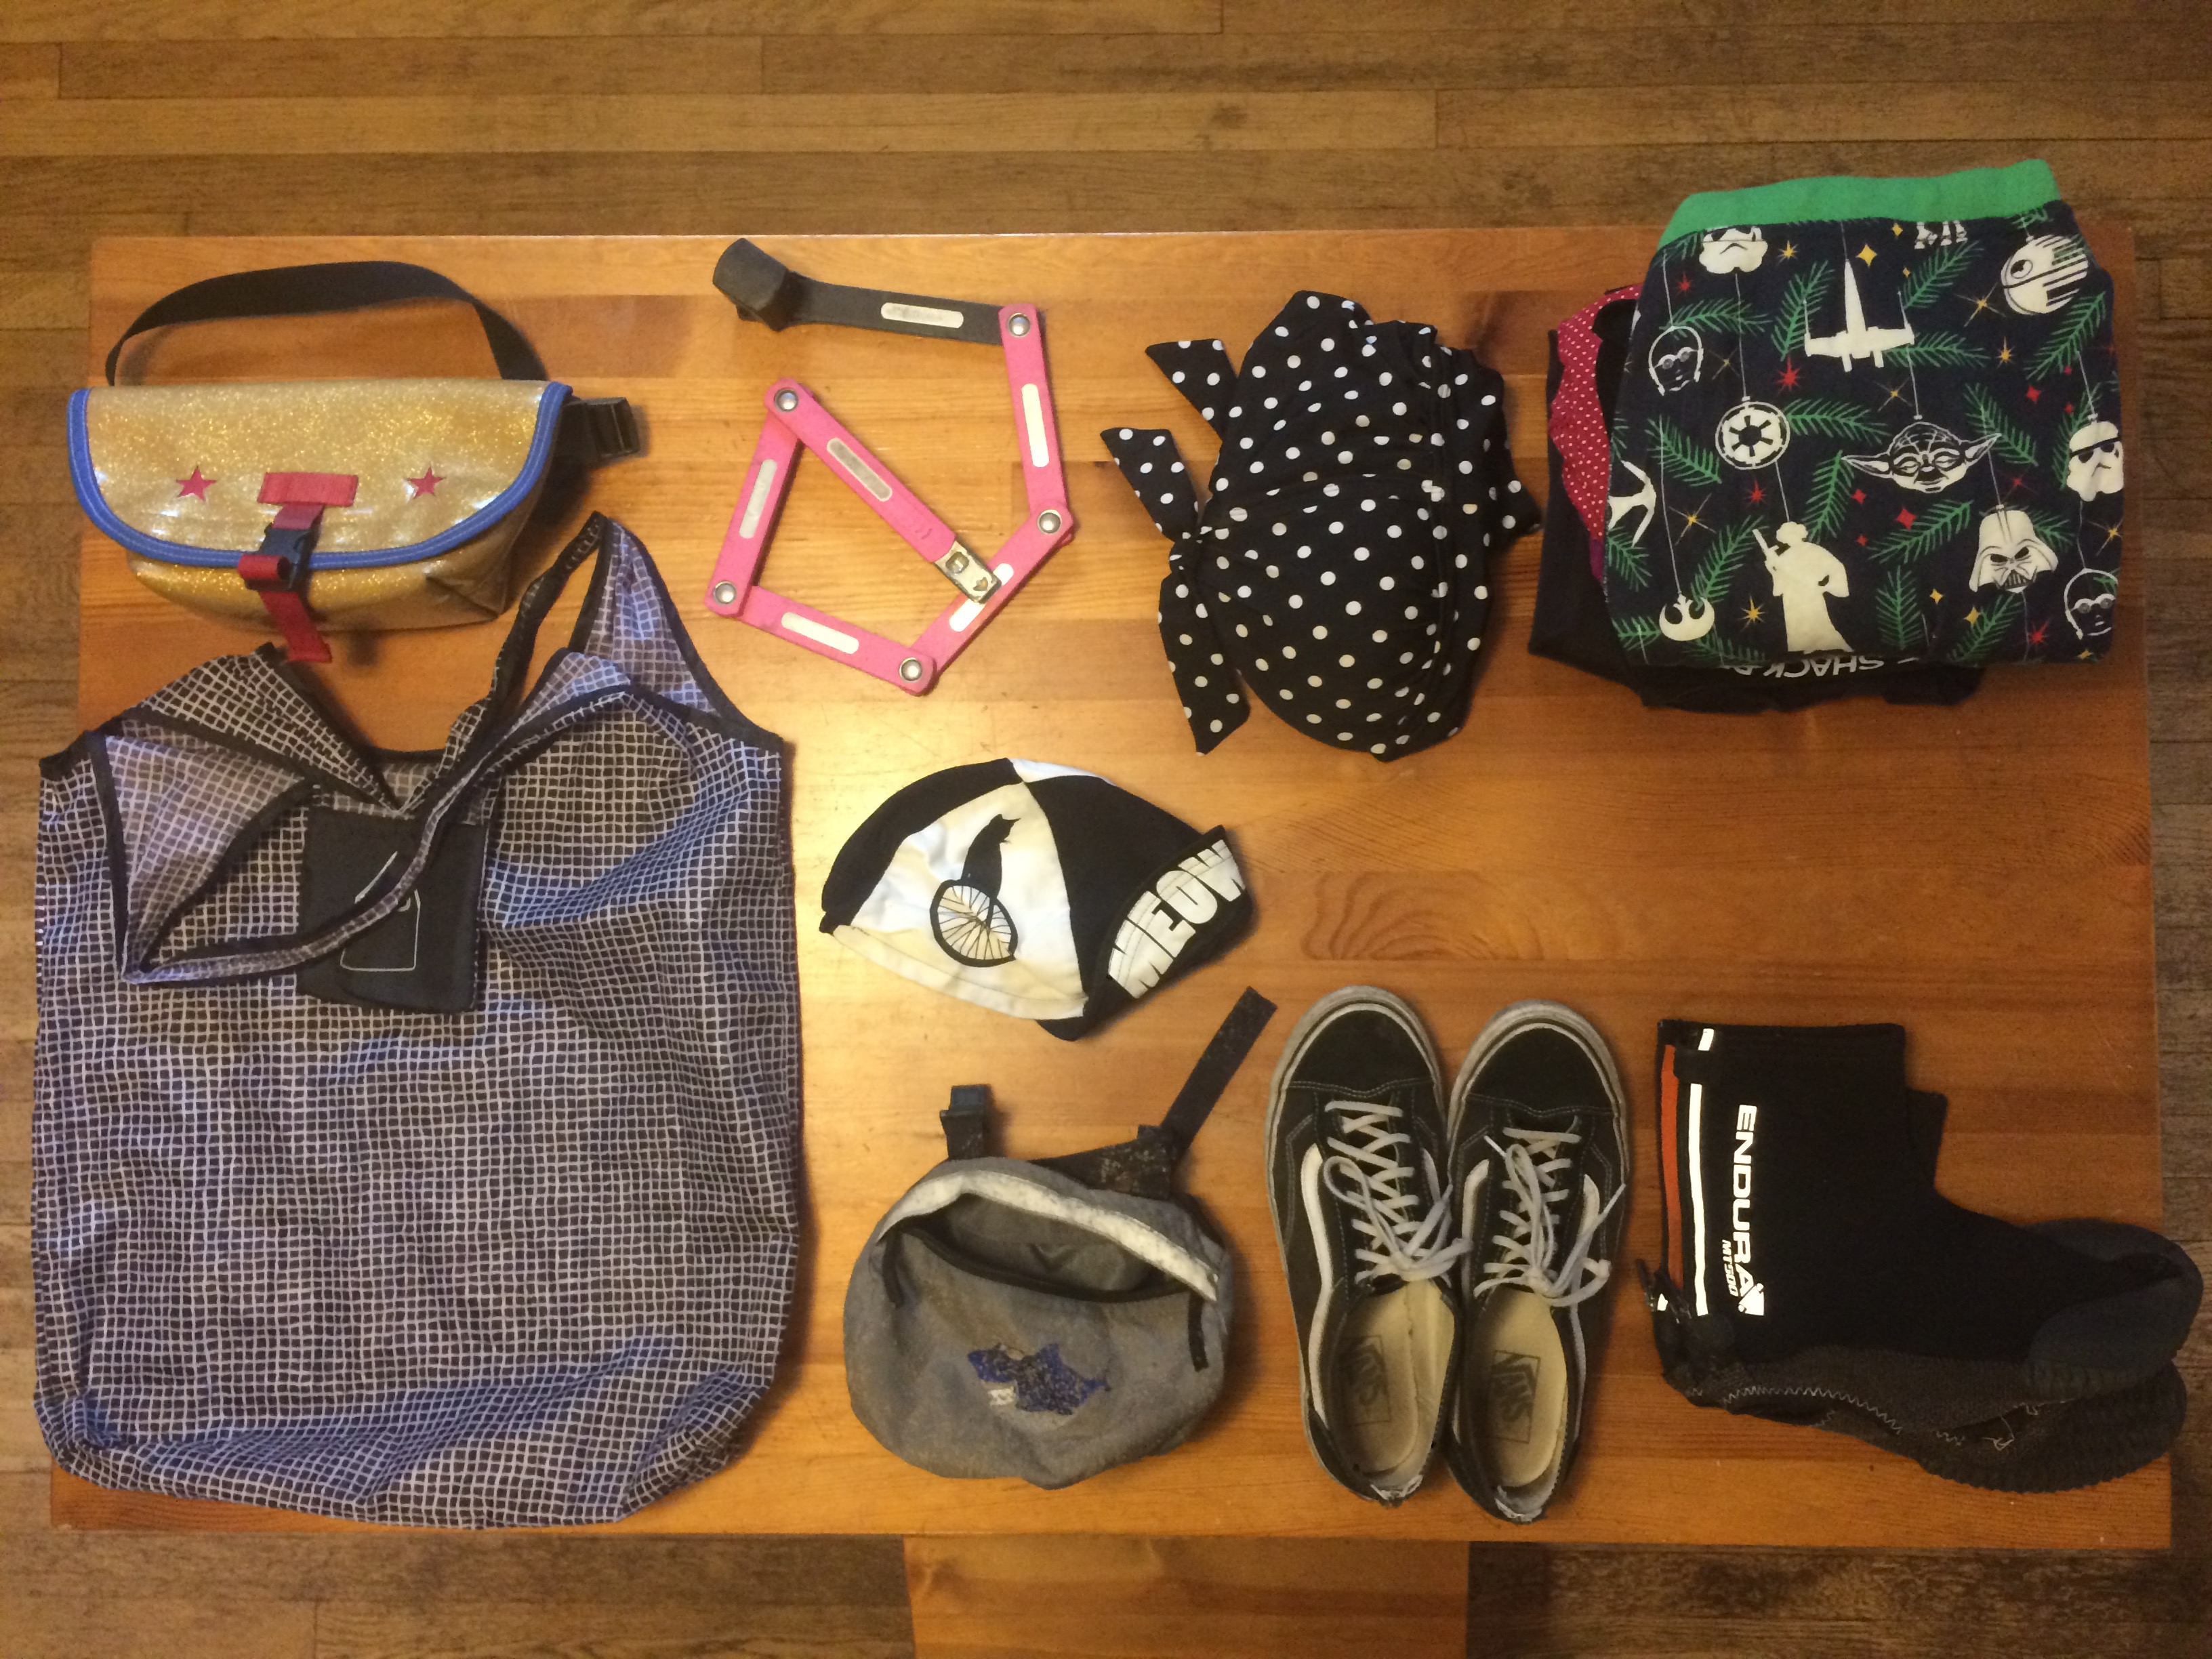
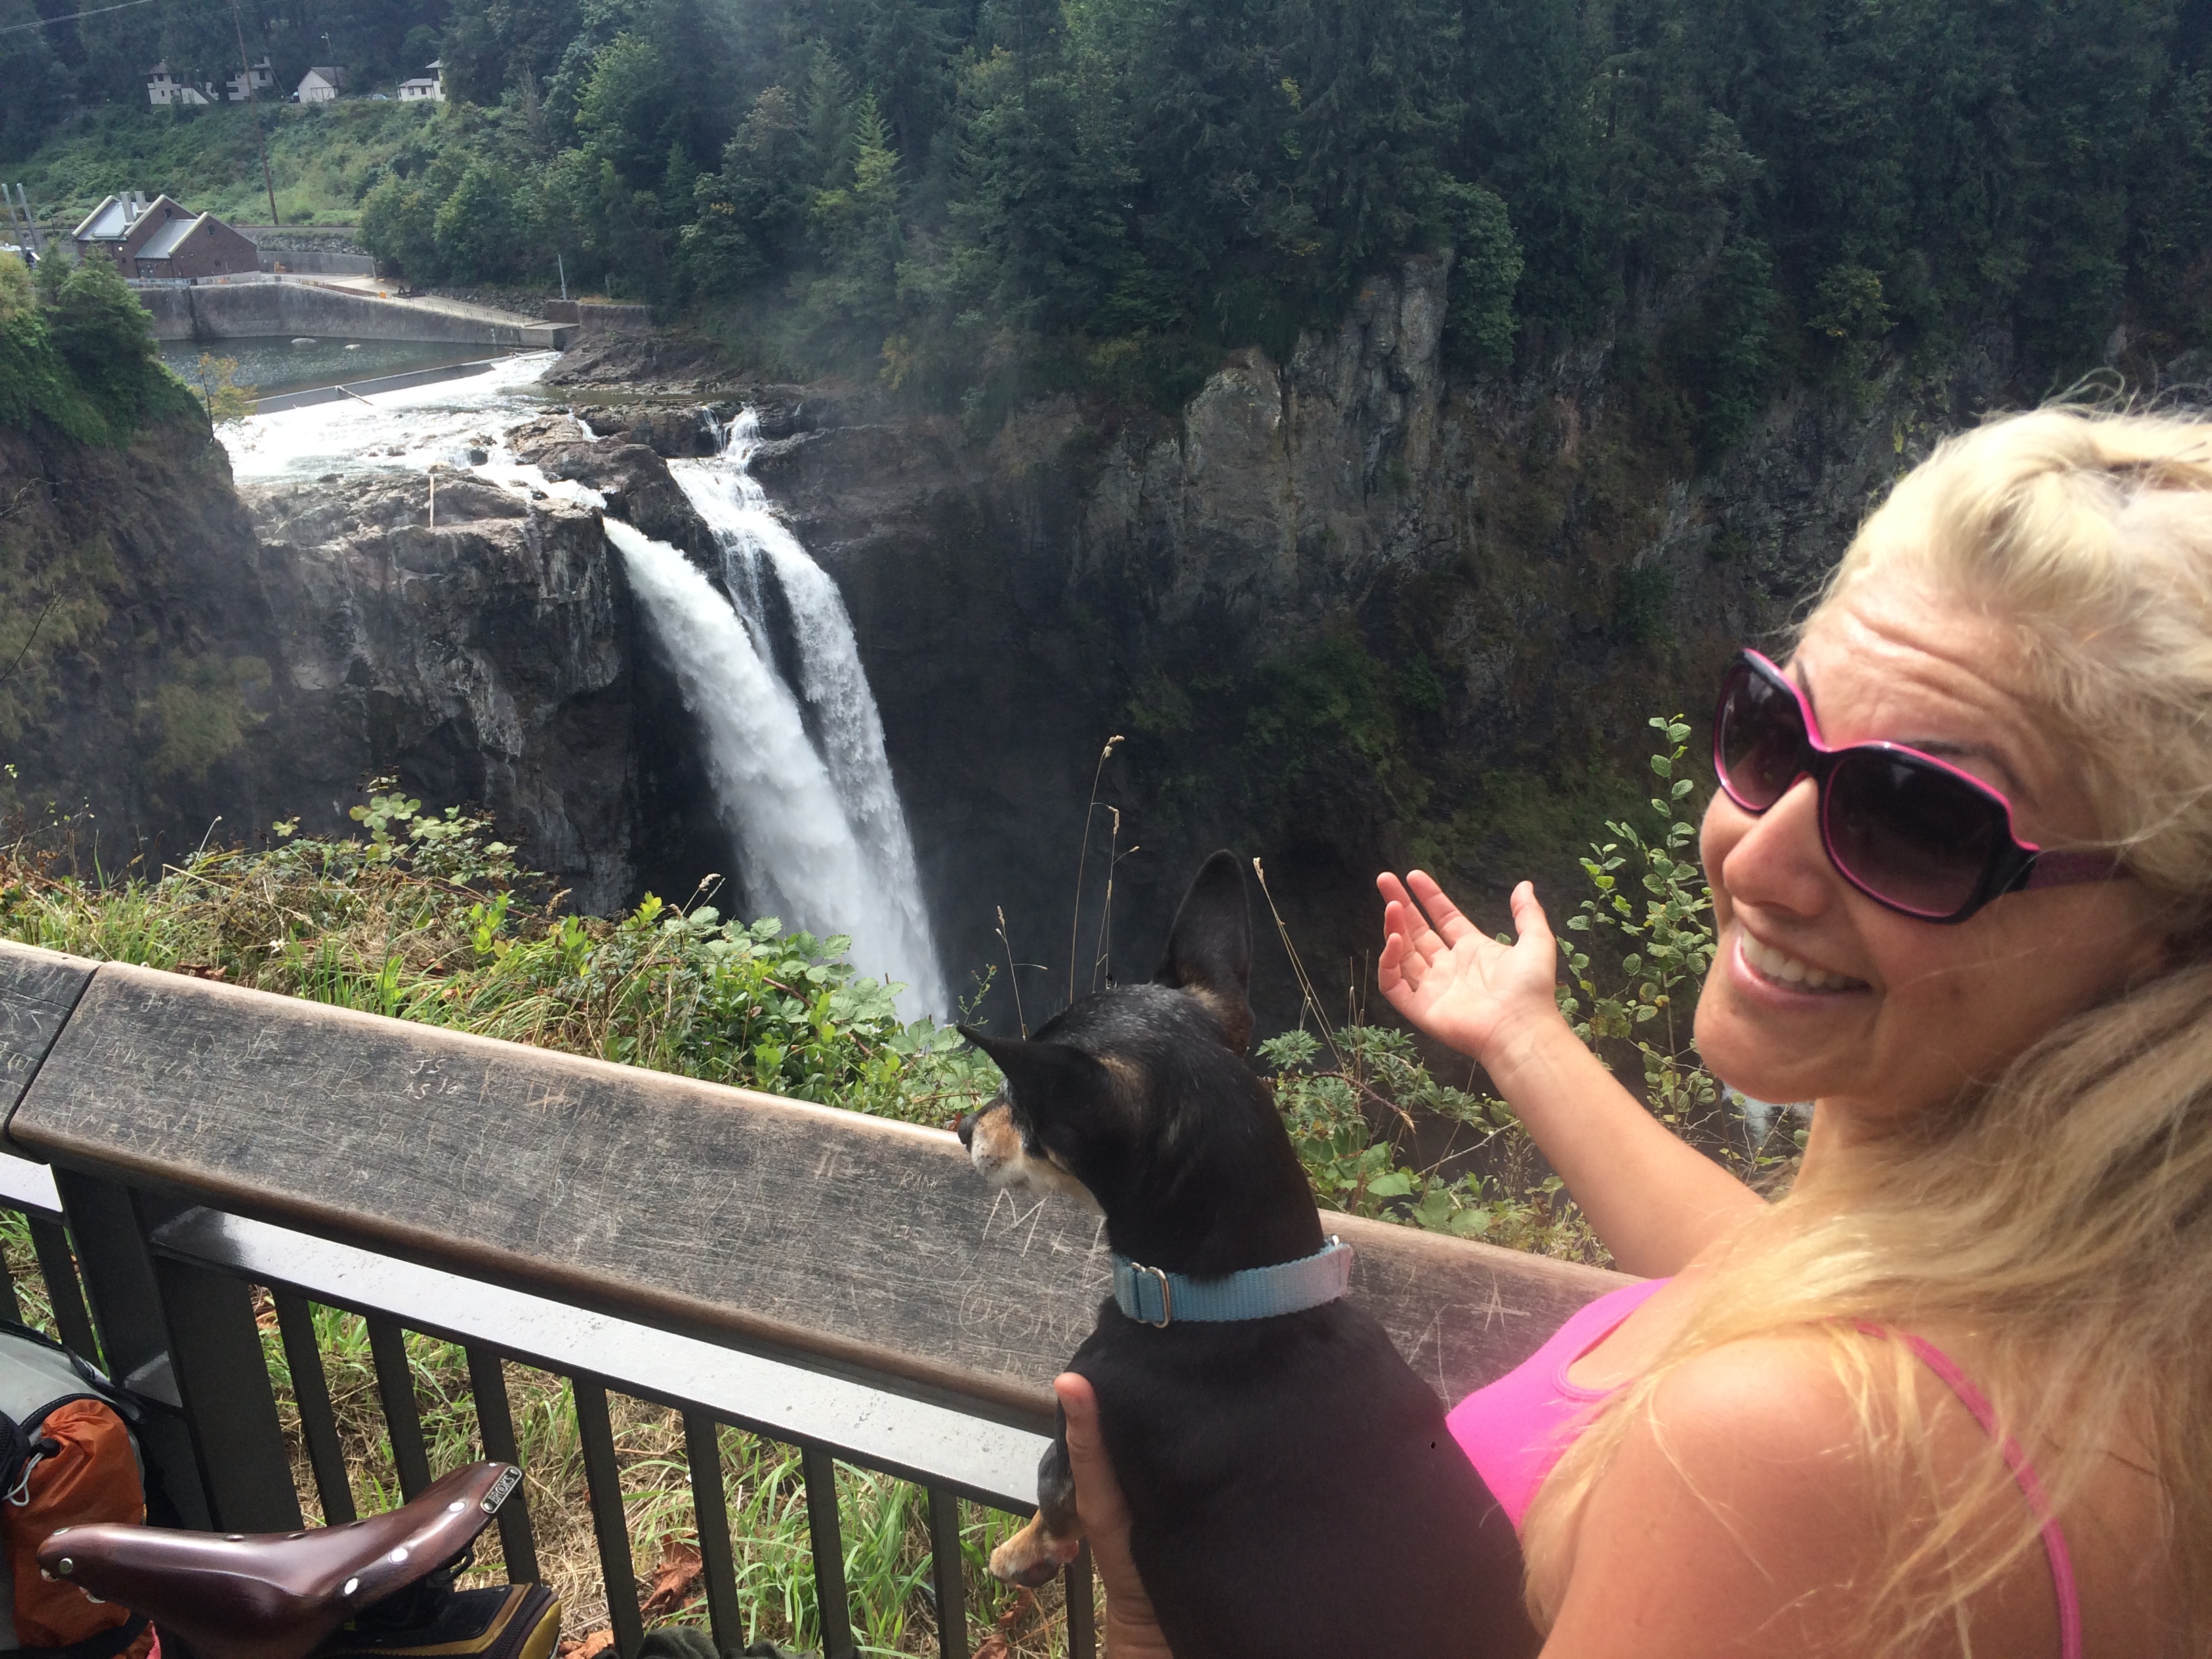
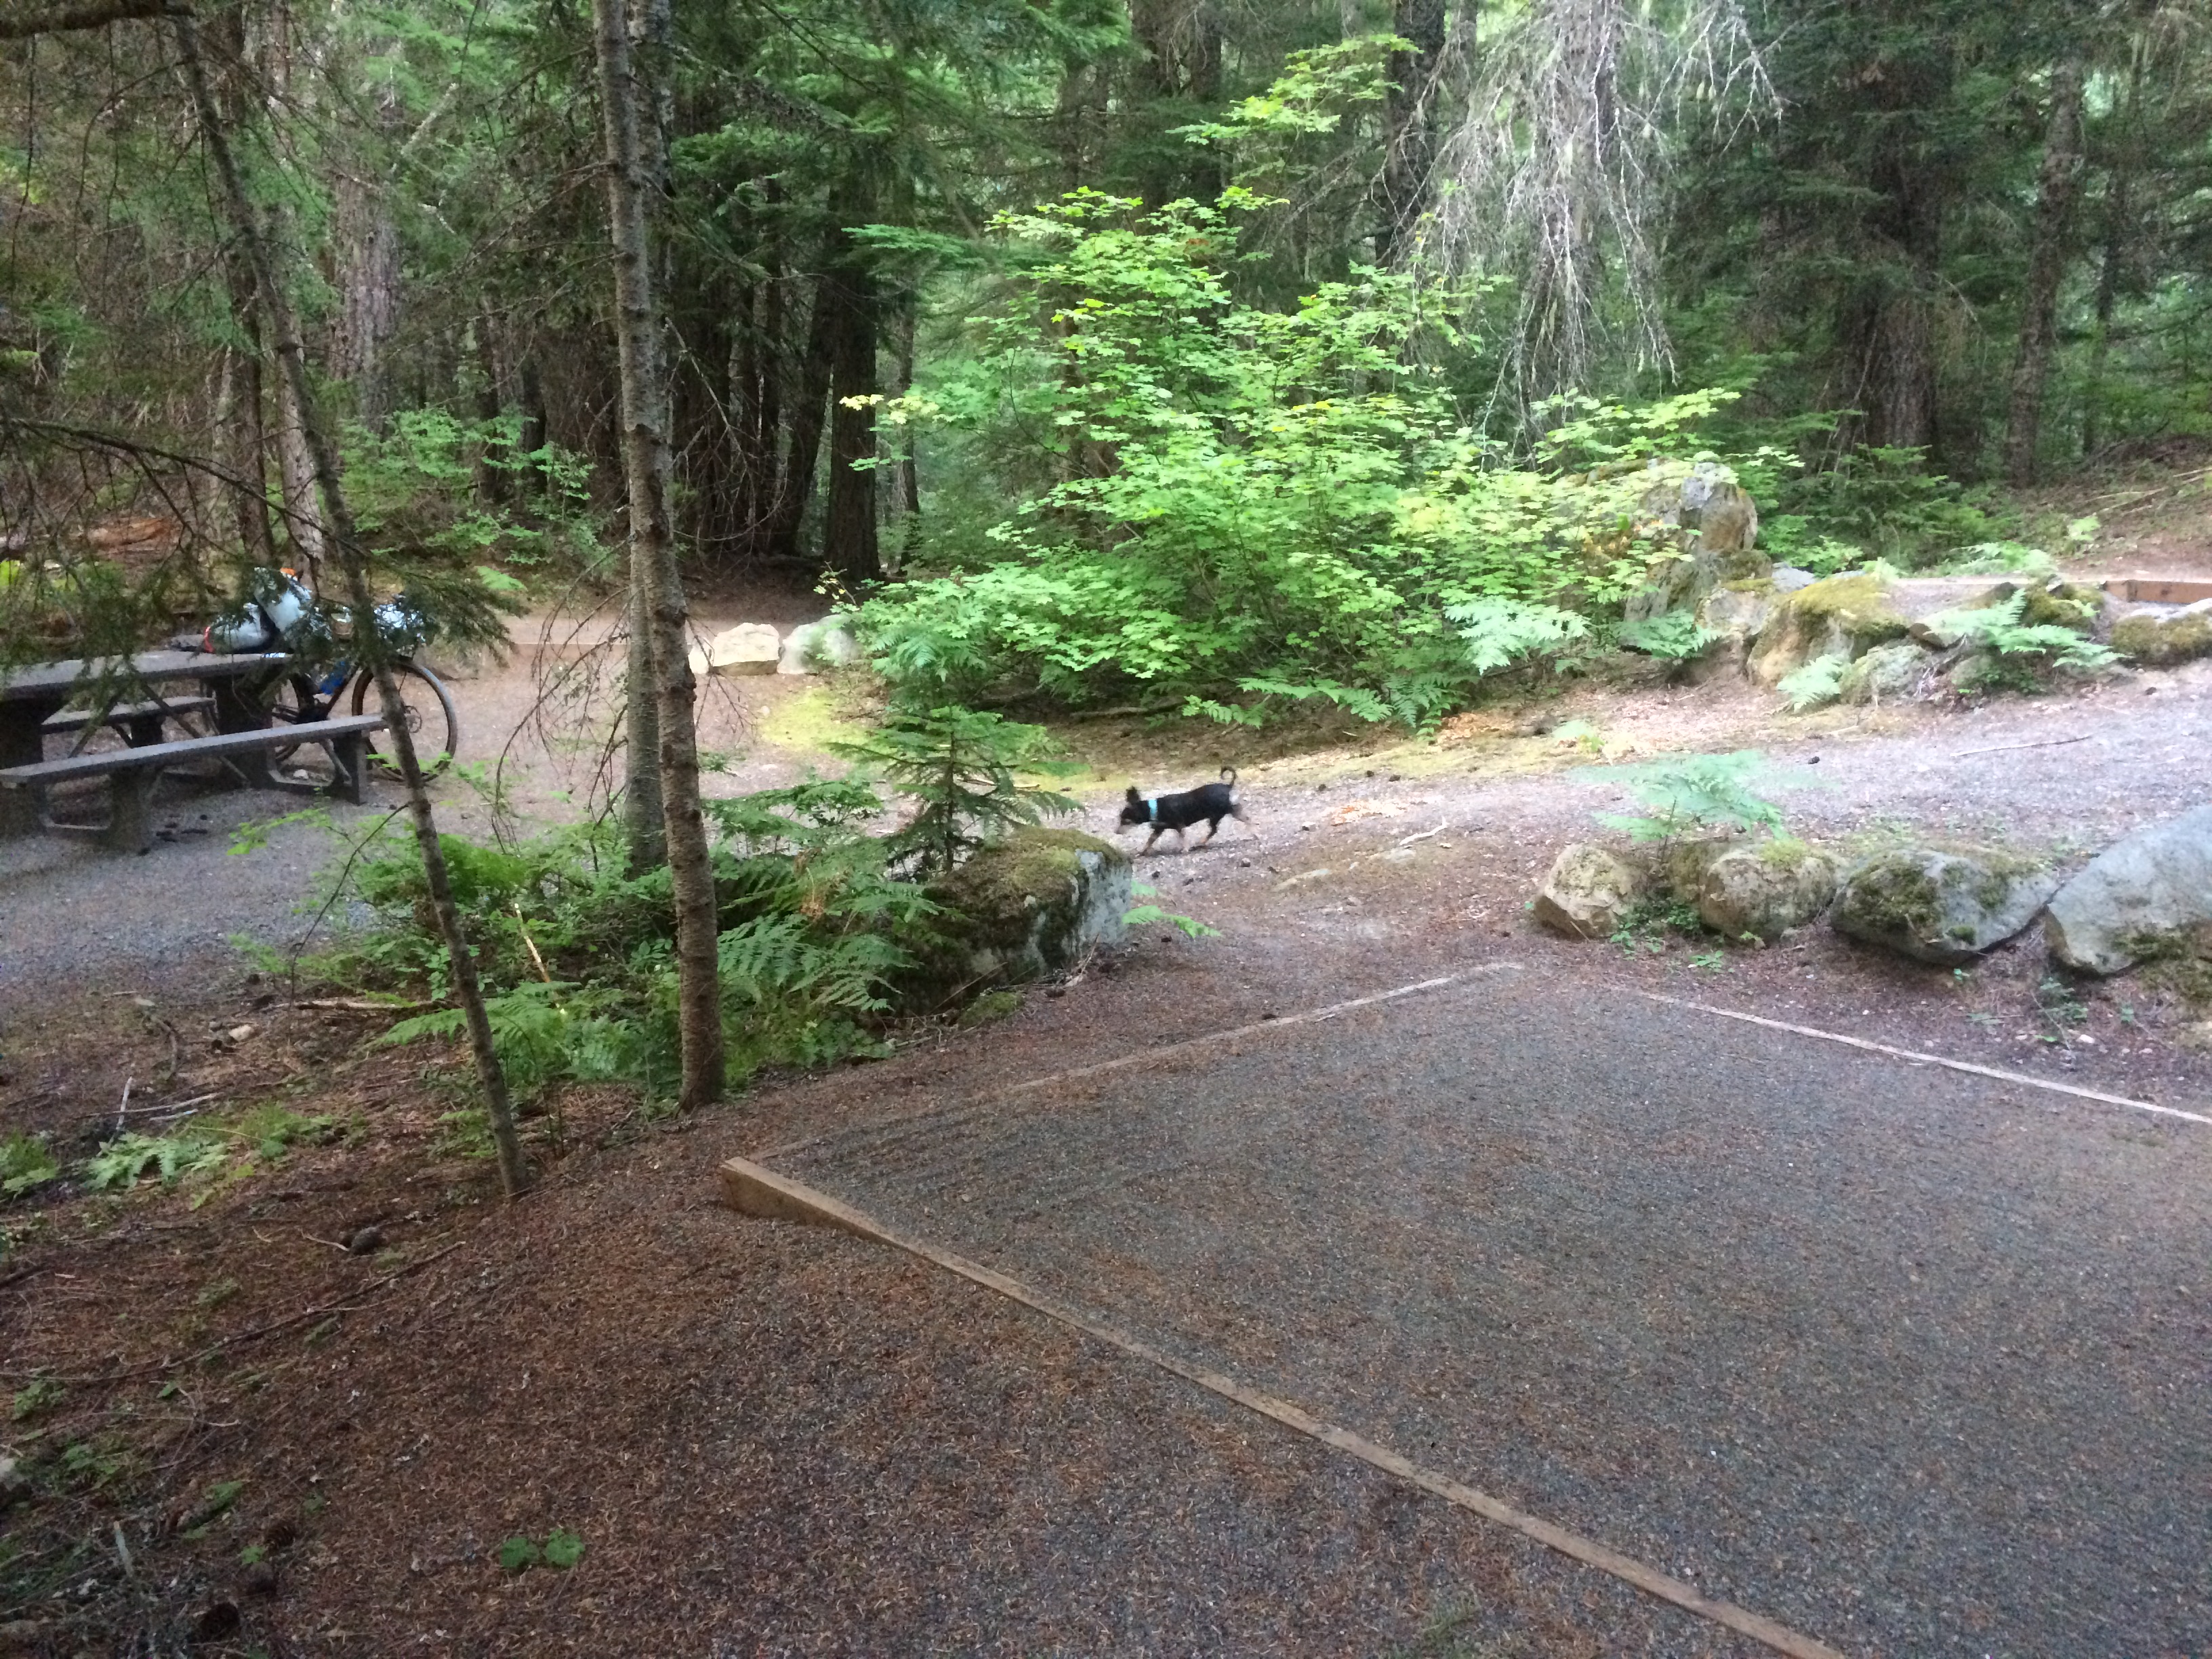
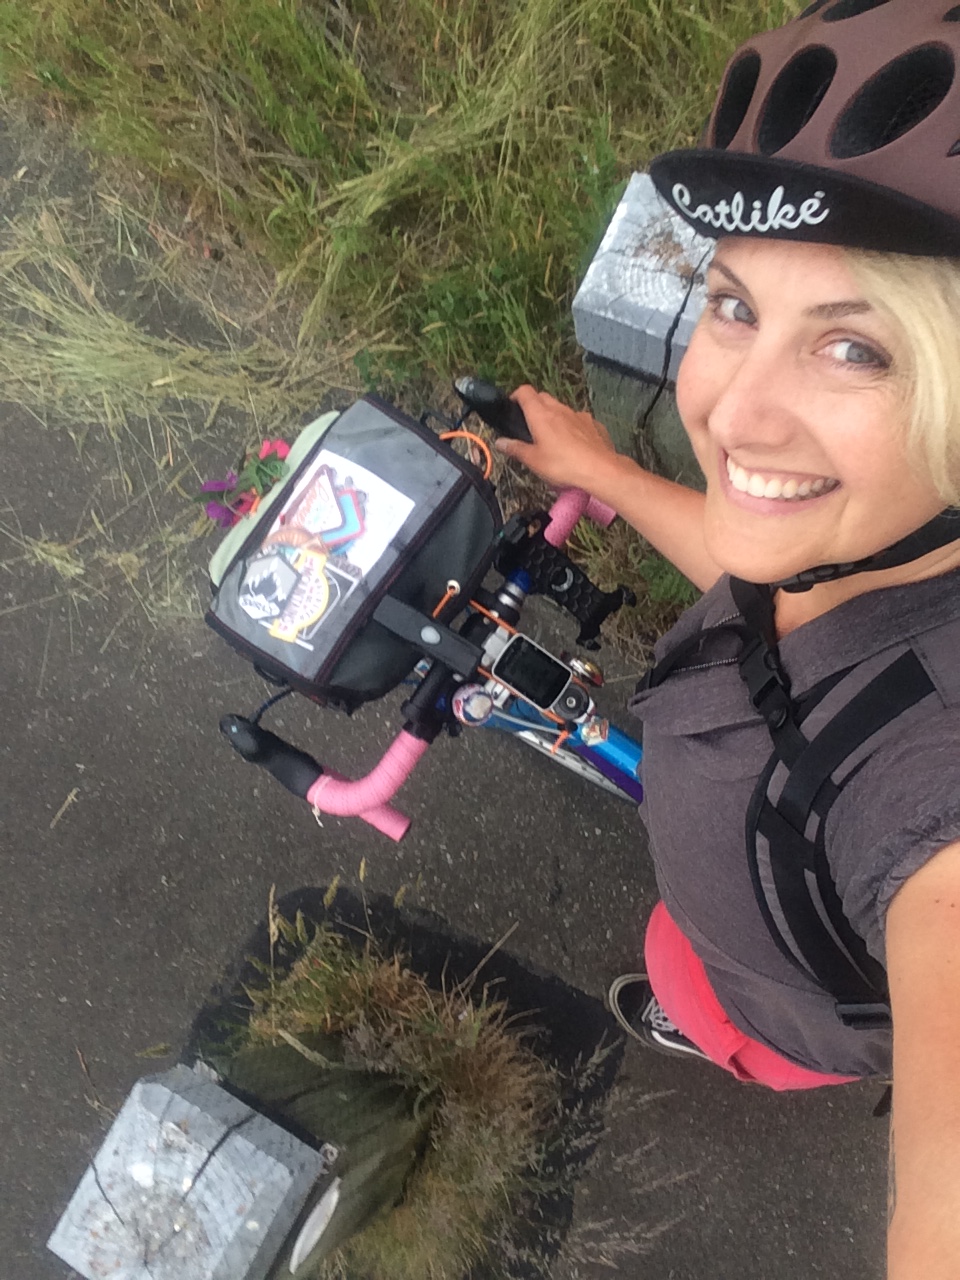
Did I mention Pixie came, too? She was in my backpack the whole time.

Bike camping Vancouver Island/Salt Spring Island

I’ve been to Salt Spring Island many times, primarily as a kid in the backseat of my family’s car as we trekked our way north from California. We camped along the way, but once on Salt Spring we always stayed at my aunt and uncle’s house so I’ve never had the pleasure of camping there before now. I have, however, biked there once before: four years ago I borrowed a three-sizes-too-big bike and panniers and left early in the morning for a one-night journey to the island and back. It was quite the whirlwind trip, but very worth it to visit with my aunt and uncle before their health failed. The visits (by car) bringing kids of my own were rewarding, too, of course, but it was nice to have a very focused visit this one time.

I started a blog post about that trip, but never finished it. I don’t think I discovered anything that I won’t write about for this new trip other than: consider not doing a big trip on a bike three sizes too big because it might really hurt your back. And wash your old water bottle out well because you can food poison yourself–which is really not fun on top of an aching back. Here’s a photo from that trip. I also learned brown bikes with brown panniers don’t photograph well in woodsy settings.

Salt Spring Island, British Columbia, Canada. June, 2013.

And back to the present-day trip. Photos are here:
Flickr album: Vancouver Island, Salt Spring Island – 7/28-7/30/2017 – 218 photos · 1 video

My friend Velotron joined me and it was awesome to have company this time. It was also awesome to do it on an appropriately-sized bike and with clean water bottles. Unfortunately, Velotron’s commuter bike was out of service so he was on his too-small bike he uses for hauling his cargo trailer. And I think his back was bugging him on account of that. By the way, Velotron is my friend from Bike camping in Iron Horse State Park, take two last year. I had been pretty bummed out we weren’t going to get a chance to do a repeat John Wayne Pioneer Trail trip, but with my broken foot still on the mend, I haven’t been much for planning big trips. I’d certainly call this trip big, but I didn’t need to do planning in the sense of deciding on a destination or date. My aunt died last November and my uncle the year before. This was the weekend of her birthday so on the Friday friends and relatives scattered their ashes at sea (unfortunately I couldn’t make it all the way to the island in time for that) and on Saturday we had a memorial luncheon.

Maps. Or, my love letter to Ride with GPS
I want to interrupt my trip report with a love letter to Ride with GPS. Four years ago I did my routing at home with Google maps and hand wrote turn by turn directions on a piece of paper. It was a nerve-wracking experience, wondering if I’d made the correct turns on the trails of Vancouver Island while racing the clock to catch my second ferry.

I still use Google maps as my initial route planner, but if I want to save a route, I use Ride with GPS. For this trip, I saved eight routes, one for each leg of the trip: Ride with GPS – My Routes. I’m too frugal to invest in an international data plan when I visit Canada so I downloaded the maps of those eight routes for accessing offline. Now what I didn’t realize ahead of time is that even in airplane mode, I could get turn-by-turn navigation! It didn’t occur to me that GPS is independent of internet despite having used my Garmin GPS bike computer to record rides (stored until I’ve found wi-fi and then transferred to my phone via Bluetooth and ported over to my Strava account).

So yeah, turn-by-turn navigation! In Canada! Impossible to get lost! Note: I have a Ride with GPS paid Basic account, but you can still do a lot even with the free account: create routes, download routes, and record a ride (I rarely record with Ride with GPS because I’m already used to my Garmin/Strava system for when I want to keep track of things, but I imagine I’ll do more Ride with GPS recording in the future). What the free account doesn’t do is turn-by-turn navigation. And I see the premium account (fancier than my basic account) also gives estimated times. I got estimated times from Google maps and included it in the name field–for example, “Ruckle Provincial Park to Twig and Buoy (1.5 hours)”–but for long field names like that one, I had to click to edit it in order to see all the way to the end of the title on my little phone display. Another note: I had a discount code when purchasing my Ride with GPS account for being a Cascade Bicycle Club Ride Leader.

Ooh, and I found the screen with elevation profile! I’m not sure if following my blue dot slowly climb the hill was all that helpful or if I was just punishing myself. Maybe Chris Froome Looking at Stems isn’t missing out on the experience after all, because I still had a great time even as I grunted constant reports about how close we were to the top and what came next.

Itinerary
Since I had to bring my kids to summer camp at 9:00 a.m., I couldn’t catch the 7:30 a.m. Victoria Clipper ferry like last time so we took the 3:15 p.m. one. It’s a passenger-only (no cars!) high speed ferry–less than three hours to get from Seattle to Victoria. It’s pricier than Washington State Ferries, but it’s so convenient! Bikes are $20 (cargo bikes and tandems are $40) each way and they’re parked outside under a tarp, but still exposed to salt spray so some people don’t bring bikes for that reason.

The ferry to Salt Spring Island’s Fulford Harbour leaves form Swartz Bay which is two hours north of Victoria. I found a campground right next to Swartz Bay, McDonald Campground – Gulf Islands National Park Reserve, and was able to make a reservation over the phone–$27.20 CAD, $13 of which was the reservation fee. Our boat arrived late and we stopped for dinner in Sidney along the way so it was dark when we arrived. The campground has pit toilets and no running water (that I could see during our very short stay), but the location can’t be beat!

We set our alarms for 6:00 a.m. to roll out at 6:30 a.m. for a seven-minute ride to the ferry terminal and catch the 7:00 a.m. ferry to Salt Spring Island.

I couldn’t reserve a campsite at Ruckle Provincial Park ahead of time. There are only 10 reservable spots and 68 first-come, first-served spots. I called and was told they don’t turn bikes away so even if we couldn’t find a spot, we’d be OK.

UPDATE: We met a couple on bikes on our return ferry who had been turned away! They said there’s a new guy at the park who turns bikes away if it’s full. They found a place to camp in Ganges and paid $24 CAD rather than $20 and had RVs for neighbors.

Check out is at 11:00 a.m., but I wanted to try our luck finding a vacated spot at 8:30 a.m. so we could dump our stuff. Salt Spring is hilly and I wanted to ride to lunch and back without camping gear. We got incredibly lucky and scored an empty site right on the water.

Ruckle is gorgeous. People who arrive by car have to park in a parking lot and then bring their stuff in with wheelbarrows. So the campsite area is free of cars and despite being packed with tents, doesn’t feel overly crowded. A gravel trail runs through the campground and to get to our waterfront site, we had to follow a narrow trail through a couple other sites. I was worried about finding our way if we returned after dark, but it was still light when we got back.

Lunch was in Fernwood, 15.5 miles from Ruckle and our biggest leg on the island. It was hot and hilly, but we made it with some time to spare before noon. I was too tired to do any exploring of the small village, but just beyond Twig & Buoy was the water.

Twig & Buoy is usually just open for dinner, but this day they accommodated our special event and it was terrific. I heard many wonderful stories about my aunt and uncle and shared my own. Some of the old photos on display I hadn’t seen before, but my favorite will always be this one, from a bike tour they took all over Vancouver Island:

Our route to and from Fernwood took us past St. Mary Lake and I wish we’d brought suits for a quick swim after lunch.

Instead we biked straight to Ganges, the biggest village on the island. We had an hour to kill before dinner with my dad so I lazed in Centennial Park while Velotron explored. The Saturday Market had just closed up for the day, but it was still packed in the park and all over the village. Then despite needing to search around for a dinner place with seating, we were done eating and back to Ruckle before the sun was down.

Have I mentioned Salt Spring is hilly? I was exhausted and fell asleep before anyone else in the park.

Sunday was structured around us being back to Victoria in time for the 7:00 p.m. ferry. So as not to be rushed, we met my dad for breakfast at Rock Salt by the Fulford Harbour ferry at 10:00 a.m. and took the 11:50 a.m. sailing. We saw so many more bikes getting off and on the ferry as we had the previous morning! And then once we were back on Vancouver Island there were bikes everywhere! We kept crossing paths with the same people as we stopped for water, shade, and blackberries and had progressive conversations. The couple that had been turned away from Ruckle warned me off my plan to swim in Beaver Lake due to E. coli the last few years. And later they recommended our Victoria lunch spot: Tacofino. And we met the sponsors of the drinking fountain at one of the bike rest stations.

We ended up with tons of time in Victoria. So we immediately found ice cream.

And then we found Tacofino. I second my ferry friend’s recommendation.

After lunch we found a shady spot near the Clipper terminal and were so early we could watch the Clipper before our Clipper set sail. I don’t think I would have enjoyed rushing to catch that earlier boat and I didn’t have energy to do anything but rest and read, so hanging out in the shade with a view of water taxis, seaplanes, and the MV Coho coming from Port Angeles was just great. However, Victoria is a blast if you’ve got the energy–the kids and I had a terrific time three years ago: Victoria, BC with family bike and saw a lot of Victoria two years ago during our camping trip at Goldstream Provincial Park Campground: Spring Break 2015 Recap.

I’m not sure I’ll visit Salt Spring Island again. It is a beautiful place, but it’s just not the same without my aunt and uncle there now. If you haven’t been yet, though, I highly recommend you check it out. My whirlwind visits were well worth it, but know that one is allowed to camp at Ruckle for up to 14 days. Also, I have a feeling most people bike from Fulford Harbour to Ruckle Provincial Park and then stay put rather than go bike an additional 30+ miles. That seems like it would be pretty nice.

Riding the Deschutes River Trail

A couple weeks ago, on Bike Everywhere Day, I took a kid-free/Pixie-free train trip to Portland to carpool with friends to The Dalles for camping and bike riding.

All my photos here: Flickr: Portland/Deschutes River Trail – May, 2017 – 161 photos, 1 video

The impetus for the trip was Life on Two Wheels Marley’s plan to ride the Dalles Mountain 60 with a huge group of women over two days with camping in the middle. It sounded amazing! …except having just done the Dalles Mountain 60 with Pixie in March while carrying more weight than necessary on my bike (in addition to Pixie, that is) and considering I’m still quite a bit out of regular shape from riding a lot less than normal this winter/spring I knew I wasn’t up for it. So instead a few friends (Coffee Kelley, Neighbor Kelly, and Chele) and I made plans for a gear-free (other than snacks) bike ride in the area with plans to visit Marley’s #galsatthedalles group Sunday morning. We would car camp at the Deschutes River State Recreation Area Saturday night after riding one of many scenic loops in The Dalles area. the original plan was to ride either Japanese Hollow or Hastings, but in the end we decided we’d simplify things and just ride out the Deschutes River Trail a bit, turn around, and come back.

It was terrific! And since I tackle everything thinking about how it would be for kids: this would be a nice trail for kids, too! This Oregon Bikepacking post, Deschutes River Trail: An introduction to bikepacking, has terrific descriptions and photos of the trail. It’s nice to know we stopped before the goat heads (very pokey burrs that cause flat tires) got bad and that the rattlesnakes we saw are summertime-only denizens.

We weren’t in a rush and thus got started fairly late in the day after driving over and setting up camp. It was close to 3pm and fairly warm by the time we hit the trailhead.

The trail is mostly flat, save for one big dip where an old bridge was removed. On our way out we saw a mom and three kids coming up the hill–the oldest kid had biked up it and was resting/waiting at the top, the mom was pulling a trailer containing one little kid (!!! trailers are very hard to lug uphill!), and the middle kid was walking his bike up from near the bottom. Taking kids three miles down the trail and turning back before the hill would even be a fun ride, but tackling the hill yields some great scenery on the other side…but, of course, having to descend and climb the hill again on the way back. I found descending the hill more difficult than climbing the hill, but I’m not much of a descender.

Lots of the gravel is the good kind of small hard-packed gravel, but there is also quite a bit of rocky stuff to maneuver around. I rode my Surly Straggler with smooth Compass tires with 38mm of width and they were OK. Neighbor Kelly’s Rivendale Atlantis was the other “narrow” tired bike with 42mm wide Compass tires and Coffee Kelley and Chele rolled on 3-inch fat tires on rigid (no suspension) fat bikes–a Surly ECR and a Bantam adventure bike. We all thought it was pretty bumpy.

Along the trail are several pit toilets (bring toilet paper if you’re visiting outside the high season) down near the river surrounded by open areas for dispersed camping for hikers, bikers, and rafters. This is where the 18 #galsatthedalles camped, but we opted for the luxury of the regular, less-rustic camping at the Deschutes River State Recreation Area campground.

While we didn’t go quite far enough (and I’m not sure how eager I would have been to hike up a steep side trail if we had!) to see the petroglyphs mentioned in the Oregon Bikepacking post, we saw lots of cool stuff.

Abandoned train car! The abandoned train car around mile six provides shade! And it’s fun to explore. It’s very close to a spot with cell phone reception, too.

Puddle! At the bottom of the hill (3.5 miles in) there’s a puddle or two to ride through. Deep enough to splash one’s feet. Related: there are also a couple cow catchers along miles 0-11 in case you’re touring with a Chiweenie (Pixie was running free for portions of the Dalles Mountain 60 and got tripped up by one).

Lava tubes! I think these were a bit past the hill. Remnants of little lava tubes according to Coffee Kelley who knew the most about the region–though the least about rattlesnakes–of all of us.

Old homestead! The old homestead 11 miles in was our turning-around point and a good shady rest spot. Coffee Kelley said last year when she was here the house was upright and she was able to walk up the stairs inside. I hope it doesn’t dilapidate more because it’s beautiful in its current state!

Rattlesnakes! We saw a rattlesnake in the barn by the homestead!!!!!! It was my first rattlesnake; Coffee Kelley’s, too. Neighbor Kelly and Chele both grew up with snakes (not to be confused by “were raised by snakes”). It wasn’t feeling social and slowly slithered away as we took photos. This one never coiled up and rattled. While heading back we passed close to a snake on the side of the trail that did rattle! I pedaled past before I realized what was going on while my three friends stopped behind it to let it move away from the trail. Coffee Kelley took pictures. I took pictures of Coffee Kelley taking pictures from a much safer distance and decided I’d Google “rattlesnake bite treatment” once back to camp with a cell signal.

I was relieved to read that the rattlesnakes are summer attractions. Between that and the heat we experienced, this trail is probably most fun in the spring.

Dispersed campers! We saw a group of teens with a couple counselors bike camping at the farthest (mile 10?) pit toilet. I was so impressed! Especially when I rode out the following morning and saw them returning to civilization, just after they scaled the hill. Go kids!

We encountered the #galsatthedalles group in small batches as we headed back to camp Saturday night and directed them to the camping area by the pit toilet around mile 8. Conveniently the group of teens had left markings in the gravel at the turn off (indicating “No, don’t stop here, continue along” for their own group). We may have been a little excited about our snake sightings and mentioned the possibility of rattlesnakes to each group, but I don’t think we caused any undue fear.

I rode back out the following morning to visit with the #galsatthedalles and found them breakfasting and breaking camp. It turns out they had a car at the trailhead for carrying their gear so I volunteered to carry stuff out on my empty bike since they still had a 30-mile day, including Old Moody Road. I scored two panniers and a shoulder bag. I also scored a pinch flat, boo. But that was the only flat for our small group all weekend.

And that’s that! It was awesome, but as I’m not a big fan of driving places to ride my bike and am perfectly happy with all the places we can reach by pedaling or pedaling plus bike/train/ferry, I’m not sure how soon I’ll be back. Neighbor Kelly pointed out the trail alongside the highway, but it doesn’t go all the way through yet. One can still ride all the way there, but parts of it are along fast-moving highways and parts of it experience stop-and-go traffic with no shoulder for passing near Multnomah Falls.

Portland Stuff
Just wanted to acknowledge a couple cool new Portland things:

Better Naito is a temporary bike lane I took upon leaving the train station and it’s amazing!

While accompanying Kath of Portlandize on her test ride for her weekend Kidical Mass PDX Treats Ride, we biked next to a contraflow bike lane on SE 34th Ave at Division. Kath said it was residents of that block who had spearheaded the project to fix the problem of people parking in front of their driveways. What an interesting and unexpected reason!

Train Stuff
I took the Amtrak Coast Starlight on the way down and the Amtrak Cascades on the way back. I’ve written a comparison of the two trains before: Portland with bike and dog! And Amtrak Coast Starlight vs. Amtrak Cascades and that all remains the same, but there is a new procedure at King Street Station in Seattle: someone walks your bike the looooooooong way down to the baggage car now! I’m not sure if this is only for the Coast Starlight or both trains. The Coast Starlight is much longer so I wouldn’t be surprised if it’s not for all trains. Also, it’s a very new procedure so despite several different employees warning me that someone would come for my bike at some point–including “in five minutes”–once I got out the door, there was no promised bike pusher so I walked the bike myself. One of the employees (the guy with my first and third warnings) saw me and jumped out of the baggage car to walk the bike the last little bit to facilitate this photo op:

Have you been along the Deschutes River Trail? What was the old homestead like during your visit? Any additional tips?

Photo by Coffee Kelley

Dalles Mountain 60 with Pixie

Pixie and I just stumbled our way through the amazing and muddy experience called the Dalles Mountain 60.

Photo by Aaron K

Details from VeloDirt:

It’s ridden the 2nd Saturday in March, 10:00 a.m. roll-out from Holsteins Coffee in The Dalles.

This is the classic ride that started it all. By today’s standards it’s on the tame side, but that’s why this is a perfect introduction into the wide world of dirt & gravel riding. Take your road bike and learn how to pick a line through loose gravel. Just keep an eye on the weather, as winds in the gorge can make this a suffer fest and the beautiful climb up Dalles Mountain bakes in the sun (a great thing come winter time). Warning: access to the top of the Maryhill Loops is private property… The alternate is to drop down US-97, West/left on WA-14 ~1 mile, then right at the road for Stonehenge.

Details:
60 miles, ~30% dirt
GPS Route
Start/End: The Dalles
Services: The Dalles, Biggs
Tires: Optimal = 28-32c

I was really slow–here’s my Strava: 57.1 miles, 3,970 feet elevation, elapsed time 8:58:46, moving time 6:00:58. I knew going in that most people would ride cyclocross and road bikes and treat this like a race (or “sufferfest”); I’m pretty sure Pixie was the only dog along, I may have had the only bike with a kickstand, and my bike was loaded too heavy for me to lift…but it was great!

Pictures! See all my photos in my Flickr album: Dalles Mountain 60 – March 11, 2017 – 172 photos, 2 videos for the full experience. Ride recap (and a lot of overthinking about future gear) below…

We arrived at Holstein’s Coffee Co five minutes late and most of the 100 riders had already departed. This was fine by me because I probably would have felt a bit intimidated seeing all the Portland people on fancy fast bikes in more “serious” bike clothing. I’m curious how the fast people did temperature-wise. I was never too cold. And I had panniers to stow all my layers in during my spells of overheating. So there’s something to be said for a heavy bike and storage. One friend went out with only one of his two pairs of gloves and had to stop for a long time in Biggs Junction to thaw out.

The first gravel started about six miles in and started as a nice gradual climb, but soon got steeper and steeper (but maybe I was just tireder and should have eaten by then) and went on forever. I saw quite a few people riding back the other way and initially thought they were gluttons for punishment and wanted to ride up a second time, but in retrospect I think they were heading back either for timing reasons or frozen reasons. I recognized a friend from Portland heading down and she said she was following after a hypothermic friend rather than wait for an ambulance with him at the top of the hill. Eek.

I let Pixie run alongside me a couple times so she wouldn’t get bored. Also, even though she only weighs nine pounds, having an empty basket is nicer for hill climbing. Having a cheerful little dog pull you up the hills is nice, too.

I bumped into a couple friends from Seattle on my slow way up. This is Bock whom I’ve only ever seen on a fat bike:

I’m not sure I’ve ever seen him in long sleeves, come to think of it. He was contemplating turning back at this point because he wasn’t sure about wanting to do all the road riding at the end in the dark. That gave me pause. I really wanted to do the whole thing, but I was worried about my two friends in the rental car being done hours before me and having to wait. I figured they could find me another ride with all that time if it was a problem (we were driving 20 miles from The Dalles to Hood River for night two).

I had figured I’d ride the entire thing alone and had the Ride with GPS route saved on my phone and an external battery pack because my phone tends to conk out in the cold (I also have a The Plug but I never use it because I have to turn off my light and go 10 mph). However, I ran into four friends who had stopped to eat at the top of the first peak! Aaron with the yellow fenders is from Portland and we have a bunch of friends in common though we’d never met before. Wang, Mohawk Mike, and Mark I know from Seattle. They’re all quite a bit faster than me, but waited up for me (or stopped for snacks) repeatedly so I wasn’t alone after all. While it would have been fine riding alone, it was awesome riding with friends.

The highlight of the ride is the Maryhill Loops, a smooth loopy downhill run. Those poor fast riders had to ride them in drizzle and fog, but the sun snuck out from behind the clouds just as we arrived! Behold my three Seattle compatriots as three small specks:

And after that we saw Stonehenge. Yes, there’s a Stonehenge in Washington!

And shortly after that we crossed back into Oregon and stopped at the gas station in Biggs Junction, figuring it’d be quicker than McDonalds (and thank goodness, I haven’t been to a McDonalds even since before watching Super Size Me). I bought a sandwich despite having lots of snacks left and filled my water bottles with water from the soda dispenser. And peed. I was curious how pee breaks would work. Pixie was fine on the side of the road, but I was happy I didn’t have to go until reaching Biggs Junction.

I sent a message to my travel buddies to let them know how far back I was and planted the seed that if they were impatient and wanted to scoop me up from the road, I wouldn’t feel cheated since I’d already done the first big hill and the loops.

Soon after Biggs we found more dirt! Not gravel this time, but toothpaste-like sandy mud on Old Moody Road. I’m not sure I would have fared better had this been the first hill of the day, but given the long day in the saddle it was tough! I walked all the uphill parts. But it was beautiful! And I thought a lot about bike weight and packing while trudging along. I also checked for messages from the car crew when I had a signal. The passenger found a ride ahead of us and the driver was happy to wait. I have to admit once I suggested the possibility of a ride it started sounding enticing, but I’m glad I got to do the whole thing. Also, he got to meet a lot of people as they arrived to Holsteins after him/before me so that’s fun!

The full moon rose just as we got to the end of the gravel and followed us along Fifteen Mile Road. It was beautiful, but also a bit disconcerting as it masqueraded as a headlight during the occasional glance over a shoulder to see if there was a car back.

Speaking of cars, there were very few all day. We biked past a construction site on Old Moody and I saw trucks head out downhill after we had passed it, but our timing was such that we didn’t have to share the road with them (and two slow-moving trucks coming towards us wouldn’t have been a big deal). A few miles into the day, someone yelled at me to “Get on the sidewalk!” as I biked over the bridge all alone (I doubt anyone opted to ride on the debris-strewn sidewalk), but there were no other incidents and it was a lovely low-car-traffic route as a whole.

Shortly after moonrise I had to put Pixie in her backpack because she finally got fed up not being at the front of our pack (she’s a born pack leader, of course) and she was able to sit calmly in the backpack whereas the front basket just made her whiny. And this meant I hadn’t brought the backpack along in vain! That was with about 10 miles left.

So speaking of bringing stuff in vain, let’s look at all my crap…

Snacks

  • Chocolate peanut butter cups
  • Emergency bourbon
  • S’mores flavored Pop Tarts
  • Sriracha bacon jerky
  • [Trail mix (I left this behind)]
  • Three little chocolate bars
  • Teriyaki turkey jerky
  • Salmon jerky
  • Cheese bites
  • 10 mandarin oranges

I had a lot of leftover food…but I like to share and I don’t like to worry about not having enough food. Plus I bought that sandwich at the 35-mile stop. In addition to that photographed above, I also had two little peanut butter tubs and a hot chocolate packet taken from the hotel’s Free Continental Breakfast I figured I could pass along to someone bonking on the side of the road. I guess I could have made do with half the peanut butter cups, only the salmon jerky, one chocolate bar, and two oranges (and the purchased sandwich).

Other gear

  • Flat fixing kit (pump, two tubes, two tire levers, patch kit)
  • Multitool
  • Knog Milkman bike lock
  • Fish knife, zip ties, nail clippers (in case I had to remove my basket for the car rack)
  • Wallet
  • All my keys
  • Two water bottles
  • Two peanut butter tubs, hot chocolate packet (mentioned above)
  • ECOXGEAR EcoPebble Waterproof Speaker
  • Garmin
  • Lifeproof iPhone mount
  • All of Pixie’s food in plastic bag, lidded plastic dish for serving water/food
  • Long-sleeved merino wool bike jersey
  • Lightweight long-sleeved merino wool shirt
  • Four John’s Irish Straps (that I only used for the car bike rack)
  • RAVPower external battery/iPhone cord
  • Sunglasses
  • Safety pizza
  • Bandaids
  • More bandaids
  • Gum
  • Four quarters
  • Advil
  • DayQuil (I have a cold, but didn’t take any)
  • Two USB cubes
  • Power cord for Garmin/external battery/speaker
  • Five HotSnapZ reuseable heat pack

I didn’t need most of this stuff with me. Here’s what I used:

  • Both water bottles
  • Money
  • A very small amount of Pixie food that she ate out of my hand, not the container
  • Speaker
  • Garmin
  • iPhone mount
  • External battery
  • Sunglasses
  • Safety Pizza
  • Two Advils
  • One heat pack (for Pixie)

Of course I’d still bring the multitool and flat-fixing stuff. But I guess I could leave all that other stuff behind.

Bags

  • Pixie’s Atomic Cycle Werks liner and BYOBB (Bring Your Own Basket Bag)
  • Two small Swift Industries panniers
  • Timbuk2 Muttmover backpack
  • cargo net to hold Muttmover to rear rack

Obviously no Pixie would mean I’d have all my basket space for a sensible amount of snacks and minimal gear. Perhaps that would go in the BYOBB (many poeple use these for non-dog stuff, but mine has a special doggie head hole…but with a flap so I can close it for non-dog purposes). I think I’d still want a cargo net strapped to my rear rack because it would be convenient for quickly shoving clothing layers into. The handlebar mittens look big, but they’d go nicely onto the rear rack for too-hot periods. It’s tempting to try to “look the part” without fluffy handlebars were I to travel lighter, but it’s really nice to have warm and dry hands!

Clothing/#kitgrid

  • Bern helmet
  • Knit cap
  • Showers Pass Rogue Hoodie water resistant jacket
  • Portland Pogie handlebar mittens
  • Tank top
  • Ibex zip-up merino wool sweater
  • Defeet wool DuraGloves
  • Ibex El Fito 3/4 length wool bike tights
  • Rainlegs rain chaps
  • Hi-vis Defeet socks
  • SIDI bike shoes

I think I did OK on clothing. I have a thinner (but too large) rain jacket, but I need to re-waterproof it before I bring it on a ride like this. I need to re-waterproof my rain chaps, too, come to think of it.

Stuff I left in the car

  • Atomic Cycle Werks hip pouch
  • IKEA shopping bag
  • Abus bike lock
  • Back Alley Bike Repair MEOW cap
  • Jandd shark handlebar bag (I would have attached this to my basket for easy snacking, but I loaned it to a friend)
  • Swimsuit (never used…Pixie couldn’t come down to the hot tub)
  • Vans
  • Friday and Sunday clothing, pajamas
  • Endura shoe covers I decided were overkill
  • [And toiletry kit, but I forgot that at the hotel in The Dalles]

It was nice having somewhere to stow this stuff! Other than the bike lock it wasn’t heavy, but it was bulky. If I do this again, I’ll want to be able to stow stuff again.

So that’s that! Any gear suggestions, both for traveling with dog and without are welcome.

Bike camping in Iron Horse State Park, take two

Funny story, while busy biking around Mount Rainier I missed a chance to respond to an email about being outdoorsy and car-free. Fortunately I still got mentioned in the Seattle Weekly article Do Urbanists Have a Wilderness Problem?: Density foes argue the whole point of being in Seattle is the ability to get out of it…with a car.

There are the bike enthusiasts, such as Seattle Bike Blog creator and anti-car urbanist Tom Fucoloro or family bike expert Madi Carlson, both Seattle residents who frequently journey to the forested outlands by bike alone (and in Carlson’s case, with two kids in tow).

The article posted sandwiched between two bike camping trips on the John Wayne Pioneer Trail. Neither trip was with the kids, but I did have Pixie along both times and that’s almost the same…though 100 pounds lighter.

With the one stint of bike camping in Iron Horse State Park under my belt, which was extremely fun despite taking a route out of Seattle that was less than ideal, I was ready to try again. This time my friend Velotron came along and we made it a three-day/two-night trip to make it even bigger and better than last time.

ironhorse-with-velotron

Pictures: Iron Horse Trail with Velotron – Labor Day Weekend, 2016 (268 photos)

Routes:

  • Day 1: 66.4 mi, 6:58:35 moving time, 9:36:55 elapsed time, 9.5 mph avg, 37.8 mph max,
    4,426 ft elevation gain
  • Day 2: 54.8 mi, 4:40:12 moving time, 7:17:06 elapsed time, 11.7 mph avg, 23.0 mph max,
    1,853 ft elevation gain
  • Day 3: 63.0 mi, 5:28:50 moving time, 8:04:46 elapsed time, 11.5 mph avg, 32.9 mph max, 2,487 ft elevation gain

I still didn’t take the perfect route between Seattle and North Bend, but it was much better than last time and I’m sure with a bit of preparation I could figure out the perfect route for my “Third time’s the charm” attempt.

I had hoped to completely avoid the road-kill-strewn 202, but my chosen route followed it for a short bit. I chose a route by searching Ride with GPS for keywords “seattle iron horse trail” and ended up choosing this one: Seattle to Keechelus Lake. There were several options, some even without any 202, but many were there-and-back routes and I thought that would be more confusing to follow. I don’t find Ride with GPS the easiest way to navigate (the Google Maps app with upcoming turn warnings is my favorite), but it’s still a great resource.

Just to keep things interesting, we ignored the map 31 miles in, shortly after the Preston-Snoqualmie Trail spit us out onto Preston Fall City Road. We’d spent a lot of the trip on trails — I-90 Trail, Pickering Multi-use Trail, Issaquah-Preston Trail, and Issaquah-High Point Trail — so when Preston Fall City Road headed uphill and we noticed the Preston-Snoqualmie Trail picking back up on our right, we thought it’d be fun to get adventurous and hop on the trail. And if coming face-to-face with a series of steep switchbacks to walk is adventurous, then we were in luck!

img_8879

Once we got up the switchbacks the trail was great! After a while we saw a sign that warned the trail ended ahead. Velotron worried that meant we wouldn’t be able to get through, but I was optimistic that it meant we’d have to get back on a road. Before we got all the way to that dead end (which has a great vista point and is worth a trip if you’re not on your way somewhere–see Biking Bis: The surprise on the Preston-Snoqualmie bike trail) we looked more closely at the map and realized the dead end was really a dead end and we turned back…but not all the way back, just to the previous cross street, Lake Alice Road. So we skipped some of busy Preston Fall City Road and I got that great switchback photo. And we met some nice bike tourers on the switchbacks, too, whom we saw the following day on the Iron Horse Trail. I have a feeling they intentionally took the trail and knew to turn off at Lake Alice Road.

Lake Alice Road connected us up with the 202–but for much less of the 202 than I experienced on my first trip out. Unfortunately, I’d stopped paying attention to my pinned Ride with GPS route so I didn’t realize we could have turned off the 202 after a mile and accessed the Snoqualmie Valley Trail (!!) but we turned off even earlier to take Fish Hatchery Road. Remember, this is the road I avoided last time based on a friend’s advice. Fortunately for us, we met a guy on a road bike who guided us away from a wrong turn suggested by my Google Maps app. He also told us about Strava Routes for future route help. It was nice to avoid part of the 202 and still go by Snoqualmie Falls.

The rest of the way to North Bend was the same as I took before, but we stopped in town for groceries, at what must be the most beautiful QFC in the world, tucked in the shadow of Mount Si.

img_8904

We also hit a bike shop for Velotron to pick up a spare rear tire in case his old one didn’t survive the gravel trail (but it did!) and Pixie and I met a biking family with an adorable toddler who were planning to move to the area.

We ate our grocery-store-bought lunch at the Northwest Railway Museum somewhere I’ve only previously been by car so of course it was SO EXCITING TO BE THERE BY BIKE!

img_8910

Soon we were back on the Snoqualmie Valley Trail, which was so much better than the busy road I took last time, but starting the slight uphill gravel this early was a bit tiring. It was incredibly fun heading back down two days later, though!

Our plan was to bike to Roaring Creek Campground at milepost 2109, the eastern-most campground in Iron Horse State Park, but it was getting late and would be dark by then and we were tired so we decided to stop at Carter Creek Campground at milepost 2123 and save the Snoqualmie Tunnel for the morning.

Carter Creek Campground was great! There were several other bike campers there, but it’s divided into three sections so we had our own picnic table and three tent squares. I think Carter Creek and Cold Creek (milepost 2113, where I camped last time) are my two favorite campgrounds in Iron Horse State Park. The creeks are right there for easy water collection and they’re pretty. Alice Creek Campground (milepost 2127, the closest to farthest west) is very exposed and the creek is on the other side of the trail. We checked out Roaring Creek Campground the next day and didn’t explore enough to find the creek, but it wasn’t right by the campsites. It was pretty, though.

Alice Creek Campground

Alice Creek Campground

Carter Creek Campground

Carter Creek Campground

img_8991

Carter Creek Campground

Roaring Creek Campground

Roaring Creek Campground

Day two was supposed to be a day trip without gear from Roaring Creek Campground to Cle Elem for award-winning BBQ at Smokey’s Bar-B-Que, but after much consideration (Should we pack up and then ditch the camping gear at Roaring Creek before going to Cle Elum? Should we leave the tent at Carter Creek and go to Cle Elum and back? Should we pack up and carry everything to Cle Elum and decide where to camp in the evening? Should we ditch the gear at Roaring Creek and just go to Easton? Should we leave the tent at Carter Creek and just go to Easton?) We eventually opted for what we figured was the most reasonable choice and left our tent at Carter Creek so we’d have a smaller day three and see how far we could make it to lunch–Cle Elum if we felt ambitious or just Easton if we wanted to take it easy.

We were right to hit the tunnel Sunday morning rather than Saturday evening. It was packed! We saw at least 70 people in there (and three other dogs), more people were on bikes than walking, but there were plenty of both. This was Velotron’s first time in the tunnel and I think he may have been a bit disappointed that we couldn’t find a spot dark enough to turn off our lights and appreciate the total dark. But I thought it was fun and festive.

img_9025

We ended up stopping in Easton for a 55-mile day rather than an 80-mile day. Mountain High Hamburgers was perfect. Over 40 flavors of milkshakes and each hamburger named for a pacific northwest mountain. The bathroom was full of framed photos of Mount St Helens erupting and several outdoor picnic tables meant it was easy to eat with Pixie.

img_9123

Had we made it to Cle Elum we would have bought dinner supplies at a big grocery store, but in Easton we had only the gas station RV Lounge. That worked well enough, plus we got some of Leo’s THE BEST SMOKED SALMON for breakfast.

img_9132

As we headed along Lake Easton Road between the trail and Mountain High Hamburgers, we noticed what we thought was the trail through the trees. So on the way back we found a little path through the trees and found a short cut to…not the Iron Horse Trail. But it was a great little low-traffic road Google Maps called Old US Hwy 10/Iron Horse Trail.

img_9143

I got a little worried when I saw a DEAD END sign considering day one’s Preston-Snoqualmie bike trail whoopsie, but this was the good kind of DEAD END that featured a gate closing the road to cars, but not bikes.

img_9150

And then we saw signs for the John Wayne Pioneer Trail ahead and transferred to a great trail (also called Iron Horse Trail by Google Maps) that connected us back up to our trail. I really liked this little detour because it meant we biked along the south side of Lake Easton on the way to lunch and along the north and west sides of the lake on the way back. And we saw a lot of families with bikes past the DEAD END gate, presumably parked at Easton Lake Beach.

img_9159

And then Brad (Brad of my Mount Rainier trip) found us on our way back! Oh, I should mention that I know Velotron because he also has a cargo bike (an Xtracycle EdgeRunner named the 7XL). I checked with him the night before our trip to make sure he really wanted to bring small bikes rather than longtails. Brad was also on a small bike instead of his Surly Big Dummy. He’d driven with a friend to North Bend and biked up through the tunnel as a day trip.

img_9189

Upon arriving back at our campsite we met family bikers! They had parked at Hyak (just east of the tunnel) with their bikes in their van and biked the eight miles downhill to Carter Creek. The mom was on a regular bike, the dad was on a Bullitt longjohn carrying the littler kid and the gear, and the older kid was on a 14- or 16-inch Islabikes (same brand my kids have). They were hoping the biking kid could make it the whole way on her own wheels because they hadn’t saved room for her and her bike in the Bullitt box. We made it a bit past Carter Creek on our Iron Horse Trail trip with Brad two years ago and I remember the uphill ride taking FOREVER.

The ride back was fun! Slight uphill gravel is OK, but slight downhill gravel is AWESOME. We mostly followed our Saturday route in reverse. I belatedly noted the turn off for getting to the Snoqualmie Valley Trail and and avoiding the 202, but it was steep so we stuck to the 202, knowing it’d be better on a holiday Monday than on a real weekday. And this time we stopped at the Snoqualmie Falls.

img_9282

We stopped for lunch in Issaquah and made it home before it started raining. Hooray! I think that’s it for camping for me for the year, but the kids just expressed interest in bike camping again so we might try to squeeze in one more trip on a nice weekend with no other plans.

img_9331

Bike camping in Iron Horse State Park

The kids and I have been on a little bit of the John Wayne Pioneer Trail/Iron Horse State Park twice: five years ago with the old mama bike and balance bikes and two years ago with the Big Dummy and kid pedal bikes. Both super fun and epic by our standards. But with the kids away on a vacation and a couple days to kill before my Mount Rainier and Mount St Helens trip with Brad (yes, same Brad from the Iron Horse trips of yore), I thought it’d be fun to ride all the way to and through the tunnel with Pixie.

In a nutshell, it was awesome, but I took a not-so-nice route to get to the start of the start of the trail so I need to try it again.

Pictures! Flickr: Iron Horse Trail – August 7-8, 2016 (261 photos, 1 video).

IMG_6292

I did a teensy bit of research before heading out, but when I don’t bring the kids along I tend to be a little more fly-by-the-seat-of-my-pants since I’m only responsible for myself.

I was inspired by Seattle Bike Blog: Bus-bike-backpacking on the Iron Horse Trail is simply unreal, but my Surly Straggler has a front rack and doesn’t fit on our bus racks and I kind of wanted to ride the whole way for fun (and save bus fare). And this Biking Bis: Washington state lists parks with bike/hike campsites helpfully listed the four campsites (lower numbers are farther from Seattle):

  • Alice Creek – Milepost 2127
  • Carter Creek – Milepost 2123
  • Cold Creek – Milepost 2113
  • Roaring Creek – Milepost 2109

so I knew ahead of time I wanted to ride to Cold Creek Campgrounds just past the tunnel.

And the night before my trip was the Dead Baby Downhill so I was able to ask a few friends for route advice in person…because discussing routes while watching adults on tiny track bikes in a mini velodrome adjacent to tallbike jousting is the best way to figure out a trip 10 hours before the fact.

Here are my DO-NOT-TRY-THIS routes for my own future reference:

Since I live up in Wallingford, it sounded nice to go over the top of Lake Washington rather than head south for the I-90 trail. Not to mention much more flat. And the beginning was great: Burke-Gilman Trail to Sammamish River Trail to Marymoor Connector Trail. But then roadkill-strewn Redmond Fall City Road / highway 202 was not very nice. Granted, it was better on Sunday than Monday–there were many more big trucks on the weekday trip home. One little bonus: this route took me to the top of Snoqualmie Falls so that was pretty cool! I’ve been there once before, years ago, in a car.

IMG_6028

IMG_6090

After that it was pretty nice and quiet, but following the Google Maps app on my phone took me away from the all-trail route I should have taken and I had a lot more climbing that I should have.

And that meant I didn’t find the grocery store in North Bend mentioned in the Seattle Bike Blog post and ended up at a small golf course market.

IMG_6145

But soon enough I was at Rattlesnake Lake and on the Iron Horse Trail!

The 2% railroad grade gravel is awesome. I knew from our first family biking trip there that other people were surprised by how slowly they moved–about half the speed they had expected to tour at. My normal alone biking speed is slowish so I had a great time. Not having to worry about tired and hungry kids or keeping up with faster friends makes for a relaxing trip. I’ve done a couple other solo trips, to Illahee in April and to Fay Bainbridge last summer. But those were a lot smaller than this. Side note, Bicycling Times posted a nice feature, ALONE, a week after this trip.

IMG_6232

My Surly Straggler has Compass Barlow Pass tires–700c x 38mm kept at fairly low tire pressure: 30 psi when not loaded for camping, and they were probably at 40 psi for this trip, but looking back I realize I didn’t bother checking ’em, oops. I didn’t see a ton of other people on the trail, but it’s OK with any sort of bike. I saw quite a few people on mountain bikes, some on cyclocross bikes, but having been on it previously on my city bike and my cargo bike (I guess the Big Dummy could best be compared to a rigid mountain bike for these purposes), don’t let not owing the “right” type of bike stop you from checking it out. I didn’t find any patches of loose gravel on this big trip, but there are doubtless periods when new gravel has been placed in sparse spots making it not as easy to bike through those particular small areas while it’s fresh.

Cold Creek Campground was really pretty. It was too cold for swimming and I forgot my mosquito repellent so I didn’t do any exploring, but I will in the future. There’s no running water so being alongside a creek in which to use my Sawyer MINI Water Filtration System was good.

IMG_6313

IMG_6325

IMG_6334

I discovered one trick on this trip and utilized it on my way home: hang your mug on the outside of your bike (or at least don’t bury it at the bottom of a pannier) to help fill water bottles at drinking fountains that don’t easily accommodate bottles. This would have been helpful on day one at Wilmot Gateway Park in Woodinville, a popular stopping spot judging by the number of people on bikes there and did come in useful at the Three Forks Off-Leash Dog Park on day two. Also, it’s a good way to clue in onlookers that you’re bike camping and not just out for a little ride. Displaying your tent poles helps with that, too. For real, though, packing your tent poles separately is a great way to better fit the rest of the tent in a pannier.

IMG_6424

Pixie did great for the long trip. She’s quite the homebody and would ideally have us all stay home with her all the time, but her second favorite thing is to chill in the bike basket. She’s seven so she doesn’t require a ton of exercise, but I took several breaks for her to stretch her legs at parks and she ran alongside me for part of the trail on day one and that was awesome. She also isn’t much on eating away from home, but I was able to entice her by putting treats (lamb lung!) on top of her food. However, she ate a lot more than I thought she would and we almost went through all her food so I’ll have to pack a lot extra next time. This has happened on our Fay Bainbridge trips, too, so I thought I had packed extra, but apparently not extra enough!

Heading home I decided I’d reverse my route over since it felt mostly uphill and the thought of mostly downhill seemed nice. But as I mentioned before, the 202 was even worse on Monday. So I won’t make that mistake again. But I will most definitely do this trip again. And perhaps next summer with the kids on their own bikes, letting the bus take us part of the way there!

Three days around Mount Rainier (and to Mount St Helens)

My friend Brad and I had some overlapping kid-free days so we left our Big Dummies and tandem bikes at home for a multi-day bike tour on single-occupant bikes. I’d never done multi-day/multi-site bike camping, and last year marked the first time the kids and I camped for more than just one night period (on Vancouver Island over Spring Break and at Fay Bainbridge Park in August).

Here’s the photo album: Three days around Mount Rainier (and to Mount St Helens) with Brad (435 photos).

And here are my Strava recordings of the trip to see the route:

  • Day one: 85.6 miles, 7:47:36 moving time, 6,593 feet gained
  • Day two: 109.3 miles, 11:43:18 moving time, 10,663 feet gained
  • Day three: 114.1 miles, 9:31:59 moving time, 4,057 feet gained

Brad and I usually ride with our four respective kids–like when we went bike camping at Manchester State Park last month. This trip was very different. I’ve known Brad for years through family biking, but he’s also a randonneur so I should have realized going into our trip that it would be really hard. Note to self: no more bike touring with randonneurs–it’s too hard! That said, it was also really fun, and I’m glad we went. But I’m glad we ended up coming home a day early and I’m REALLY glad we cut out two of the mountain passes Brad had planned. I feel a great sense of accomplishment at our miles and elevation biked, and the scenery was spectacular, but the best part was the people we met along the way.

Brad plotted our route, including checking with other randonneurs about the status of washed-out roads, plus he was familiar with a lot of the area thanks to Seattle International Randonneurs events. So I just answered “yes” to any route questions posed to me, let all the details go in one ear and out the other lest the number of miles or mountains intimidate me, and blindly followed along. Now, I love leading rides and planning routes, but it’s so nice to take a break and not do any thinking about things every once in a while! He mentioned taking the bus to cut out the “boring miles” and get out of the city faster so that meant I had to take my road bike, since the front rack and basket on my Surly Straggler mean it doesn’t fit on the bus rack. I knew from a recent trip to Veneta, Oregon (which I hope to at least post photos of soon, if not also do a little blog recap) that I could fit my camping gear on my road bike. And I was happy to have my lightest bike along for the big ride, though that meant no room for Pixie so I left her behind with a friend.

My bike:

IMG_6654
2006 Specialized Dolce Elite road bike with:

My tires are 700c x 25mm at 110psi (max tire pressure is 120psi) and they proved uncomfortable on the miles and miles of bumpy chipseal. Perhaps the aluminum frame (versus steel) added to that, but it was probably more about my tires. My Surly Straggler’s (steel, btw) tires are 700c x 38mm and I keep them at 30psi. Big difference! But with that bike come two big panniers and a front basket and I tend to shove as much stuff as I can in all that room so it would have been much heavier.

Brad rode his Surly Long Haul Trucker with four panniers (two of which started out empty), a small frame bag, and a handlebar bag. He offered to carry a bunch of my stuff so I could better keep up, but I don’t think the small weight of my gear made any difference–I’m a much slower rider than him in general. But still, I let him carry increasingly more stuff: rain jacket on day one; rain jacket and sleeping pad on day two; rain jacket, sleeping pad, bag of extra snacks, and tent poles on day three. Had we kept our day four, I’m sure I would have ported over all my stuff.

IMG_6746

Day One:

Taking the bus (Sound Transit 578) to Auburn cut out 20 miles. We cut through the Seattle Center (Space Needle!) to get to the bus stop so at least I got a good little dose of city riding, since that is my thing after all. While most Seattle area buses have three-bike racks (all King County Metro and most Sound Transit buses can carry three bikes, I think), the 578 had a two-bike rack. So we were lucky there wasn’t already a bike on board.

IMG_6458

It was fun to recognize a couple places from my first big bike overnight, the Swift Campout to Ipsut Creek. First up was Enumclaw-Black Diamond Road, though Brad and I took it in the easier direction, and at the beginning of our day. Then we stopped for lunch at the Safeway in Enumclaw, our return lunch stop of the Swift Campout.

And this is where we made our first friend of the tour, Claire from Seattle, who had biked all the way from Capitol Hill on an old Schwinn mixte with a backpack and no firm plan, other than to take a few days to explore around Mount Rainier. We bumped into her two more times over the course of the day so that was really fun.

We took a look at summiting Crystal Mountain. I’ve never been there in the winter (I’ve been to Stevens Pass once and Summit at Snoqualmie a bunch of times) so it sounded exciting, especially since we could ride the gondola at the top. But there was no way we could bike to the top (six miles) in the hour before the gondola closed due to intermittent road closures for construction. However, we could have made it up in time were we able to catch a ride in the back of the construction truck. The friendly construction worker checked with her boss if it was OK to give us a lift up the mountain, but unfortunately she didn’t have enough time before the tar arrived at 5pm. Oh well. It was a fun almost-plan!

IMG_6594

Our next almost-peak was Sunrise, but with so many clouds in the sky, we weren’t sure we’d see Mount Rainier. So we biked down down down to the White River Ranger Station to check the conditions. Brad said the park ranger would be able to tell us about visibility, but the gate and ranger station were already closed so we flagged down a passing car to ask some fellow park visitors. Conditions were spotty so we decided to skip seeing the sunset at Sunrise. But we did learn that restrooms are now called “comfort stations” and we saw Claire for the last time as she arrived to camp at White River Campground.

So we biked up up up to the top of Chinook Pass. It was exciting to see the first bit of snow–proof that we were up high in the mountains! And I saw one marmot close to the top, but I didn’t get a picture of him. And then we biked down down down to Ohanapecosh Campground.

IMG_6671

The descent from Chinook Pass to Ohanapecosh was ridiculous! You know when Bugs Bunny falls down a hole and screams and flails for a long time and then gets bored of screaming and flailing so he sits in an easy chair and reads the paper…and then he makes a cup of tea…and then he yawns and puts on his jammies, sets the alarm, and goes to sleep…and then the alarm goes off and he jumps up and starts screaming and flailing again? It was like that. Sooooo loooooong.

Ohanapecosh was a great campground! We arrived at night and chose a walk-in site, which is not like the hiker/biker sites I’m used to, but rather means you park your car in a parking lot and walk a few extra steps to your site. And the walk-in site area doesn’t have a bear box like the other areas do so we stashed all our food in one pannier and stuck it in the bathroom, not having a bear-proof vehicle like everyone else. This would definitely be a great campground to rent a car and come to with the kids (or bike to when we’re all up to this long of a journey). The visitor center was great as was the variety of programming in the amphitheater.

Day Two:

We started our day with a long climb to Paradise. I’ve been once before, but by car, so it was really exciting to arrive by bike!

It was a long, slow ride, but filled with tremendous views. The first of the three Reflection Lakes reflected Mount Rainier perfectly, though someone piloted a drone low over the lake, creating ripples.

IMG_6844

On the way up, we stopped to let a mom and daughter cross the road from the Cowlitz Divide Trail. We stopped to talk and learned the mom is a tribal leader of the Cowlitz Tribe and in the space of ten minutes, we learned a ton of history. Here’s a tidbit for you: the Cowlitz word for Mount St Helens is Lawetlat’la.

It was also neat to use Strava FlyBy to identify and “give kudos” (that means clicking the thumbs up on someone’s Strava recording) to the fast guy who passed us as we crawled up Paradise.

IMG_6830

For heading down from Paradise, out of Mount Rainier National Park, and into Gifford Pinchot National Forest, Brad took us on a great forest road/service road/dirt road cut-through he’d ridden before. It led to the lovely Skate Creek Road, which is apparently Jan Heine’s (randonneur extraordinaire) favorite road. So while bike touring with a randonneur will make the miles and elevation really add up, it can lead to some great stuff. It also led to us finding our way to Cline Road to avoid busy highway 12 which was quiet with a few rolling hills, but we were chased by four dogs! So now I’m scared of farm dogs. Granted, one of those dogs was a tiny Yorkie.

IMG_6938

We stopped for lunch in Packwood and while stocking up for dinner and breakfast at the grocery store, a guy confided in us that the town is run by elk. I was kind of relieved to hear that because it explained all the NO SHOOTING signs. He said they know exactly where the signs are and keep on the right side of them. And when he has to open the pizza place early in the morning it often takes him an extra half hour because they’ll block his car in the middle of the road and only move aside when they’re ready. Brad didn’t seem convinced, but I’ve had a healthy fear of elk since I was a kid camping in Oregon and Washington and took the warnings to stay away from elk because they’re assholes (that might not have been the exact word the park rangers used) very seriously.

It was late by the time we got into the Gifford Pinchot National Forest. I’m not sure if it was the result of the long day of biking or if the grades of routes 25 and 99 were really steep, but I had to slalom back and forth to get up the hills. It was too dark to see Mount St Helens, but the clear sky and half moon meant we had a terrific view of shooting stars from the Perseid meteor shower.

Day Three:

Getting to see Mount St Helens and view the distinct flora (and lack thereof) of the blast zone in all directions in the morning was amazing. We met a few people setting up an aid station for the Bigfoot 200 Mile Endurance Run along the Truman Trail at the Windy Ridge Viewpoint. Oof, I can’t even imagine.

IMG_7083

Even with our less strenuous day planned, I was having trouble finding my groove. It may have been the two big days in a row, or having spent almost 12 hours in the saddle on day two, or something else (or all three!), but even on the descents I was moving slowly. After many sluggish hours, we stopped for lunch in Elbe at the Mt. Rainier Railroad Dining Company and that fixed everything. Elbe is also a place I’ve been to before, but only by car.

IMG_7236

We didn’t have a set plan for days three and four, but were tentatively thinking about aiming for Orting where we’d either have to pay for a hotel or “free camp” (a term we learned from some nice bike tourers we met on highway 12 or 7…it was before lunch so I can’t remember where we were). Somewhere along the way we realized we could make it all the way home a day early, most easily done if we caught the bus again. Sound Transit 578 starts in Puyallup, but Sumner was closest to us if we could make it there by 9:19 p.m. So I rallied and we picked up the pace and we arrived to Sumner Station at 9:03–a whopping 16 minutes early to snack and unload our bikes. This bus also had a two-bike rack, but the driver told us the last bus of the night will allow excess bikes inside.

En route to Sumner I recognized Orting from having passed through in the other direction during Swift Campout. We raced along the Foothills Trail, though not as fast as the world’s fastest ElliptiGO rider (stepper?). He slowed his roll for a bit to chat with us. Turns out he’s doing the High Pass Challenge (a ride from Packwood up Windy Ridge–where we just were!) and will probably be way faster than a lot of the bike riders.

IMG_7292

Ta da!

318.5 total miles (adding in my Seattle miles on either side)
21,313 feet climbed (not adding in my Seattle elevation because I didn’t Strava that and don’t know how to calculate it easily)

Aches and pains:

I wish I’d brought my fingerless gloves along because by day two I was getting a bit of chafing on the sides of my forefingers where they rested against the hoods of my drop bars. I bought the gloves for biking the McKenzie Pass while visiting Eugene in May, but didn’t need them, nor did I use them for biking from Seattle to Portland shortly after that. So it didn’t occur to me to bring then on this trip. I ended up with a blister on the heel of one hand by the end of day three, but it wasn’t painful.
And I got “hot foot” (a fancy term for an achy foot from being trapped in a tight cycling shoe all day) halfway through day three, but stopping for lunch and taking my shoes off while eating meant I could make it through the rest of the day relatively discomfort free.

Donate to parks and forests

In addition to having a tremendous time in Mount Rainier National Park and the Gifford Pinchot National Forest, we did so very cheaply. We arrived too late to pay one entrance fee and a nice park ranger decided to waive our fee at another gate. So I settled up by donating, both to Washington’s National Park Fund (WNPF)–you can select the specific park–and the National Forest Foundation–you can’t select which forest, but you get to see how many trees your donation will plant.

IMG_7024